I love overdrive pedals. I have a bunch of them. But I realized that part of why I have so many has a lot to do with not really understanding how to set them up properly. I’d get an overdrive pedal because a demo I heard sounded great, or I loved how it was voiced. But when I’d get it home, it just wouldn’t sound quite right, so I’d put it in my “storage” area.
But as I got more experienced with setting up my amps, I also began to understand how to set up my overdrive pedals. And now that I have a bunch, I’ve got a variety of pedals to choose from to get the sound I want depending on my sets or my mood – okay, I admit it: It’s mostly due to my mood. 🙂
Admittedly, I did a lot of forum lurking as well to gain insights on setting up an overdrive, so a lot of what I’ll be sharing here comes from the things I’ve learned from others in addition to the stuff I’ve learned on my own.
What actually motivated me to write this was a conversation that I had with a friend. I asked him what he thought of a particular overdrive pedal, and he said he didn’t like the way it sounded. I looked at him a little puzzled and said, “Maybe you didn’t set it up right.” And that led me to say that not all overdrives are created equal, and you have to set them up according to how they work best, or how they were intended to be used. Truth be told, I haven’t spoken to him since that conversation, so I have no idea if he tried what I suggested. But in light of that, I decided to share my thoughts.
Related Articles
- Overdrive vs. Distortion
- Evaluating an Overdrive Pedal
- Hmm… Cranked Amp? Booster? Overdrive? Distortion?
- Are New Overdrives Irrelevant?
- I’d Like to Get Another Overdrive Pedal… I REALLY Would…
Types of Overdrives – Not Necessarily What You Might Think
Before we get into the actual setup of an overdrive, I thought I’d go into a discussion about types of overdrives because how you set up an overdrive has a lot to do with the type of overdrive it is. No, this isn’t a discussion about circuit types or transparency. I suppose this could be related to the circuit type on which an overdrive is based, but I’m not that electrically savvy, so I’ll discuss this in more practical terms.
From my experience with having played several overdrives over the years, I’ve found that they fall into roughly two different categories (mind you, these are my own terms): Interactive and Standalone. Interactive overdrives are meant to interact with the preamp of your amp, and together they produce the overdrive sound.
Standalone overdrives are typically purpose-built to mimic an amplifier, and though they can certainly be set up to be interactive, they can function just fine on their own in front of a clean amp.
Notice that I haven’t named any specific overdrive models. The reason why is that overdrives sound different with different amps. For instance, the EHX Soul Food sounds great as a standalone overdrive in front of my Fender amp. But it doesn’t sound nearly as good as a standalone overdrive in front of my Plexi-style amps, so I set it up as an interactive overdrive for those amps.
So the idea behind interactive vs. standalone has little to do with a specific type or model of overdrive; rather, it has to do with how the overdrive sounds with your amp.
Setting Up an Overdrive
I have two processes that I go through to set up an overdrive. At this point, I know all my pedals and whether they’re standalone or interactive, but I still follow the same processes for my different pedals when I set them up on my board. Also, if I come across or get a new overdrive, I first assume that it can be a standalone overdrive, then if I find it doesn’t work well that way, I’ll then set it up to be interactive. Here are the step-by-step processes I follow:
Setting Up a Standalone Overdrive
- Set up the amp:
- Clean
- Set EQ to work with your guitar
- Set guitar volume to the middle
- Guitar EQ where you want it
- Set overdrive with all knobs to the middle.
- Engage the overdrive and get it to unity gain (so that when you engage it, your volume doesn’t change), or to just get a small volume bump when the pedal’s engaged.
- Set the EQ on the overdrive
- Adjust the overdrive/gain knob to get your desired amount of distortion from the pedal.
- You will probably have to make adjustments to the level knob to maintain unity gain.
- Evaluate the sound and feel by playing around with chord progressions and licks.
- All the while, raise and lower your guitar volume to see how the pedal responds.
- Repeat steps 5 and 6 until you dial in the right volume/sound/feel.
- If the volume, sound, and feel are fine for you, then you’re all set and ready to gig and the overdrive pedal will work fine as a standalone device.
- If the sound doesn’t feel “right,” chances are you’ll have to do some interaction with the preamp of your amp, so continue to the next section.
Setting Up an Interactive Overdrive
- Set your guitar volume to the middle (It’s important you start here)
- Set up the amp
- Set Gain/Volume so the amp is at the edge of breakup.
- You’ll know it’s there when you turn up the guitar’s volume and the amp begins to distort, then cleans up when you turn it down. Also, if the guitar’s volume is set to the middle, if you strum hard, it will break up.
- This is the reason you set your guitar volume to the middle so you can affect the preamp easily.
- Set EQ on the amp
- Set Gain/Volume so the amp is at the edge of breakup.
- Set guitar EQ where you like it
- Set overdrive with all knobs at their middle positions
- Engage the overdrive
- More likely than not, you’ll get a big volume boost when you engage at this level, so you’ll have to adjust both the overdrive’s level and amp’s volume/master knobs to get to the right volume.
- If you don’t have a master volume, turn down the overdrive’s volume/level knob to get to a manageable volume.
- Because you want to get both overdrive AND amp distortion, you’ll want to get a small volume bump when you engage the pedal as you want the amp to go over the edge of breakup.
- More likely than not, you’ll get a big volume boost when you engage at this level, so you’ll have to adjust both the overdrive’s level and amp’s volume/master knobs to get to the right volume.
- Now, play around.
- See how the combination responds to volume swells on your guitar.
- Make adjustments to the overdrive gain to get the right combination of pedal and amp distortion.
The Importance of EQ
Notice that I mention setting EQ on the amp, guitar, and overdrive pedal. Setting EQ is extremely important because it can be the difference-maker in your overall tone. There’s no “ideal” EQ setting. But for me as a rule of thumb, I want to get a rich, slightly bright tone that sits well in the mix and isn’t so warm compared to the other instruments so it won’t get washed out when we’re all playing together.
Also, for live gigs, I usually don’t touch my amp or pedal EQ once I get them set up. I use my guitar’s tone knob to adjust how warm or bright my sound to be.
Amp/Pedal Combinations
All that said, if you’ve followed the steps for setting up an interactive overdrive, and it still doesn’t sound right no matter what you do, then the pedal sucks. Just kidding. 🙂 Truth be told, I’ve found some overdrives work better with different amps. If you have another amp, then try the pedal out in front of it.
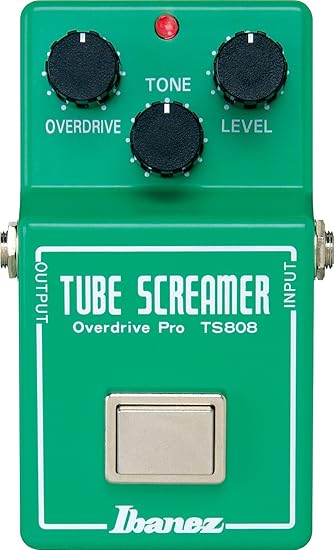
For instance, Paul Cochrane of “Tim” and “Timmy” pedal fame recommends not using the pedal in front of a Fender Blackface amp. I don’t have a blackface amp, so I had to take him at his word, but the Timmy works great in front of all my amps. For me, I will not use my venerable Ibanez TS-808 TubeScreamer in front of my vintage Marshall-style amps. It just doesn’t sound good to me, no matter how I set it up.
I think it’s because the TS produces a big midrange bump when engaged, and my amps are voiced bright, so it ends up sounding piercing like little ice picks on my eardrums. Even EQ adjustments don’t work for me. But in front of my Fender Hot Rod, the TS truly screams! My Hot Rod has the classic Fender “scooped” tone, so the predominant midrange of the TS fills in the mids.
WHERE You Play Matters
Seems obvious right? Well, it’s not. In fact, what might sound great in your bedroom or living room may sound like crap on stage. That smooth, round bottom end that sounds so luscious in your headphones may just get you lost in the mix when you play with a band.
A few years ago, I went to see Joe Satriani play the Hendrix Experience concert. When Joe finally took to the stage, he sounded HORRIBLE! Way too much bottom end and way too much compression. He had to crank his guitar to be heard and the sound was just deafening. The FOH guys finally got his tone dialed in and Joe had to make some changes – I’m assuming, EQ changes – to his pedals. After that, they were able to bring volume down to comfortable levels.
In my own experience, I normally set my EQ a little brighter than when I’m at home. When I’m playing on stage and my amp is pushing some serious air, being a tad brighter helps cut through everything. But I’m careful about going too bright because that could get really harsh.
What About Stacking Overdrives?
That gets a bit more complicated, but I’d follow the basic procedures above, treating the trailing pedal as the amp. In this case, I’d tend to set up the amp as clean and have the trailing pedal always on. There lots of ways to approach this as well. I know one guitarist that uses three at once to get his “sound.” More power to him! 🙂
But truth be told, I hate to dance on my board, so even though I will use a couple of overdrives, I only use one at a time depending on the kind of voicing I want. I also, don’t like complicate my sound finding the right balance of multiple overdrives. I just want to play. Granted, I could do a lot of pre-gig work to get that, but for me, employing the KISS theory works best.
Many people like to stack, and that’s great. Stevie Ray Vaughan used to use two TubeScreamers stacked together; one as an overdrive and one as a booster.
Wah-wah and Overdrive
If you don’t use a wah-wah pedal, then you can ignore this section. But I thought it would be important to add this to the mix, mainly because I’ve found that certain overdrives work better depending on where the wah-wah pedal is placed. Admittedly, my personal preference is to place the wah pedal after my overdrives. But there are a few boutique overdrive pedals that I have that work much better when the wah pedal is in front of them. Not sure why this is. Luckily, I only have a couple of pedals that act this way, so I know not to use a wah pedal with them if I have it set up after my overdrives.
Exploration
To close this out, I have to admit that I’m a bit of an overdrive junkie. I may not buy every single one that piques my interest, but I do check out new overdrives when I run across them. The great thing about overdrives is that they really are all different, even the knock-offs, so I’ll continue to explore overdrives. I never know what I might find. 🙂


 One of the things that completely pisses me off when I’m gigging is when I reach my foot out to activate a pedal in the back row of my board, and I end up also activating a pedal in the front row. Aiiiyeeee!!! This happened to me recently at a church gig. I was playing a nice, sweet, clean solo, and want to texture my sound a bit by adding some reverb.
