Every few years, I write about things I’ve learned. I’m an eternal student of guitars and music and performing and I never stop trying to learn because there is always something to learn. So, here’s another chapter in my learning experience.
The sound is all that matters
One might think that after all these years running a gear site that I’m obsessive about my gear. I’m not. What I am obsessive about is my sound and at least from a gear standpoint, what it will take to achieve the sound I’m after. That could come from a cheap guitar or pedal, or it could come from my Les Paul worth thousands of dollars. If I can get the sound I’m expecting, I’m golden.
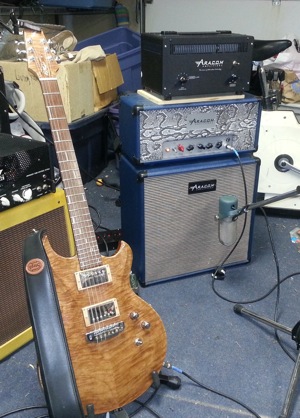
I no longer obsess over minute details like what kind of chip or circuit a particular pedal may use. I don’t really give a shit about whether an amp has tubes or not. All I need to know is if some gear helps me deliver my sound. The result of that is that I use a lot less gear now, especially pedals. My pedal chain is incredibly simple: Vox Big Bad Wah (if I’m the solo guitar player) -> Peterson StroboStomp Tuner -> BOSS GE-7 EQ -> Wampler Belle (ODR-1 clone) -> Timmy for stacking -> BOSS CE-2 Chorus (just because) -> BOSS DM-2w Analog Delay -> Pigtronix Class A Boost. That’s it. Depending on my mood, I’ll use either my Fender Tone Master Deluxe Reverb or DV Mark Little 40. When I’m in a Plexi mood, I’ll use my Aracom VRX22 (6V6) or VRX18 (EL84). My number one guitar is a Taylor T5z, though I will often switch with my Squier CV Tele.
Test, Test, TEST Your Gear
Before I leave for any gig, I spend an hour or two practicing and testing my gear to make sure all the connections are good, all the knobs are tight, and there are no shorts or anything crackling when I play. If I’m obsessive about anything, it’s making sure my entire signal chain is in good working order. I do this to ensure that once I get to a venue, what I set up on stage matches what I set up at home. Even with my signal chain being so simple, I still do this because I can’t tell you how many times I’ve found issues with my gear before leaving for a gig.
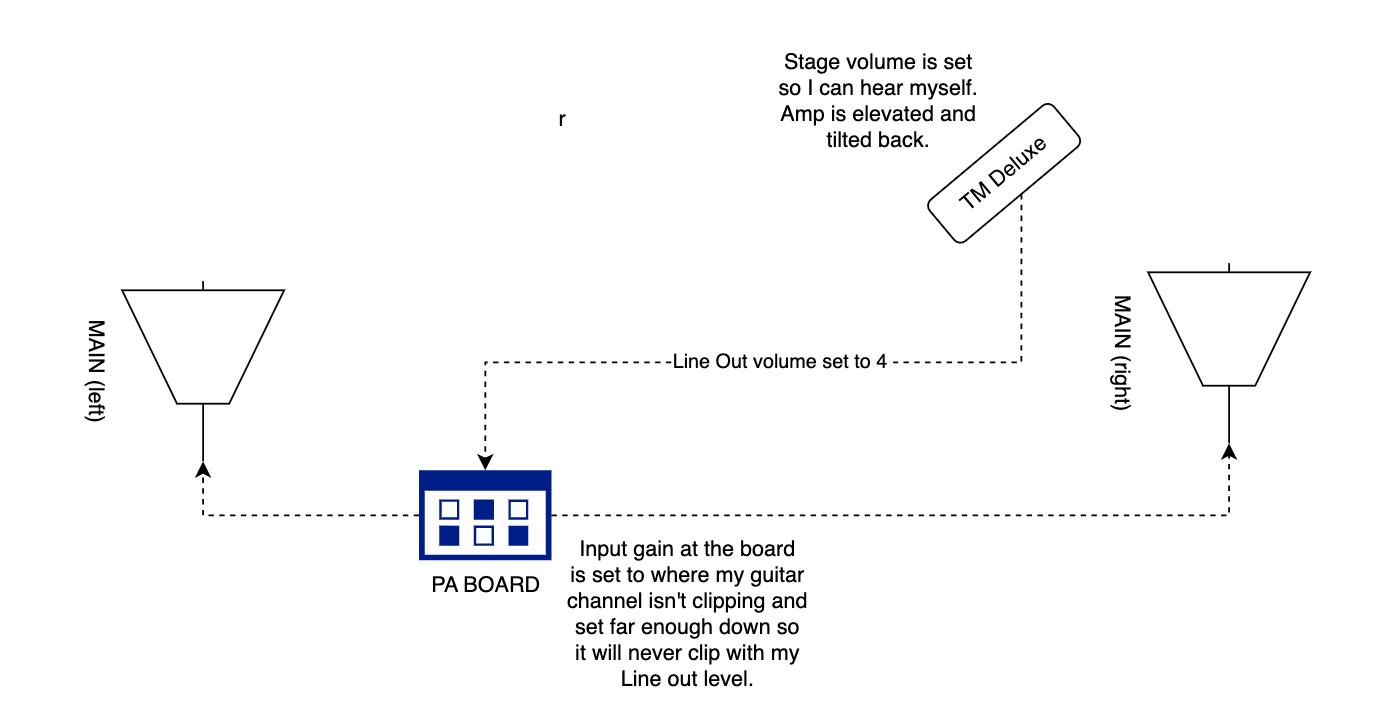
I also test my levels, so there are no surprises when I hook up to the PA. Depending on the venue, I know where my levels need to be, and I adjust them, accordingly, sometimes even going as far as testing through my DAW to ensure my levels are in the right place. When I talk about levels, it means dialing in my stage volume AND checking to make sure that what I’m sending to the PA isn’t too much or too little. I can’t tell you how many times I’ve played with folks who don’t test their gear or check their levels, especially their output levels, only to set up their rig at a gig and monopolize our setup time or eat into our sound check while they dial their shit in at the gig.
Have Two of EVERYTHING
I’ve written about this before, but I bring spares for everything to a gig, though admittedly, I usually only bring a single amp to a gig, but that’s because I’ve tested thoroughly. But I always have a spare guitar. I have two or three extra XLR, 1/4″ cords, patch cables, batteries, mics (vocal and amp). I also carry no less than three packs of strings.
Other important items I bring: A multitool just in case I need some pliers or cutters. For instance, at my last gig, I had to do a quick repair on my mic stand. I was so glad I had the multitool. Another thing I also bring is a high-power tactical flashlight. That has come in handy many times, especially at the end of a gig and we’re striking the stage. That flashlight mitigates leaving stuff at the venue. Finally, I always have a supply of Hall’s Mentholyptus cough drops. As a singer, they’ve been a lifesaver. But even if I’m not singing, at least for me, there’s something about the freshness that helps get my head straight.
Never Ever Wear Beer Goggles
I once played a gig where I was totally fucked up on bourbon. I thought I was playing great, and that the gig went well. But when I heard the recording, I was embarrassed to hear just how much I SUCKED! There were times where I was even singing completely off key! The moral of the story is that when you’re inebriated, you don’t sound as good as you think you do.
Listen to the Bass
I know that sounds counterintuitive since most people tend to think the drums provide the rhythm, but in every band I’ve played in over the years, it’s the bass that holds down the core rhythm. That’s why Peter Frampton refers to his bassist as the “Balls of the Band.” While the drums provide basic beat and tempo, from a musical standpoint the bass provides rhythmic “mood.” This is what I play off. For instance, in my church band, my bassist is not only skilled, but he’s a rock-solid musician who has great command over his fretboard. We’ve been playing together for years and we mix well as we play off each other. It’s a great mix. So while we’re performing a piece, I’m actively listening to what he’s playing and will adjust my playing to match the mood he’s presenting.
Ambient Reverb Is Only Good for the Studio
When the Christian group Hillsong broke through with their hits like “Oceans” and “What a Beautiful Name,” it seemed that every other Contemporary Christian band started using ambient, long-tail reverb like the Strymon Big Sky. The sound that pedals like that can produce is pretty awesome, but that sound only works in the studio or in a controlled environment.
I saw Hillsong live a few years back at the Oakland Coloseum arena. The guitars sounded like shit! They used all that ambient reverb and the guitars were completely washed out and muddy-sounding. The FOH guys compensated by boosting their levels, but that was a mistake. It just created an amorphous wall of mushy guitar sound. It was a shame because their guitarists are excellent musicians.
As Doug Doppler put it, “I add just a touch of reverb to give my tone a little grease. More than that and it turns mushy.” I totally agree. A little bit of reverb is fine. But as you add more reverb, you lose articulation as notes start overlapping each other. And in a live situation, that can be disastrous to your sound. It may sound great to you up close, but once the sound projects out to the audience along with all the other instrumentation and vocals, it will get completely lost in the mix. So as much as you might like that “big sky” sound, it’s probably a good idea to dial it down.
Using Less Gain
There’s nothing like the sound of a sweet, creamy distortion. But over the years, I’ve learned to use a lot less gain, especially with my overdrive pedals because too much gain causes your signal to compress. What then happens is your sound becomes completely muddy. For example, several years ago I went to the Experience Hendrix Tour with Joe Satriani. It was a great show, but when Joe first came on stage, he had way too much gain in either his pedals or amp and his tone was completely muddy. It was difficult to make out the notes he was playing. The FOH guys compensated by turning up his volume in the PA, but all that did was make his shitty, muddy sound louder – excrutiatingly so. Fortunately, after his opening number, he realized how bad he sounded, made some adjustments on his board, then all was well.
Personally, playing mostly classic rock, I’ve rarely gone into high-gain territory with my sound. But I’ve learned that like reverb to add enough gain to add some grease to my sound and get a great distorted tone without ever getting muddy.
And as far as overdrive is concerned, it boils down to setup. Whatever amp I use, I set it to the edge of breakup, so that if I attack harder or turn up the volume knob on my guitar, I’ll get go into overdrive. I normally use two overdrive pedals with a booster at the end of my chain. With the overdrive pedals, I add just enough gain to color my sound, but I make sure that the levels are at unity. If I stack, I expect only a modest jump in volume. With my overdrive pedals I want to make sure I have lots of control over my levels from my guitar. I kick in the boost for solos, which will slam the front-end of my amp, so I get a bigger jump in volume. That will also increase the amount of distortion, but I still fall short of fully saturating my front-end, which would cause compression and muddy my tone.
Get a Graphic EQ
It’s hard for me to believe that for as long as I’ve been playing, up until recently, I didn’t even consider using a Graphic EQ in my chain. But since I’ve added one to my chain, there’s no way that I will ever be without one on any of my boards. As Phil McKnight puts it, “A Graphic EQ solves problems.” Truer words could not be spoken. And the thing is that you don’t need much adjustment to affect dramatic change to your sound! When I use it on my acoustic board, because my piezo pickup is a bit midrangy, I setup my EQ in a slightly scooped pattern. We’re talking just a couple of dB on the low end and upper frequencies. But the affect that has had on my tone is insane! On my electric board, when I’m playing my Tele (which is most of the time), I slightly cut the lowest frequencies, and boost up the upper mids and slightly cut the highest frequencies. Talk about a rich tone!
You don’t have to spend a ton on one either. I purchased the BOSS GE-7 simply because I know that a BOSS pedal will withstand hundreds of gigs. But Behringer makes a good pedal for a quarter of the price. But no matter what you end of getting, you’ll be amazed at what it will do for your sound!
Read Full Post »