|

|
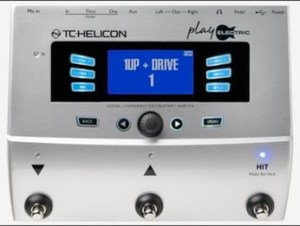
TC-Helicon Play Electric
Summary: Sporting the fantastic TC Helicon vocal engine and upgraded guitar pedal effects, including several TonePrint patches – Corona Chorus, Hall of Fame Reverb, Flashback Delay – plus a very nice compressor. Play Electric adds amp emulation from its big brother, the Voicelive 3, and with the right tweaks, it’s entirely possible to plug this right into a PA and leave the amp at home.
Cons: The only little nit that I have is that the loop length is extremely short – around 15 seconds. That’s enough to capture a few bars to solo over, but there are times when you want to loop an entire verse or chorus. For that, you’ll have to use another looper. A bit of a bummer, but not enough to dismiss the power behind this unit.
Price: $349.00 Street
Features (from web site):
- Professional Vocal Effects and Tone with natural sounding Vocal Harmonies guided by your guitar and/or Room Sense which captures the ambient sound and can be used with piano.
- Guitar FX styles from TC Electronic’s award-winning range of TonePrint pedals
- Powerful amp emulations from VoiceLive 3 with a dedicated guitar output
- User-friendly design with per-preset Vocal and Guitar FX combinations for easy performance control
Tone Bone Rating: 4.75 ~ If it weren’t for the short loop length, I’d be giving this unit a 5. I got a Switch-3 switch box to control the looping, and if you’re going to use the looper, this is a must-have. |
I’ve had this unit a few months, but actually didn’t start using it until a couple of weeks ago when I had holiday gigs at various venues where space was at a premium, and lugging my pedal board along with my PA was impractical. I wish I had started using it sooner… the on-board modulation effects combined with amp simulation provide a super-rich tone; equivalent to the quality of tone that I’ve come to expect. But I’m getting a little ahead of myself.
The first holiday gig I had was for the staff party at an assisted living facility. To get to the place I was to play, I’d have to park my car in a loading zone then carry my stuff through a couple of halls. Now normally, my load out would take two trips, but this wasn’t really an option. Conceivably, I could take my entire rig (pedalboard, gig bag, cord bag, and SoloAmp PA) in one trip, but the stuff is a bit unwieldy, and I’ve dropped my pedal board, actually ruining a couple of pedals once. So a single trip was in order.
While I was trying to figure out how to configure my rig, I remembered that I had the Play Electric unit that had everything that I needed on board. So the morning of the gig, I did a quick tweak of the guitar settings (setting them to global so they’d be the same for every vocal patch, which is a godsend of a feature, by the way), packed up my cord bag with the cords I needed plus the Play Electric, and set off to my gig.
I didn’t use the looping feature at that gig because after seeing another dude play with a VoiceLive 2 and the Switch-3 switching unit, I knew that was the way to go, and besides, I didn’t have the Switch-3 yet. But that was okay. It was only a two-hour gig, and I could do all my songs – even the ones where I normally loop – without a looper.
Setup was an absolutely breeze. I had the VoiceLive 2, so setting up wasn’t anything new. Once I was all set up, I remembered the RoomSense feature, which is an on-board mic that picks up the ambient sound in a room, and can be used to harmonize for instruments that don’t plug in; like a piano for instance…. The facility where I played had a beautiful Kawai baby grand, so I upped the sensitivity of the RoomSense mic, and tested it out. OMG!!!!! I wish I had used that with my VoiceLive 2 when I had it. I could’ve been doing harmony while playing piano all this time! Oh well… lesson learned, and where there was a piano at my holiday gigs, which was everywhere except for two places, I used the RoomSense to harmonize while playing piano.
Note that since the unit uses the same vocal processing algorithms found in all the high-end TC Helicon vocal processors, I won’t be covering harmony here, just the guitar stuff.
Packed with Features
I thought the VoiceLive 2 had tons of stuff packed into it, but the Play Electric has so much more. Here are the amp models that are offered in the unit:
Clean Brit, Cali Clean, UK Clean, Deep Clean, Bright Switch, Warm, Little Thing, Chicken Picker, Brit OD, AC Crunch, Chunky Brit, Lil Champion, Chime Drive, 2×12 Combo, 4×12 Crunch, Swamptone, Nasaltone, Brown, Scooped, Metallic, TC Electronic Dark Matter Pedal, OD Pedal, Dark OD Pedal, Distortion Pedal, Acoustic (Flat), Acoustic (Shaped/BodyRez)
On top of that, you have full EQ control in the unit to adjust the EQ settings for what every guitar you’re playing. One nice feature of the EQ is that you can “move” the midpoint frequency of the mids. This is something that you typically find on good PA boards, but I can see the sense in including a feature like that with the Play Electric. You could move it higher for a naturally warm-sounding guitar, or lower to take the edge off a bright guitar, then adjust the high, mid and low around the midpoint. Very cool feature.
On top of that, the same algorithms that power the TonePrint pedals are also in the unit. I use two of the pedals on my electric board: the Corona Chorus and Hall of Fame reverb. These are mainstays on my pedal board, and to have those pedals in the Play Electric is awesome. The delay and compression models are also quite nice. I totally dig the compressor, and even though it’s fairly simplistic, it’s adjustable enough to achieve a very rich tone.
How It Sounds
Sorry, I don’t have any sound clips to share at this time, but after using it several times, I can confidently say that both the vocal and guitar tones are awesome. But as with anything, it takes spending a bit of time dialing in the settings. Luckily this is not at all difficult with the Play Electric. The brightly lit LCD screen is super-easy to read, and frankly, you can adjust practically everything without having to refer to the manual (though admittedly, I had to refer to the manual to adjust amp EQ settings).
As far as guitar tone is concerned, though I probably should’ve tested this with an electric guitar, the plain fact of the matter is that I would use this almost exclusively in my acoustic gigs (I’m actually in between bands right now). And for that, this unit produces incredible sound; so incredible, in fact, that I will be leaving my pedal board at home going forward. Here’s a little more discussion on the pedal models:
Though the unit includes TonePrint models, it’s not exclusively limited to those. Each model includes several other non-TonePrint models that you can use (I believe these are the same found on the VoiceLive 2), which have been traditionally pretty high-quality. Personally, I didn’t use them when I had the VoiceLive 2 because I had dedicated pedals that were much better than the on-board models. But with the TonePrint models, as these are my pedals of choice for modulation effects (specifically, chorus and reverb), using them is another no-brainer.
Corona Chorus
This is not nearly as adjustable as the standalone pedal; actually none of the models are, but it’s very easy to dial in the right level and speed to get a subtle (which I prefer) to a super-wet, drippy chorus tone.
Hall of Fame Reverb
When I got this pedal a couple of years back, it soon became my go-to reverb. The spring reverb is magnificent, but it’s the plate and hall reverbs where this pedal shines. I use the hall reverb to add a subtle expanse to my guitar tone without it sounding like I’m in a simulated all. It’s just a touch to “grease” as Doug Doppler says.
Delay
I don’t know if the Flashback model is used here, but the delay is quite nice on this unit. Again, I use it very subtly to provide just a touch of slapback, with a low mix level.
Compressor
This is actually my favorite “pedal” in the unit. There are five presets available that provide either more attack, sustain, pop or pump, and you can adjust the amount and makeup gain as necessary. I use the Subtle Sustain setting, and it works great with my acoustic.
Looping
As I mentioned, my only nit about the Play Electric is the short loop length, but after playing through several of the songs I play with looping, I found that for the most part, I can live with the short loop length because the sound that the Play Electric produces completely meets my needs; moreover, the prospect of carrying one less bag makes using this an absolute no-brainer.
Wrapping It Up
Getting to the point, I dig Play Electric. I wish it had longer looping, but to get that, plus a finer control over the guitar and vocal settings, I’d have to go to the VoiceLive 3 which is more than twice the price of this unit. Could it be worth it? Possibly… probably… but it’s not expense that I can make right now (especially since I’m saving up for a Gretsch Brian Setzer) 🙂 But for what the Play Electric provides besides looping, it’s a unit that will serve me well for a long time.
Read Full Post »


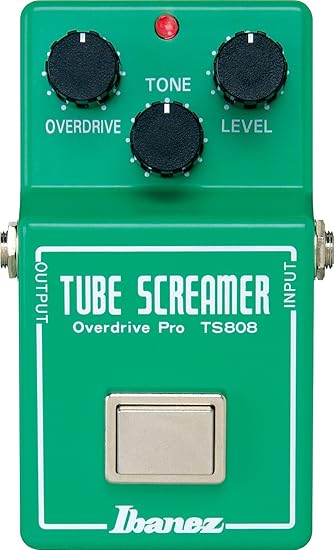
 For me, it’s overdrive pedals. Transparent, amp-in-a-box, tone-coloring, you name it, I love it. To me, overdrive pedals are a lot like guitars. They all have their own unique sounds. And like guitars, when your wife or significant other asks you how many overdrive pedals do you need, for me, the answer is always: Just one more…