Feeds:
Posts
Comments

Posts Tagged ‘fender’

When doing my research on the Tone Master recently, I ran across a great review where the reviewer said that perhaps the attenuator on the Tone Master was really a master volume because, after all, it’s a digital/solid-state amp. Part of me agrees with this because let’s face it: Signal processing happens in the chips of the amp, and not tubes as there are no tubes in the amps.

But another part of me said that depending on where the Fender engineers placed the attenuator in the sequence it could very well be an attenuator. Just like tube amps, a solid-state amp has two basic stages (not including the power supply): The first is the input gain stage (in the tube world it’s commonly known as the preamp stage) that amplifies the incoming signal; then the output stage (power amp) takes the input stage signal, adds more power to it, then outputs it to the speakers.

This is an important concept because of how master volumes and attenuators work. A master volume is placed in between the input and output stages, essentially regulating the amount of signal that flows from the input stage to the output stage. An attenuator, on the other hand, is placed between the output stage and the speaker. And when cranked, the distorted sounds an amp produce are different -sometimes significantly – between a master volume and an attenuator.

Before continuing let’s make an assumption that we want to get an amp into overdrive at a reasonable volume level – let’s say bedroom-level.

To get bedroom-level volume with a master volume-equipped amp, you turn down the master volume way down and crank up the gain or volume knob. This will overload the preamp and cause the signal to distort. As the master volume is essentially a gate that regulates the amount of signal that gets to the power amp, because it’s turned down, the resulting volume is at a level that doesn’t blow your eardrums apart. In this scenario, the distortion is coming almost entirely from the preamp. At least to my ears, this type of distortion tends to have a sharper edge to it.

With an attenuator, on the other hand, as it regulates the amount of signal sent to the the speakers, both the gain and master volume knobs can be cranked up. This means that all the signal from the gain stage can pass into the power amp and saturate it and also drive it into overdrive. The combination of the two types of distortion produce a warmer and a little compressed output signal as compared to just preamp distortion. To be clear, I am in no way suggesting one type of distortion is better than the other. They’re just different.

Circling back to the Tone Master amps, to answer the title of this post, since they only have a single volume knob and no master volume, it seems to me that Fender’s attenuator is actually an attenuator, regulating the final signal that gets to the speakers, as opposed to a master volume.

All that said, I realize that all this is a big fat guess. And in the end, does it really matter? Probably not. I absolutely dig my new Deluxe Reverb. And frankly, whether the power scaling feature is an attenuator or not, the fact that I can crank the amp and not shatter my eardrums is all that matters.

Read Full Post »

If you don’t want to read any further…

Damn! I shouldn’t have loved it, let alone like it, but I absolutely fell in love with this amp! I’m not ready to buy it as I’ve got to try out the Deluxe Reverb, but I probably will get one of them. Now that that’s out of the way, let me give you the back story.

TL;DR

With the pandemic lockdown over, my former old farts classic rock band asked me if I’d like to come back and play with them. At first, it was just to sub at an upcoming gig for their current lead guitarist who had to attend a company retreat. But over the course of a few rehearsals leading up to the gig, they kept on hinting, then finally just outright asked if I’d play with them again during the break at our gig. I had forgotten just how much fun I had playing with them so I readily agreed.

For the gig, I used my BOSS Katana Artist. I love that amp and through the first set, it worked awesome. But a few songs into the second set, its volume started fluctuating. I powered it down then powered up again, and it didn’t happen again during the gig. But my confidence in the amp was shaken. And an amp isn’t something that I normally bring a back up for a gig. So needless to say, that experience put me in the market for a new amp.

A couple of days ago, I took a bit of time to go down to my local Guitar Center. They didn’t have the Deluxe in stock, but they did have the Twin. So I took it out for a spin.

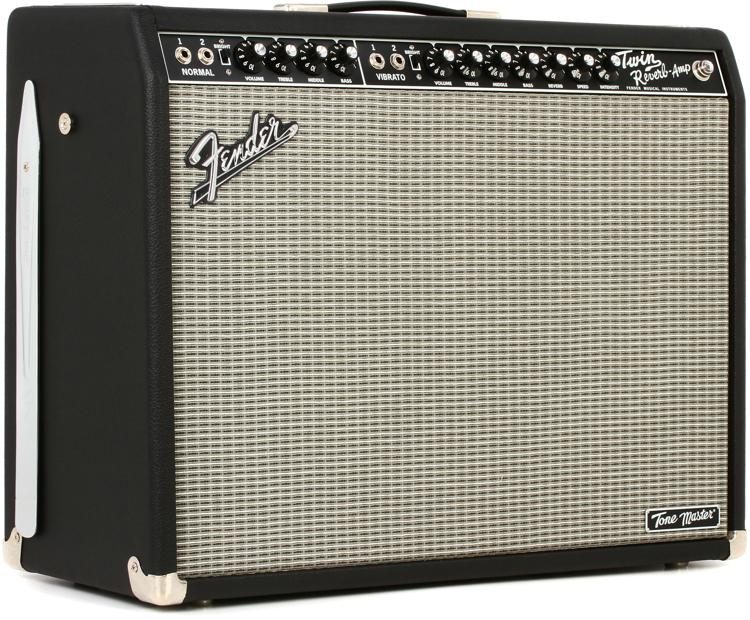
Like a regular Twin, it’s all about clean headroom. But the totally AWESOME thing about this amp is that it has power scaling, basically a built-in attenuator to reduce the output wattage of the amp so you can crank it. The Deluxe allows you go all they way down to 0.2 Watt and the Twin lets you go down to 1 Watt. That’s still pretty loud, but it does let you crank the amp and not make your ears bleed.

The dirty sound of the Twin is just okay. Truth be told, it doesn’t break up a lot, but that’s not what you get an amp like that for. But for cleans and tons of clean headroom, this is a GREAT platform. And though the sound is a little different from an original Twin (which frankly you should be able to get real close with EQ), the sound is unmistakably Fender, with that luscious three-dimensional quality about it. If the amp didn’t have that quality, I would’ve dismissed it out of hand.

But the sound is good. Real good. And for me, it was so good that I almost bought it on the spot, but I need to try out the Deluxe before I make a decision.

And I almost forgot… The amp only weighs 33 lbs! An original Twin starts at 64lbs and goes up. My buddy’s Twin weighs over 80 lbs! And the Deluxe only weighs 23 lbs! For an older guy like me, that’s totally appealing.

I didn’t get to try the feature out at the shop, but I dig the fact that it has an XLR out with optional cab simulation IRs. This is a total value-add as I can get my sound into the PA and not have to rely on the amp to get my sound out. I can keep it at a reasonable volume near me and let the PA get my sound out to the audience.

An XLR out. Power scaling. Great sound. I’m sold. I’ve always leaned towards the Twin because I just love the Twin’s sound. But I’m a little conflicted because the Deluxe’s dirty sound is damn good, at least from what I’ve heard on demos. It’s the kind of amp you set at the edge of breakup then use a combination of volume knob and pedals to tip it over the edge. It’s the way I’ve set up my amps for years. But lately, I’ve been wanting a lot more clean headroom.

Then there’s the weight of each respective amp. The Deluxe is a total lightweight at 23 lbs. And though the Twin only weighs 33 lbs, that’s still a 10-lb difference. I really need to A/B the two amps.

Circling back to sound, one might ask just how close to the sound of an original Twin does the Tone Master get? I’ve played several Twins over the years, but I didn’t have one to A/B, so I can’t really answer that question. But at least for me, the Twin has always been about the classic scooped, Fender sound. The Tone Master has that down in spades. And though it’s a digital amp, emulating an original black face, that emulation is damn good, both in sound and dynamics; so good to me at least that even if it wasn’t emulating an original Twin, it could easily stand on its own merits as a great amp.

Plus, with the two speakers, the spread of the sound is wonderful. Whereas a single 1 X 12 is pretty directional, the two speakers of the Twin provide a sonic spread that adds depth and breadth to the sound.

As compared to my Katana Artist or other digital amps, the Tone Master might seem to be a one-trick pony. But to me, therein lies its beauty. What Fender has done is to create a digital emulation that is absolutely superb, focusing solely on that as opposed to other amps that include effect emulation and/or emulation of several amps. It’s this focus on a single platform and doing it excellently that to me at least makes it stand out.

Admittedly, it’s not for everyone. For years, I’ve gravitated towards the Marshall Plexi sound. I’ve always had a Fender amp of some sort in my studio, but for playing live, I’ve mostly used Marshall style amps. That changed when I got my Katana that I got specifically for its clean headroom to be a pedal platform.

That amp has a sound all its own, and I was actually thinking about getting another one. But what I think influenced my research into the Tone Master line was the old Fender Ultra Chorus I use at band practice. That amp just oozes Fender clean goodness. It’s a great clean platform that emulates my live sound.

If I had any negative marks about the Tone Master line it’s the same negative marks I give to other Fender products. That is the price. At $1049 for the Twin, it’s a bit of a steep barrier to entry. The Deluxe is $949.

With only a few features, you might think that the prices Fender’s charging exceed the value of the amps. But if the sounds differ from the originals much like the difference in sound due to different tubes or speakers, then perhaps the value lies in the emulation software and computing power of the amps. The Deluxe uses dual processors, while the Twin uses quad processors.

That said, you can occasionally get these on sale for slightly less. I may wait for a sale. Or maybe I won’t. I do know that I will end up with one of these amps.

Read Full Post »

I have to admit that before yesterday, I had absolutely no idea that this guitar even existed. I only discovered it by watching a video of Juliana Vieira doing a demo of the BOSS RC-10R rhythm/looper.

When I looked at the guitar, I thought it was a Gretsch or a 335 but then I saw the distinctive Fender headstock and thought What? When did Fender do a hollowbody?

It turns out that back in 1966, in response to the popularity of the Epiphone Casino, Fender enlisted Roger Rossmeisl, a German luthier who designed guitars for Rickenbacker to design them a hollowbody guitar that could compete with the likes of Ephiphone and Gretsch. The guitar went through a few iterations in its original production run from 1966-1972. Then Fender discontinued production.(1)

But in 2013, Fender reissued the Coronado II, which was the dual-humbucker version of the Coronado that featured a Tune-O-Matic bridge and what Fender called Fidelitron humbuckers. Those pickups made me think the guitar was a Gretsch at first because they look like the TV Jones pickups. But then I looked at the body an thought that it bore a real resemblance to an ES-335. The block inlays on the neck further reinforced that, but the headstock gave its away.

When I saw that it was a Fender, I literally laughed out loud. As I mentioned in the title, I love schizo guitars. I personally have a Godin Artisan ST-V which, from a distance, looks like a Strat with a long upper horn. But on close inspection it’s nothing like a Strat. But it’s so cool to play! Another one that comes to mind is the Gibson Firebird which looks like a backwards Fender Jaguar but at the same time looks like an Explorer “Lite.”

Though Wikipedia says that the guitar is still in production, I couldn’t find any new guitars in the major online shops, and there is absolutely no information to be found on the Fender website. All the guitars that I found on sale are on the used market. And there aren’t that many.

With the re-issue, when Fender released the Coronado II, it’s as if it was again responding to the popularity of another manufacturer’s release, namely the Gretsch 5xxx Electromatic line. I bought one back in late 2011. I got it for $549. The Coronado went for $100 more – of course Fender’s charging more. 🙂

The ones I’ve found are in pretty good shape at around $600. I might just have to pull the trigger on one of these in the near future.

Here’s Juliana Vieira’s demo of the BOSS RC-10R.

_________________________________________________________

1 Fender Coronado. Wikipedia

Read Full Post »

I have to admit that I haven’t been too impressed with Fender’s offerings for quite awhile. I have three Strats and a Tele, but I haven’t seen anything coming out of Fender that got me really excited; that is, until now.

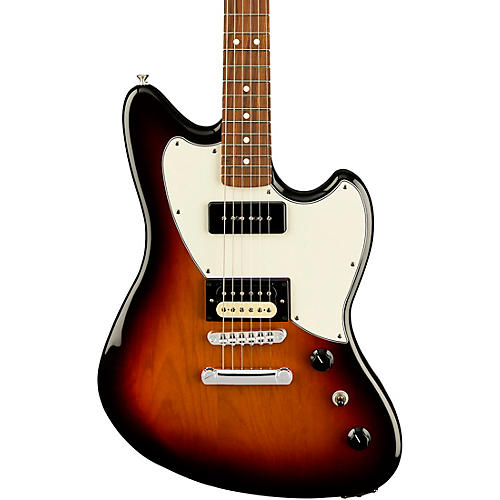
When I checked my email this morning, I saw one from Fender entitled, “Alternate Reality | The Powercaster.” At first, I rolled my eyes, but when I went to read the email, I was immediately intrigued by the body shape. I thought that it looked like a Jazzmaster or Jaguar. Then on closer inspection of the picture, I saw that it has a P90 in the neck and a humbucker in the bridge. The very first thing that came to my mind was: Rock Machine. So I decided to take a closer look.

So I went to the Powercaster product page. Maybe I shouldn’t have because now I want one of these!

Before I go on, here are the basic specs:

  • Alder body
  • Roasted maple neck (wood is roasted to remove all moisture)
  • Pau ferro fingerboard
  • Synthetic bone nut
  • 24.75″ scale length
  • 9.5″ neck radius
  • Modern “C” neck shape
  • Adjusto-matic bridge with hardtail
  • Comes in 3-color Sunburst, Surf Green and White Opal (it’s like a translucent grey)
  • Made in Mexico
  • Street price (so far): $899.00

One of the first things I noticed was the scale length and neck radius. Look familiar? It should because those are Les Paul neck specs. When I saw the scale length, I started salivating because the feel would be like a Les Paul. And being a Les Paul guy, I imagined that I would be right at home with this guitar.

After reviewing the Powercaster site, I went to the forums and gear blogs to see what others thought. The reviews were mixed. One person didn’t like the Tune-O-Matic style bridge (I actually would’ve preferred a more modern bridge like a Gotoh 510). Another didn’t like the thought that Powercaster didn’t have a “Fender” sound based on demos he saw. Another didn’t like the Gibson scale length.

Others like me, love the features. But the person who didn’t like the scale length also brought up a couple of valid points. First, they didn’t quite know who the target consumer of this guitar would be. He also pointed out that considering the price and where it’s made, the price point sits just below American-made prices. These are very valid points that I’m sure will need to be sussed out a bit more.

Personally, I think that this guitar is aimed at someone like me who doesn’t have a dogmatic perspective of brands; for instance, if something is branded Fender, then it has to have a Fender sound – whatever that is. I tend to judge gear based on their own merits, and I LOVE that P90/Humbucker combination! I also love that roasted maple neck because dry wood is very resonant. And as far as the price is concerned, while it’s about $150 more than other MIM guitars, I don’t think it’s really all that out of line.

Of course, while I’m excited by the features and possibilities this guitar has on offer, I need to get my hands on one and play it. But it sure shows a LOT of promise!

Read Full Post »

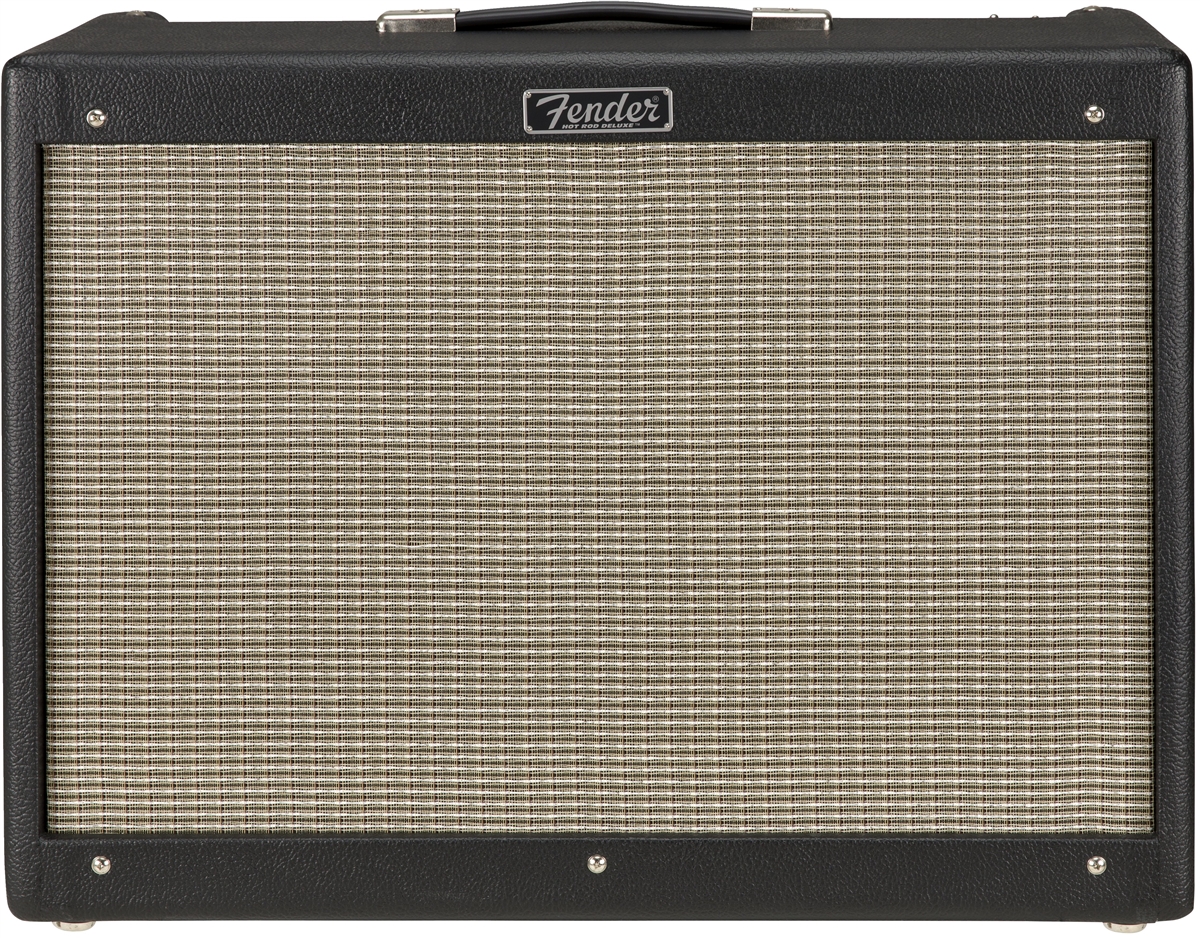
2231200000_amp_frt_001_nrI haven’t had much time to devote to GuitarGear.org in the last couple of years, so when I do post something, it has to be meaningful to me. And surprise, surprise… I got an email in my inbox this morning that kind of intrigued me. It was an announcement from Fender that they were releasing version IV of their popular Hot Rod Series of amps.

Normally, I’d be like “whoop-dee-doo,” but after reading what they’ve done with the amps, I got really intrigued. I’ve had a Hot Rod Deluxe for years; it was my very first tube amp. So I’ve kept tabs on the various changes the lineup has gone through. I haven’t been all that impressed with the previous releases, but the new features in the new version – at least in the Hot Rod Deluxe and Deville – are pretty significant; significant enough for me to plug it. So here’s what Fender has listed on their site for major features:

  • 40 watts; Normal, Drive, and More Drive channels
  • Celestion 12″ A-Type speaker
  • Modified preamp circuitry for increased overdriven note definition
  • Spring reverb modified for improved smoothness
  • Lightweight pine cabinet
  • Includes 2-button footswitch and cover

To me, the two features that stick out are the pine cabinet and the preamp circuitry for better overdrive. In particular, the overdrive on the Hot Rod has been pretty weak in previous versions. In fact, I would rarely use the drive channel on my own amp, and just use the amp as a pedal platform. But if they’ve improved the overdrive channel, that’s intriguing enough for me to check out.

I almost bought a Series III amp from my buddy a few years ago. It was much lighter in weight than my Series II, but the overdrive of the amp was simply, well, uninspiring, and way too open and choppy for my tastes. I even tried running the amp through a different speaker, and it still didn’t improve the sound. But if they’ve tightened it up with more note definition, this really gets me excited.

What about the change to a pine cabinet? Damn! Not only would that significantly lighten the weight of the amp, it would make it much more resonant. I absolutely love pine cabinets. They just resonate so, so beautifully! Combine that with the silky smooth Fender cleans or even with some tight overdrive, damn! Yet again! Interestingly enough, with the Pro Junior IV and the Blues Junior IV, Fender has replaced the birch/plywood cabinet with MDF. Maybe it made more sense sonically to them; hard to know what a manufacturer is thinking.

I can’t wait until that amp is available in stores so I can test it. But in the meantime, if you’re curious, you can check out the product page on the Fender site.

Read Full Post »

fender_fa135ce

Fender FA 135 CE Concert Acoustic-Electric Guitar

Summary: Part of the Fender Classic Design series, this lower-end model is a real surprise; especially in the sound department. Nice, low action, and a great feel. If you’re looking for a starter guitar or getting your child his or her very first guitar, you can’t go wrong with the FA 135 CE.

Pros: Some reviews have questioned the build quality of this guitar, but I’m very impressed with how solid this guitar is built. The guitar stays in tune and playing it is so, so easy. And for a smaller concert size guitar, this has a very rich sound; it’s quite unexpected.

Cons: The only nit that I have – and it’s really just a nit – is that the tuners are bit fast for my tastes. Fine tuning is a little challenging at first, but it’s easy to get used to.

Price: $179 street

Features:

  • Laminated bass wood sides and back
  • Laminated spruce top with X-bracing reinforcement
  • Nato wood neck
  • Rosewood fretboard
  • Compensated rosewood saddle
  • Single cutaway
  • Fishman Ion-T Preamp with built-in tuner

Tone Bone Rating: 4.75 ~ For what it is, I can’t help but give this guitar a great rating. Fender really surprised me with this guitar!

My 12-year-old son has been taking Ukelele lessons for a couple of years, and after he finished his last lesson, he came out and told me that he wanted to start playing guitar. His teacher, Michael, had accompanied him out of the lesson room and told me that he was ready. And since his birthday was coming up, I thought I’d get him a new one, as opposed to fixing up one of my old ones. My thought is that just like my dad did for me, I’d give my son a brand new guitar for his first one.

So today I went to Guitar Center and spent a couple of hours in their acoustic room evaluating all sorts of acoustic guitars. I didn’t want to spend over $200 for this guitar, but luckily, as a big-box retailer, Guitar Center has a pretty wide selection of “value” guitars. I tried guitars from Mitchell, a used “Little Martin,” several Yamaha guitars, and even a Gretsch.

The Little Martin was impressive and solidly built and was at a great price of $189, but it wouldn’t be available until Wednesday due to some city ordinance about a waiting period for used guitars. I needed a guitar today. So I sat in the acoustic room, and my gaze fell upon the Fender. I immediately thought to myself that it looked really nice. But, the thought also occurred that it was a Fender acoustic, and my previous experiences with those haven’t been all that good.

But in spite of my preconceptions, I decided to give it a try and was immediately surprised by the tone of the guitar. For a smaller-body guitar, I wasn’t expecting much sound-wise. But this had a sweet, gorgeous, rich tone. It completely took me by surprise. Then I started playing it, and thought, This couldn’t be a Fender acoustic! It sounds and plays way too nice – especially at $179!

Folks, this guitar is a sleeper, and it reminds me of the experience I had with my Squier Classic Vibe Tele. Great sound, great playability at a SUPER-affordable price!

Fit and Finish

The build quality of this guitar is awesome, just like my CV Tele. There are no uneven paint lines, and all the seams are clean and straight. The neck is straight, and the action is set up low, though it does raise just a little bit in the higher registers; but it’s not so bad that it’s not playable. This is a great guitar for fingerstyle playing, but even strummed, there’s no buzz. But more importantly, the setup is perfect for a beginning guitarist like my little boy.

Playability

Quite frankly, the main criterium for choosing a guitar for my son was playability. I could live with a guitar that had only okay sound just as long as it was easy to play. The frets are medium wire. Not great for bending and vibrato, but hey! This is a beginner’s guitar, so that’s not a big issue. The spacing is great between the frets as this is a shorter-scale guitar. For a seasoned player, this guitar plays with ease. For a beginner and a young player at that, the short scale will help them build up confidence.

How It Sounds

For a low-priced guitar, the FA 135 CE is amazingly articulate. As expected, it has a bit brighter voice as compared to a larger body guitar. But it has some nice sustain, and the spruce soundboard resonates with a surprisingly rich tone. Projection is great with this guitar due to the X-bracing under the top to provide stability and to help with projection. What also surprised me about this guitar is that it’s louder than I expected.

Tone-wise, as for me, I prefer a brighter-sounding guitar. While I liked the Little Martin, doing an A/B with that vs. the FA 135, it was as if a blanket was put over the Martin. The sound was much warmer and a bit too subdued for my tastes. That guitar projected very loud, but it would get lost in the mix when played with other guitars. This shouldn’t happen with the FA 135 CE.

Quick Demo

Here’s a quick demo I recorded just before posting this review. Sorry for the sound quality – and background noises – as this was recorded using my MacBook’s built in microphone, my new puppy was being a little playful across the room… 🙂

Preamp Test

As mentioned above, the guitar comes equipped with a Fishman Ion-T preamp. It’s a pretty simple preamp, so I thought I would give it a whirl. It’s not a bad preamp as preamps go, but it’s nothing special. In fact, its output is only okay. In order to record, I had to peg the guitar’s volume and add a lot of gain on my audio interface. Not a big deal. What was important to me was if I could get a good enough guitar signal to use the guitar in a song.

https://soundcloud.com/goofydawg/fender-fa-135-ce-preamp-test

I have to say that I was pretty impressed with the result. I didn’t have to tweak the EQ at all. Of course, I did some production processing, but that was the point of the exercise, which was to see if I could get a good, mixable acoustic guitar sound from a plugged in guitar.

Overall Impression

I love this guitar! Who cares if it was manufactured in China. I have to commend Fender for finding an overseas manufacturer that does a great job at building guitars. The build, play and sound quality of this guitar have far exceeded my expectations. I think this is a guitar that my son will enjoy for years to come!

Read Full Post »

I love overdrive pedals. I have a bunch of them. But I realized that part of why I have so many has a lot to do with not really understanding how to set them up properly. I’d get an overdrive pedal because a demo I heard sounded great, or I loved how it was voiced. But when I’d get it home, it just wouldn’t sound quite right, so I’d put it in my “storage” area.

But as I got more experienced with setting up my amps, I also began to understand how to set up my overdrive pedals. And now that I have a bunch, I’ve got a variety of pedals to choose from to get the sound I want depending on my sets or my mood – okay, I admit it: It’s mostly due to my mood. 🙂

Admittedly, I did a lot of forum lurking as well to gain insights on setting up an overdrive, so a lot of what I’ll be sharing here comes from the things I’ve learned from others in addition to the stuff I’ve learned on my own.

What actually motivated me to write this was a conversation that I had with a friend. I asked him what he thought of a particular overdrive pedal, and he said he didn’t like the way it sounded. I looked at him a little puzzled and said, “Maybe you didn’t set it up right.” And that led me to say that not all overdrives are created equal, and you have to set them up according to how they work best, or how they were intended to be used. Truth be told, I haven’t spoken to him since that conversation, so I have no idea if he tried what I suggested. But in light of that, I decided to share my thoughts.


Related Articles


Types of Overdrives – Not Necessarily What You Might Think

Before we get into the actual setup of an overdrive, I thought I’d go into a discussion about types of overdrives because how you set up an overdrive has a lot to do with the type of overdrive it is. No, this isn’t a discussion about circuit types or transparency. I suppose this could be related to the circuit type on which an overdrive is based, but I’m not that electrically savvy, so I’ll discuss this in more practical terms.

From my experience with having played several overdrives over the years, I’ve found that they fall into roughly two different categories (mind you, these are my own terms): Interactive and Standalone. Interactive overdrives are meant to interact with the preamp of your amp, and together they produce the overdrive sound.

Standalone overdrives are typically purpose-built to mimic an amplifier, and though they can certainly be set up to be interactive, they can function just fine on their own in front of a clean amp.

Notice that I haven’t named any specific overdrive models. The reason why is that overdrives sound different with different amps. For instance, the EHX Soul Food sounds great as a standalone overdrive in front of my Fender amp. But it doesn’t sound nearly as good as a standalone overdrive in front of my Plexi-style amps, so I set it up as an interactive overdrive for those amps.

So the idea behind interactive vs. standalone has little to do with a specific type or model of overdrive; rather, it has to do with how the overdrive sounds with your amp.

Setting Up an Overdrive

I have two processes that I go through to set up an overdrive. At this point, I know all my pedals and whether they’re standalone or interactive, but I still follow the same processes for my different pedals when I set them up on my board. Also, if I come across or get a new overdrive, I first assume that it can be a standalone overdrive, then if I find it doesn’t work well that way, I’ll then set it up to be interactive. Here are the step-by-step processes I follow:

Setting Up a Standalone Overdrive

  1. Set up the amp:
    1. Clean
    2. Set EQ to work with your guitar
  2. Set guitar volume to the middle
  3. Guitar EQ where you want it
  4. Set overdrive with all knobs to the middle.
  5. Engage the overdrive and get it to unity gain (so that when you engage it, your volume doesn’t change), or to just get a small volume bump when the pedal’s engaged.
  6. Set the EQ on the overdrive
  7. Adjust the overdrive/gain knob to get your desired amount of distortion from the pedal.
    1. You will probably have to make adjustments to the level knob to maintain unity gain.
  8. Evaluate the sound and feel by playing around with chord progressions and licks.
    1. All the while, raise and lower your guitar volume to see how the pedal responds.
  9. Repeat steps 5 and 6 until you dial in the right volume/sound/feel.
    1. If the volume, sound, and feel are fine for you, then you’re all set and ready to gig and the overdrive pedal will work fine as a standalone device.
    2. If the sound doesn’t feel “right,” chances are you’ll have to do some interaction with the preamp of your amp, so continue to the next section.

Setting Up an Interactive Overdrive

  1. Set your guitar volume to the middle (It’s important you start here)
  2. Set up the amp
    1. Set Gain/Volume so the amp is at the edge of breakup.
      1. You’ll know it’s there when you turn up the guitar’s volume and the amp begins to distort, then cleans up when you turn it down. Also, if the guitar’s volume is set to the middle, if you strum hard, it will break up.
      2. This is the reason you set your guitar volume to the middle so you can affect the preamp easily.
    2. Set EQ on the amp
  3. Set guitar EQ where you like it
  4. Set overdrive with all knobs at their middle positions
  5. Engage the overdrive
    1. More likely than not, you’ll get a big volume boost when you engage at this level, so you’ll have to adjust both the overdrive’s level and amp’s volume/master knobs to get to the right volume.
      1. If you don’t have a master volume, turn down the overdrive’s volume/level knob to get to a manageable volume.
    2. Because you want to get both overdrive AND amp distortion, you’ll want to get a small volume bump when you engage the pedal as you want the amp to go over the edge of breakup.
  6. Now, play around.
    1. See how the combination responds to volume swells on your guitar.
    2. Make adjustments to the overdrive gain to get the right combination of pedal and amp distortion.

The Importance of EQ

Notice that I mention setting EQ on the amp, guitar, and overdrive pedal. Setting EQ is extremely important because it can be the difference-maker in your overall tone. There’s no “ideal” EQ setting. But for me as a rule of thumb, I want to get a rich, slightly bright tone that sits well in the mix and isn’t so warm compared to the other instruments so it won’t get washed out when we’re all playing together.

Also, for live gigs, I usually don’t touch my amp or pedal EQ once I get them set up. I use my guitar’s tone knob to adjust how warm or bright my sound to be.

Amp/Pedal Combinations

All that said, if you’ve followed the steps for setting up an interactive overdrive, and it still doesn’t sound right no matter what you do, then the pedal sucks. Just kidding. 🙂 Truth be told, I’ve found some overdrives work better with different amps. If you have another amp, then try the pedal out in front of it.

For instance, Paul Cochrane of “Tim” and “Timmy” pedal fame recommends not using the pedal in front of a Fender Blackface amp. I don’t have a blackface amp, so I had to take him at his word, but the Timmy works great in front of all my amps. For me, I will not use my venerable Ibanez TS-808 TubeScreamer in front of my vintage Marshall-style amps. It just doesn’t sound good to me, no matter how I set it up.

I think it’s because the TS produces a big midrange bump when engaged, and my amps are voiced bright, so it ends up sounding piercing like little ice picks on my eardrums. Even EQ adjustments don’t work for me. But in front of my Fender Hot Rod, the TS truly screams! My Hot Rod has the classic Fender “scooped” tone, so the predominant midrange of the TS fills in the mids.

WHERE You Play Matters

Seems obvious right? Well, it’s not. In fact, what might sound great in your bedroom or living room may sound like crap on stage. That smooth, round bottom end that sounds so luscious in your headphones may just get you lost in the mix when you play with a band.

A few years ago, I went to see Joe Satriani play the Hendrix Experience concert. When Joe finally took to the stage, he sounded HORRIBLE! Way too much bottom end and way too much compression. He had to crank his guitar to be heard and the sound was just deafening. The FOH guys finally got his tone dialed in and Joe had to make some changes – I’m assuming, EQ changes – to his pedals. After that, they were able to bring volume down to comfortable levels.

In my own experience, I normally set my EQ a little brighter than when I’m at home. When I’m playing on stage and my amp is pushing some serious air, being a tad brighter helps cut through everything. But I’m careful about going too bright because that could get really harsh.

What About Stacking Overdrives?

That gets a bit more complicated, but I’d follow the basic procedures above, treating the trailing pedal as the amp. In this case, I’d tend to set up the amp as clean and have the trailing pedal always on. There lots of ways to approach this as well. I know one guitarist that uses three at once to get his “sound.” More power to him! 🙂

But truth be told, I hate to dance on my board, so even though I will use a couple of overdrives, I only use one at a time depending on the kind of voicing I want. I also, don’t like complicate my sound finding the right balance of multiple overdrives. I just want to play. Granted, I could do a lot of pre-gig work to get that, but for me, employing the KISS theory works best.

Many people like to stack, and that’s great. Stevie Ray Vaughan used to use two TubeScreamers stacked together; one as an overdrive and one as a booster.

Wah-wah and Overdrive

If you don’t use a wah-wah pedal, then you can ignore this section. But I thought it would be important to add this to the mix, mainly because I’ve found that certain overdrives work better depending on where the wah-wah pedal is placed. Admittedly, my personal preference is to place the wah pedal after my overdrives. But there are a few boutique overdrive pedals that I have that work much better when the wah pedal is in front of them. Not sure why this is. Luckily, I only have a couple of pedals that act this way, so I know not to use a wah pedal with them if I have it set up after my overdrives.

Exploration

To close this out, I have to admit that I’m a bit of an overdrive junkie. I may not buy every single one that piques my interest, but I do check out new overdrives when I run across them. The great thing about overdrives is that they really are all different, even the knock-offs, so I’ll continue to explore overdrives. I never know what I might find. 🙂

Read Full Post »

20161017_102120First, a little history…

My very first tube amp was a Fender Hot Rod Deluxe. I got it based on a conversation I’d had with Noel at Tone Merchants in Orange, CA back in 2007; soon after I created this blog. In fact, my Hot Rod Deluxe was the reason I created this blog in the first place! It started making me think about gear combinations, and thus GuitarGear.org was born in January of 2007.

I remember the conversation. It was sometime around November 2006. At the time, I was playing an earlier model Line 6 and a Roland Cube 60. Both amps served me well for playing with my church band, and from 2001 through 2006, I just played those two amps (also, I’d occasionally use a Roland JC120).

But as I started getting the gear bug (I had already started to acquire a few guitars and a bunch of pedals), I realized that where I was lacking was in the amp department. So I started going on the gear boards, and I saw a reference to Tone Merchants and gave them a call. Noel answered the phone, and we must’ve chatted for at least a half-hour. He explained how tube amps worked and how they respond to various inputs and how different types of tube configurations produce different sounds. I remember telling him that my head was spinning.

He laughed and said that the trick with tube amps is that you have to play a bunch until you find the right sound for you. This is where he made the distinction between Marshall and Fender tones, and until I knew what I liked, he recommended I don’t buy a boutique amp right away. Instead, he said that I should get a Fender Hot Rod Deluxe. It was a great platform with which to start out. I could learn about swapping tubes and replacing speakers. And then once I’d gotten the hang of a tube amp, I could start looking at other amps. So I got a Hot Rod Deluxe II. Then over the next few years acquired a bunch more amps, all in search of that elusive unicorn of tone.

Now I’ve come full circle. I’m back in a band that plays mostly 60’s – 70’s classic rock, but I’ve also made a foray into writing and playing reggae. Clean is the name of the game with almost everything I’m playing right now, and if I need some dirt, I just switch on an overdrive or distortion pedal. And since I’m gigging with the band, I’ve been wanting to use a simpler combo as opposed to my separate heads and cabs. Those give me a lot of versatility, but the fewer pieces to lug, the better.

Fixing my amp

With respect to the Hot Rod, it worked for a long time and though I didn’t use as much, I still played it. But about a year ago, I was recording a new reggae song, and it just started cutting out after a few minutes. And being in a rush to lay down a track, I just switched amps, not wanting to deal with my failed amp. So I covered up the Hot Rod and put it back on its shelf, where it stayed until this morning.

I recently wrote a blog post about the Fender Ultra Chorus and said I wanted to get one. But I thought to myself this morning that rather than getting yet another amp, let me see if all that was wrong with the Hot Rod was a bad power tube. Luckily I had a matched set of spare JJ 6L6GCs in my tube drawer.

So I pulled my amp off the shelf, I plugged the power tubes in, and let the amp run for several minutes in standby mode. Then I started playing and found absolutely nothing wrong. Damn! There was that Fender clean tone! And with the scooped tone of the Eminence Red Coat “The Governor” speaker that I installed years ago, it was simply audio honey!

I love it when a fix goes this easy! Especially for me, deathly afraid of electronics, swapping out tubes is about the most I will do. But more importantly, I now my gigging amp! I never thought I’d use my Hot Rod Deluxe again, but as they say, needs must.

Read Full Post »

Yesterday, I had band rehearsal. But since I had a gig immediately after, I just brought my little ’58 Champ in a custom 1 X 10 cabinet to keep things simple. When I arrived, our drummer, whose house we use for practice, told me to take our lead singer’s normal spot as he was out of town. And sitting there was a Fender amp. I immediately said, “Since there’s already an amp there, I’ll just plug into that instead of setting up my rig, since it’ll be faster to get set up and strike down.”

At first, at a distance, I thought it was a Twin, but when I could see it closer, I saw that it was an Ultra Chorus. I had actually never heard of an Ultra Chorus and figured it was one of the cheaper solid state Fender amps. But I thought, Whatever. We’re just practicing and it’ll do…

So I just set up my EWS Little Brute Drive, plugged in my guitar and ran a cord to the amp, and flipped the amp’s switch to the “On” position. Immediately, I got a scratching sound because I was moving my hand on the fretboard. I forgot that with a solid state amp, you get sound – now. 🙂 But it also gave me pause because even though the volume knob was set to 4, the amp was loud; too loud even for practice and a full band, so I turned it down to 1.

I just started twiddling to get warmed up, and I just couldn’t help but notice just how good the amp sounded. I played it purely clean with a little reverb and a touch of chorus mixed into the sound. I was floored at the tone! My Les Paul sounded so deep and pure. I just closed my eyes and started playing some clean runs and chord progressions. The tone was dropping me into the zone!

Not really thinking about it, I started playing the opening riff to “Dock of the Bay,” just vamping on the G, then our bassist joined in, then the drummer picked it up. Our keyboard player took notice and she started playing, and then I just started going off with a clean solo for an intro, nodded to our singer, and she just opened up.

Throughout practice, I was doing runs and fills or playing under our singer, or adding little touches when I was singing. I was so inspired by the tone, I just went off. After finishing Duffy’s “Warwick Avenue,” our keyboard player commented that that was the best rendition we’d played, and then our drummer said he liked the guitar work. I immediately said, “You know, when I’m feeling inspired, I just get lost in the sound, and play my ass off. This amp totally reinforces why I want to get a Fender Twin. I’m tellin’ ya, I’m loving this sound right now.” That was met with simple smiles of agreement.

So… this amp is solid state! The tube amp purist in me says that it shouldn’t sound this good. But the realist in me believes in what Duke Ellington once said: If it sounds good, it IS good. Hell! I play through a solid state amp with my acoustic rig, and it sounds freakin’ killer! This is no different. This little gem of an amp is a cheap amp. In fact, you can pick one up for $200 online. I’m going to get one. Maybe today.

I’m still going to get the Twin Reverb – eventually. But for playing clean, and just putting an overdrive or distortion box in front of the amp, this’ll do. And before anyone scrunches up their nose about a solid state amp, consider this: A great guitarist that I know, Vinnie Smith, owner of V-Picks, gigs with an old Roland Cube 30 that he mics on stage! In fact, when he does demos, you never see the amp, but he plays through his Cube 30! So like I said, if it sounds good, it IS good!

About the amp

From what I could gather, this amp was made from 1992-1994. By 1995, Fender re-dubbed it the “Ultimate Chorus.” This is a 2 X 65W solid state amp. It has two foot-switchable channels, with built-in reverb and, of course, chorus, and two input jacks. You can play it stereo at 65W, or mono at 130W.

As I said, this amp is LOUD. For the entire practice, I didn’t play over 1 1/2! Granted, our drummer was playing with rods, and we had our practice volume pretty far down. But even at gig volumes, I doubt I’d put it over 4. Or, if I do get one, I’ll see if I could swap the pot out for something that has a bit smoother taper.

As far as the distortion is concerned, playing around, I set up the 2nd channel for distortion, but it gave me pretty much what I was expecting: A pretty compressed distortion sound that was not at all pleasing to my ears, not matter how much I twiddle the EQ knobs. But clean, this amp oozes that “Fender-clean” goodness. Add a little reverb grease, and a touch of chorus, and it’s a nice smooth sound.

Apparently, the amp is my bandmate’s son’s amp. He had the EQ set up scooped, and I kept it set like that for the most part, though I did turn the bass down a bit because my Les Paul has a naturally deep sound; especially with the neck pickup.

Sourcing the amp…

Finding one isn’t going to be easy. And even after that, it’s not going to be easy finding one that’s in good working condition. There are a couple of them on E-Bay for $300+. But they’re only rated in “good” condition and sold as-is. That’s a crap shoot. Guitar Center has one for $200 but the face plate is bent up on the left side, exposing a sharp corner that could cut. Not sure where that amp is located, but I might be able to get them to ship it to my local GC so I could inspect it.

Read Full Post »

fender_drriOkay… so I’m in a band… again… And I’ve got GAS… again…

BUT having reviewed literally hundreds of different kinds of gear of over the life of this blog (has it really been 9 years?), I’ve developed the discipline to not give into my initial urges and force myself to test gear thoroughly and in a variety of settings before I make a decision about getting something.

I tell you, that guilty-before-proven-innocent attitude has literally saved me thousands of dollars as I would discover that many things I’ve tested may sound great in one or two settings, but just fail horribly in other areas. Not that something has to perform well in all areas, but it must perform well in the area in which I will be using it the most.

Such is the case with the Fender Deluxe Reverb Limited Edition amp that I borrowed from a friend with the intent to buy it if I really liked it. My first sound tests were great, as they focused almost entirely on the clean tone. We all know that you just can’t go wrong with Fender cleans. But then I hooked it up to an attenuator so I could crank it up without bursting my eardrums.

Talk about a deflating experience. The custom speaker sounded like crap, so I bypassed the internal speaker and hooked up the amp to my custom Aracom 1 X 12 with the Jensen Jet Nighthawk, and the skies parted, and manna rained down from heaven. So I resolved to swap out the speaker before my band rehearsal and see how it would perform.

But life happens, and I just couldn’t find the time to do a speaker swap. But I wanted to test the amp in a band environment, and so I took it to my rehearsal as-is; no attenuator, just the stock configuration. When I got to rehearsal, I hooked up my gear, and set the amp to about 5, so I could get a little breakup with the volume knob on my guitar set to dead-center. That way, I could clean up the signal or dirty it up more with just some volume sweep. But I also took an overdrive pedal with me for some extra oomph when it was time for me to do a solo.

Dammit! I couldn’t believe my ears when we started going through our songs. The tone was absolutely marvelous! So much so that about a half hour into rehearsal, I made up my mind: I was going to keep the amp. What I realized was that the stock speaker, which I hadn’t been all that impressed with needed to be pushing air for me to really get a feel for what it was capable. And when it was able to gets the SPLs up, my mind was blown. This truly was one of the best-sounding amps I’ve ever heard, and that’s saying a lot, as I’ve heard some GREAT amps. It was right on par with the quality of my Aracom amps’ tone. Some people had mentioned that the amp produced a bit of an ice-picky sound. I didn’t get that impression whatsoever. It might very well be that up close you’d get that kind of artifact. But standing 8-10 feet away from the amp, I just got a very nice, rich tone that didn’t have any noticeable high-frequency artifacts. For me at least, I was in tone heaven!

So here’s my dilemma: I dig no, LOVE this amp. But unlike my previous experience with other gear where I loved the tone right away, only to be disappointed when I used it in the environment that I was going to be primarily using it, with the Deluxe, it was the exact opposite experience. I had mixed feelings initially, but when I used it where I’d normally be using it, it was #mind-blown!!! That was NOT supposed to happen. Rehearsal was supposed to confirm my initial findings. Instead, it turned my world upside-down! And instead of my GAS being relieved, I’ve got it stronger than ever!

Another thing that really appealed to me was the amp’s simplicity. With just a single volume knob with no master, you just set it where you’re comfortable, and just go. I know, a lot of people like to have a master volume. Almost all my amps besides this one have a master volume. BUT, with this amp, I look to it as being more of a platform for pedals. It doesn’t have enough overdrive to do it on its own; that is, if you don’t want to make your eardrums bleed or completely step on the band. So I’ve been using it with overdrive and distortion pedals, and it rocks with those! So the setup for me, is set the EQ’s to the guitar I’m playing, then set the volume level where it’s comfortable.

I’m actually quite impressed that I don’t see any modifications that I have to make – yet. Just for shits and giggles, I may replace the pre-amp 12AX7’s with some 1959 RCA Mil-spec tubes that are just wonderful workhorse tubes and sound great to boot. I may even bias the power tubes just a tad cooler to add a smidgen of clean headroom. But frankly, I’m in no rush to do either. The amp is freakin’ awesome as-is!

Read Full Post »

Older Posts »