About six months ago, I wrote a little ditty about the Dr. Z Air Brake, but I thought I’d revisit this essential piece of equipment once again. The Air Brake is a power attenuator; in other words, it reduces the amount of signal from your amp that reaches the speaker, thus reducing your audible output. Before I go any further, the big question is: Why would you want to reduce the amount of signal going to your speaker from your amp. There’s actually a very good reason: Overdrive.
With tube amps, especially those with multiple-stage gain, you can’t achieve that warm clipping (read: creamy distortion) without upping the drive to your power tubes. Unfortunately, that also means you have to crank your amp, as achieving those nice distortion characteristics is a function of both drive and gain. The net result in turn can shatter your eardrums in an enclosed space, or worse yet, have your family or neighbors scream at you for playing too loud in your garage. A power attenuator allows you to drive your power tubes into clipping but do so at a significantly reduced volume. For home studio enthusiasts like myself that usually record late into the night, this means you can work on recording projects without the fear of waking up my family or pissing off the next door neighbors (which I have done many times).
There’s a good FAQ about power attenuators and how they work here. I won’t go into the technical details, but suffice it to say that with a power attenuator, you can play at acceptable volume levels while still being able to drive your amp. With that let’s get into the Dr. Z Air Brake features.
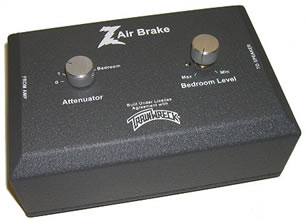
The Dr. Z Air Brake is incredibly easy to use, though in addition to the unit, you’ll need a couple of good-quality audio cables with 1/4″ plugs. If your amp’s output goes straight to your speaker and is then soldered to the speaker leads, you’ll have to do some splicing and soldering, though most tube amps today use a 1/4″ output jack. Once you’ve got the unit hooked up, you have five levels of attenuation: 0 through 4 and Bedroom. The “0” setting is total bypass, while the 1-4 settings impose approximately -2.5dB attenuation with each position by default. If you open the unit up, you can actually increase or decrease the amount of attenuation at each position by moving the leads along the resistors (this is explained in the accompanying manual – it’s a single sheet of paper). The “Bedroom” setting is what sold me on the unit. When you have the Attenuator knob set to “Bedroom,” the “Bedroom Level” knob comes into play. This provides variable signal attenuation down to 1 Watt (for sub-100 Watt amps) at the maximum level, though at this amount of attenuation, your tone really changes because the speaker cone doesn’t move enough air, thus producing a VERY thin (read: ugly) tone. I usually set my Bedroom Level knob to about 10-11 o’clock, the play with my drive and volume knobs on my amp until I’ve dialed in a good tone. Frankly, it doesn’t get much easier than this.
In addition to the variable bedroom level control, I chose the Dr. Z Air Brake after evaluating and reading various reviews, and speaking with other folks who have one. The most popular attenuator at the time I was reviewing attenuators was the THD Hot Plate. I tried one out at a shop, but didn’t like the sound that came out of it all. It literally changed my tone. The Dr. Z Air Brake, on the other hand is much more transparent, even at bedroom levels. As far as gigging is concerned, since I play a lot of small venues, it’s a real helpful piece of equipment because it allows me to drive my amp when I play with my band without stepping on the band’s overall output.
CAVEAT EMPTOR
Many people buy attenuators thinking that once they’ve attenuated their signal, they can drive their power tubes to their highest levels. It’s true, you can do this. But you’ll also burn through your tubes pretty quickly, or worse yet, you’ll damage your amp’s electronics. I’ve heard about this happening especially with resistive attenuators. People crank their drive, and after a few minutes start smelling something burning as their amp’s internal electronics fry. Also, driving your power tubes into super saturation doesn’t do anything but cause a lot of ugly distortion. When you drive your power tubes, the tone you should expect is a smooth distortion, as the intermixing sound waves weave together beautifully. Adding even more power creates a much larger contrast between the peaks and valleys of the distorted wave, and what you end up getting is a very “dirty” sounding distortion that is not in any way pleasing to the ears. So beware if you’re in the market for an attenuator!
In closing, if you’re like me, and play in a variety of small- to medium-sized venues, a power attenuator can be your friend. For me, mine is always hooked up. It has saved me from a lot of headaches and eliminated complaints!
ROCK ON!

I really believe this post. It truly is an edge throughout our occupation. When i really seriously. I enjoy your following excellent go through. I am seeking this specific reply for some time. Nowadays My partner and i eventually acquired my own response with this web site.
1 day ago – Rex Ryan will coach his first regular season Buffalo Bills matchup, while Tyrod.
Under this plan, customers have to undergo the pre-determined contract period which lasts generally from 12 to 18 months.
* Obtain and turn in upstairs at 49,40 at the Isle of Quel’Danas from Magister Hastar.