Feeds:
Posts
Comments

Archive for the ‘amps’ Category

Ever since Paul Reed Smith came out with amplifiers, I’ve been a little dubious about them mostly because anything carrying the PRS logo will invariably cost an arm and a leg. Don’t get me wrong PRS makes freakin’ incredible gear, but said gear also has a relatively large barrier to entry. So it came as a nice surprise that the PRS Sweet 16 is much more reasonably priced than one might expect of a PRS. For a hand-wired amp at just under $1700, that’s getting into Dr. Z territory, and that’s a GREAT thing!

During my latest sojourn to Guitar Center, my wanderings took me to the “quiet room” where GC has a few amps and guitars for people to play, isolated from the rest of the store. I like going in there because usually they have nicer gear like Custom Shop Strats, and high-end Gibsons. For amps, there’s always nice ones like classic Fenders (they’ve had the same silverface Twin in there for awhile now), and this time, they had the PRS Sweet 16 with its matching 1 X 12 cab.

Features (from PRS)

  • Hand-wired in Stevensville, Maryland
  • 16 Clean Watts (Smooth Overdrive at Max)
  • 2x 6V6 Output Tubes
  • Cathode Bias
  • Master Volume (Exits the Circuit at Max)
  • Reverb
  • Volume, Bass, Treble, Mid, Reverb, Master, and Bright Controls
  • Vintage-style Black and White Tolex Look

Fit and Finish

What can I say that hasn’t been said of PRS gear? It’s invariably lovely stuff! The black and white tolex and black grille cloth give the amp a very cool vintage look. As expected, there’s nary a blemish or seam out of place with this amp, and as expected, both amp and cab are super-sturdy. But that’s a given with pretty much any PRS gear.

How It Sounds

Here’s where we get into a bit of murky territory, primarily because even in an isolation room in a store, it’s not an optimal place to test – at least for me because I almost invariably don’t have my own guitars available when I do “random” tests. But that’s okay, I just spend a bit of time getting guitars that are close to what I have or had. With this test, I used a Strat and a very nice ES-335.

The Sweet 16 must have a pretty hefty output transformer because this puppy puts out some volume, even with a single 1 X 12. It has TONS of clean headroom, which made me turn down the Master and crank up the volume to get even a little grind, which indicated to me that to really get this amp to get into serious breakup, the master has to be dimed as well. The predominantly pre-amp distortion just seemed a little flat-sounding to me; it wasn’t bad, but it was nothing special. I did crank up the Master for just a little while, and even with it dimed, the breakup was  lot like a classic Marshall JTM; tons of clean headroom, with a modest amount of distortion when cranked. Definitely an amp suited for classic rock/blues.

Clean was another story. Really nice cleans with this amp, especially with a Strat. The CS Strat I played produced a smooth and complex tone with a chimey top-end. Quite nice. And the ES-335 sounded gorgeous through the Sweet 16. Adding a touch of reverb, really helped fill out the sound, and it was great playing fingerstyle with both axes.

For EQ settings, I just moved everything to 12 o’clock and didn’t have to tweak at all, though I did switch on the bright control to get some top-end shimmer; especially when playing the ES-335. The Strat didn’t need it, and the fuller sound really helped bolster the natural thin tone of the Strat.

Regarding the reverb, I do have to say that I’ve heard better. It’s not that it’s bad-sounding. I just wasn’t really impressed with it. I certainly wouldn’t use it to provide a sustaining effect with this amp. The sag is enough with the amp that I can get my sustain with my fingers. The reverb is not as pronounced as a Fender reverb, and it’s not very springy. I liken it to an Aracom reverb that isn’t very intense. It’s there, but it’s a heck of a lot more subtle than a Fender. But like I said, it’s not bad, but for me, I probably wouldn’t use it. For recording, I’d record the amp dry and layer a reverb as an insert or side-chain effect. That said, that amp sounds great without a reverb.

Overall Impressions

My gut impression is that it’s a great-looking and great-sounding amp, and it’s a good start for PRS’s entry into the low-wattage amp arena, but there are a lot better-sounding amps in that price range and below.Good examples of this are the Reason Bambino, the Aracom VRX series, and the Dr. Z Remedy. Don’t get me wrong, I’m not knocking the Sweet 16. I really liked it, but it’s not an amp that blew me away with its tone.

Despite my rather contrarian comments, the Sweet 16 gets a 4.5 Tone Bones rating. It’s well-made and great-sounding. If I ever get one into my studio, I’ll do a full review, and perhaps my rating will change. But it’s a solid performer nonetheless, and you could do a lot worse.

Read Full Post »

I’ve been extolling the virtues of the Reason Amps Bambino for several months, and how great it sounds. Among the things that I’ve mentioned is that for a little amp, it has a BIG sound. That was a design objective with Obeid Kahn, Reason’s amp designer, when he was designing the amp. He didn’t want to just build yet another affordable, low-powered amp. He wanted to build a great amp. Period.

Despite the sound though, what has really turned me on about this amp is its versatility. For instance, last Friday I did my regular, weekly solo gig at a local restaurant. I haven’t been very happy about my Stratacoustic’s tone into my DigiTech Vocalist Live box, so I decided to bring the Bambino to provide some pre-amplification and use its balanced line out to go directly into the restaurant’s board. What I was greeted with was simply put, a spectacular sound, and this from a line out directly from the amp! I’ve mentioned using this in the past, but this time, I had no speaker. I went direct into the board, and the only monitoring I had was from the PA. A couple of days later, I used it for my weekly church gig, with my 1 X 12 speaker cab, and also using the line out to plug into my church’s board.

For a church gig, minimal stage volume is important because voices are reinforced through the house audio, not from the band area. So to have this kind of amp where all I have to get is my stage volume, then use the house to get my sound out, it’s simply a boon.

The only other amps I’ve ever used that have this kind of versatility are acoustic amps. I realize that there are probably other tube amps that may have this capability, but getting all the great sound and versatility AND boutique quality in a $699 package is just unheard of! If you’re looking for a great amp that’ll work in variety of places, look no further!

Read Full Post »

I’ve been working on a new instrumental for over a month now, called “Strutter.” I think I’ve probably made 50+ recordings of the song, and even though I dig the melody I’ve come up with, I’ve always thought it needed something… more… Couldn’t put my finger on it, but none of my recordings of the song were working for me completely. After I finished recording this final cut which I’ll share below, I believe a lot of my “frustration” had to do with me wanting to only use a single guitar and amp for the recording since I play this song live with only a single guitar.

But it’s different in the studio. I have a lot of options open to me, so I decided to break down and instead of recording the song in its entirety with a single take with a single guitar and amp, I recorded the two different parts of the song with two guitars and two amps. The result knocked my socks off! So the lesson learned is in the studio, you can be truly creative, and for me, I’ll use the tools I need in favor of what I’d like to have. Anyway, here’s the song:

Gear:

Rhythm: Fender MIM Strat / Aracom VRX22 (6V6) Clean Channel
Lead 1 : Squier Classic Vibe Telecaster 50’s (bridge) / Aracom VRX18 (EL84) Channel 2 (Master cranked / Volume 3pm)
Lead 2 : Saint Guitars Messenger (bridge) / Aracom VRX22 Channel 2 (Master 4pm / Volume 3pm)

All guitars were recorded at bedroom level using the Aracom PRX150-Pro attenuator, with no effects. Estimated output of any of the amps was less than 1 watt! That unit is absolutely amazing!!!

Small room reverb was added during production to give a more spatious effect to the lead tracks, and absolutely no EQ was applied to the guitars.

Description:

This song was originally inspired by an image of a supa-mac-daddy-pimp dude struttin’ his stuff down the avenue. 🙂 At least that was the kind of vibe I wanted to capture: 70’s-style guitar-plugged-straight into the amp. It’s a raw kind of tone.

From a structure/feel point of view, what I was after with this song was a contrast in textures. The Rhythm track uses the VRX22 clean channel for that snappy clean attack. For the Lead 1, I wanted use the creamy smoothness of the VRX18 combined with a single coil, and take advantage of the awesome decay of the tube rectifier. For Lead 2, there’s nothing like the pure balls-out sound of the VRX22 drive channel played with a bridge humbucker. The distortion though is ultra smooth, but very complex.

I should be the Aracom Amps poster boy!

I just realized that this song could be an Aracom Amps VRX amp line demo! I make no secret that these are my amps of choice (I have three of them). Jeff Aragaki’s amp designs are absolutely killer – that’s why I buy his equipment.

Read Full Post »

There’s an unspoken battle raging on The Gear Page forum about which is the best “popular” attenuator on the market. Yeah, everyone claims theirs is the most transparent, and frankly, that’s true for very low levels of attenuation. But for really cranking down on the volume, my money, of course, is on the Aracom PRX150-Pro. To me, not only is it the most transparent attenuator based upon head-to-head comparisons of some of the popular attenuators done by me and others, and also being the safest with its input AND output impedance matching, it is also the most cost-effective attenuator out there. Don’t believe it? Well, the numbers don’t lie. When you consider the versatility of input/output impedance selections vs. cost of the unit that the PRX150-Pro offers, it’s simply no contest.

Let’s have a look at the numbers shall we?

Cost Per Impedance Selection Combination
Attenuator Price # Impedance Combos. Cost/Imp. Combo
THD HotPlate $329.00 1 $329.00
Alex’s Attenuator $350.00 1 $350.00
Faustine Phantom $799.00 3 $266.33
Aracom PRX150-Pro $650.00 16 $40.56

Clearly, based upon the number of impedance matching selections, the PRX150-Pro is the clear winner in terms of value. Even if the Aracom unit only had three impedance matching selections, it still will have 9 different available input/output impedance selection combinations, and each combination would only cost $72.11; still far below the competition!

Furthermore, let’s say the PRX150-Pro didn’t have output impedance matching, reducing its impedance matching combinations to 4. It still outperforms the competition in terms of value at $162.25 per selection!

Let’s compare the PRX150-Pro with the Alex’s attenuator for example. People love the Alex’s attenuator, and I understand it works great. But you have to get 4 of those units to match the impedance matching capabilities of the PRX150-Pro. In absolute cost terms, yes, the PRX150-Pro costs more. But with respect to value, well, you can’t hide from the numbers. The same thing applies to the THD HotPlate (though I have other reasons not to like this product). As for the Faustine Phantom, it has more versatility than the Alex’s by far, but it’s also very expensive, and it is unclear whether or not you’ll get one in a timely fashion. Some people have been waiting for theirs for several months.

Sometimes you have to spend more to get much more, and in the case of the Aracom PRX150-Pro, you’re getting A LOT more!

Disclaimer: I will say this again that I am not an employee of Aracom – I’m a faithful customer because of the superior product Jeff produces.

Read Full Post »

There are two things you should consider doing before you decide to get rid of it. I’ve done this on two amps, and have ended up keeping them both.

1. Change your speaker(s)

Let’s state the obvious: An amp’s speaker produces the sound, but it is amazing how many people I’ve come across who don’t look at replacing this vital component first when they’re not happy with their tone. I know, evaluating speakers is tough, and a lot of the time, you can only rely on people’s words and frequency response charts. I actually find frequency response charts useful in making a decision on a new speaker. If I want more mid-range and presence, I’ll look at speakers whose frequency response charts are big in the mids and high-mids, with a much more smooth bass response curve, like the Jensen P12N. If I’m looking for more bottom end, and a slightly scooped tone, I’ll look for a speaker that has those kinds of characteristics, such as the Fane Medusa 150. Of course, you have to hear the speakers in the end to decide if they work for you, but the frequency response chart is a good place to start.

2. Change your pre-amp tubes

I’m a NOS tube fanatic. To me, there’s nothing like the build and tonal quality of a good NOS tube. The ones I’ve chosen tend to have a bit less gain than newer tubes, and they break up so much more smoothly. But that’s just me. I want a smoother overdrive tone, whereas someone else may want a harsher tone. To each their own on this. However, changing tubes – especially pre-amp tubes – can have a profound effect on your tone. Like speakers, you have to try several before you find ones that fit your tastes, but it’s worth it once you do. And note, with respect to tubes, you get the most bang for your buck by replacing the pre-amp tubes as opposed to the power tubes. I use JJ power tubes for practically all my amps, and you know what? I’ve never replaced any of them because I just haven’t seen that much tone improvement by replacing them.

Where I have seen LOTS of improvements is in replacing the pre-amp tubes, as you’ll see below…

As I stated above, I saved two of my amps from the chopping block. Yeah, I had to spend a bit of money to save them, but save them I did. My most recent “save” experience was with my Aracom PLX18 BB. This amp is based upon the classic Marshall 18 Watt Plexi “Bluesbreaker.” When I first got it, I loved it, but one thing that I didn’t quite bond with was the fizz that the amp naturally produced. I really dug the mild distorted tone of the amp, but there was just something that wasn’t quite “right” when I’d crank the amp all the way.

So the first thing I did to bleed off some of the highs was to replace the stock speaker. The Red Coat Red Fang is a nice, bright speaker, but brand new, it’s pretty harsh, and I didn’t want spend a lot of time breaking it in. But even still, the amp was naturally bright, and with a bright speaker, I just didn’t feel it was a good fit. As luck would have it, I had another speaker on hand, a Fane Medusa 150. The thing about this speaker is that it has a real strong, tight bass response. Once I had it installed, I couldn’t believe my ears! It really balanced out the brightness of the amp, and curbed a lot of the fizz.

But there was still some fizz left. Knowing that there were JJ’s in the pre-amps, which have a lot of gain, my thought was that they were throwing a lot of gain at the EL84 power tubes, which can get fizzy when driven hard. So I swapped them out for a set of NOS circa 1959 GE and RCA long plate 12AX7’s, which are oh-so-smooth and a have a bit less gain than the JJ’s. The result was simply magnificent!

That clip was recorded with the Aracom PLX18 BB, and using my LP copy Prestige Heritage Elite. Sorry, I don’t have a “before” clip, but before I did those two simple modifications, the amp produced a ton of fizz that I just couldn’t connect with, even though I loved the dynamics when it was fully cranked. Now, I can crank that puppy up, and get those rich tones with no fizz.

Read Full Post »

I walked into my garage/studio this morning and looked over to my gear – there’s a lot (though probably not as much as I’ve seen from other gear sluts’ pictures). Peering over my collection, the thought struck me: What if I could only have one of each type of gear… What would I choose? What would be the basis for my decision?

After ruminating on this subject over breakfast and coffee, I decided that I’d choose the gear that gives me the most versatility with respect to tone and usability given the various types of music I play. So based upon that here are my choices:

  • Squier Classic Vibe Tele 50’s
  • Aracom VRX22 with 1 X 12 Cab
  • BOSS TU-2 Tuner
  • Aracom PRX150-Pro Attenuator

Those four things will get me through any gig or recording session. Not to say that they’re my favorite pieces of gear, but that combination will give me the most versatility with respect to versatility and usability.

What? No Goldie? Man, I love that guitar, don’t get me wrong. But that guitar is so heavy, I don’t gig with it unless I’m at a place where I have to sit down. The Tele, on the other hand, is super-light, and with its pine body, it’s very resonant, so I can get thick, almost humbucker-type sounds to nice trebly tones. Goldie offers that up and more, but she loses on usability in a variety of venues due to her weight.

The Aracom VRX22 happens to be my favorite amp in any case, but it’s my favorite because of its versatility. Once I had Jeff do the footswitch mod so I could switch between channels, and remove the clean channel from the master volume, there’s nary a tone – except for super heavy, high gain – that I can’t produce with that amp.

With respect to my TU-2 tuner, yeah, I know, there are much better ones out there, but it’s what I’ve got. But despite that, I’d rather be in tune than to have a cool effect, so that pedal would stay.

Finally, the Aracom PRX150-Pro attenuator will always be a part of any rig I put together because it allows me to set limits to my max volume in any venue. Since I play mostly small to medium venues, this box is essential for dialing in just the right amount of volume for the house. And even if I have to play at super low volumes where the Fletcher-Munson effect comes into play, I can rest assured that when my amp is miked, I’ll get my true tone.

I was actually surprised by my own choice of guitar primarily because Goldie is such a tone machine. But for as much as I move around when performing, lugging a heavy guitar is definitely not my cup of tea; especially if it makes me throw out my back, which I did a couple of weeks back. But it also says loads about that Squier Tele. I’ve got some great guitars, but that little $329 wonder creates such awesome tones and it plays so great, that it’s a clear winner. I might’ve gotten lucky with my particular guitar because I’ve read some user reviews that their tone is inconsistent. I’ll play a few more to see how that holds up.

Read Full Post »


When I first reviewed the Fane Medusa 150, though I gave it a pretty good rating at 4.5 Tone Bones, I wasn’t really blown away by its tone because of its big bottom end, and recommended that the speaker be put into a 2 X 12 balanced out by a speaker with more top-end sparkle. What I didn’t consider was how it could be used to balance out the tone of a naturally bright amp.

Take, for instance, my review on the Aracom PLX18 BB Trem. One of the nits I had with the combo was that the Eminence Red Coat Red Fang was way too bright for the already naturally bright amp, causing me to bleed off highs when I was mixing the song. FYI, EQ’ing my guitars in my recordings is usually a real no-no with me because I like the pure sound of my guitars and amps on a recording. The only things I’ll add in production are reverb or a touch of delay if necessary. I love the tone of the PLX18, but that speaker just didn’t work for me.

Enter the Fane Medusa 150. That speaker is actually on loan from Tonic Amps. I’ve actually had it for a few months now, and I keep on forgetting to drop it off at Darin’s new place. Well, it looks like I’m probably going to buy it off him after all because I swapped out the Red Fang for the Medusa 150 in the PLX18, and suddenly the seas parted and a way was made clear! The PLX18 tone was completely transformed! Instead of being a purely bright amp, the PLX18’s tone became much more balanced. The highs and high-mids were still present but were much more tame. This resulted in a much richer tone.

As you may know, I’ve been working on a new song called “Strutter.” I actually had the song completely recorded, but I hadn’t finished it because I just haven’t been completely satisfied with the lead guitar tone. When I got the PLX18, I knew it would be the amp I’d use to record the song. But with the stock speaker, and even with my Jensen P12N, it still wasn’t cutting it for me. I even mentioned that the amp loves the Red Coat “The Governor,” and it does, but I still wasn’t completely satisfied. Now, with the Medusa 150 in the cabinet, I’ll be completing the song. Let’s compare, shall we?

Here’s the original, recorded with the PLX18 BB with the stock Red Coat. I’m playing my LP copy, Prestige Guitars Heritage Elite:

Now, here’s a clip of the song with the Fane Medusa 150. I’m playing Goldie in her bridge pickup:

Sorry for the differences in volume levels. But where the Red Fang has much more presence, and an in-your-face presentation, the Medusa’s tone is so much more three-dimensional and more refined. The mids and highs are still present and incredibly articulate, but they’re so much less piercing! And one thing that I noticed immediately with the Medusa is the clarity of the notes through the entire EQ spectrum, whereas the Red Fang seemed to lose a bit of clarity at high-gain settings – especially when I play those transition chords. Note that the amp and mix settings stayed completely the same between the two recordings, and both guitars were played through the Trem channel which was completely dimed. I also removed the wah from the second clip because I didn’t feel the need to mix it up. For that part, I did stack my KASHA Overdrive and Geek Driver overdrive pedals, but set to unity gain, and to add just a touch of compression and sustain. Not much, but just a touch.

So what’s the moral of the story? Simple: Amp and speaker combinations are critical to good tone. Some speakers, like my P12N work with a bunch of different amps. But some speakers, like the Medusa, work much better at balancing out certain amp characteristics. I’ve learned a good lesson here: You have to try out gear in different configurations and situations. Had I not tried to experiment with the Medusa, I probably would’ve just passed it off as a good speaker that belongs in a 2 X 12 cabinet with a bright speaker.

For more information on Fane speakers, talk to Darin at Tonic Amps! Tonic is the North American distributor for Fane speakers.

For more information about the incredible Aracom PLX18 BB Trem, please go to Aracom Amplifiers.

By the way, both clips were recorded at conversation levels using the fantastic Aracom PRX150-Pro attenuator, by far the best attenuator on the planet, from my perspective. I just couldn’t live without this device!

Now, both amp and speaker get:

Read Full Post »

Click on the picture for a larger view. Aracom Amps PLX BB 18

Summary: Reminiscent of John Mayall and the Bluesbreakers, the PLX18 BB is a tribute to the classic Marshall Plexi’s of yesteryear.

Pros: Looking for classic EL84 classic rock/blues tone? Look no further. This amp has tons of mojo that’s just waiting to be tapped, with two independent channels and a subtle, tube-driven tremolo that’s to die for!

Cons: Tiny nit, but the stock speaker – Eminence Red Coat Red Fang – is voiced way to brightly for this amp. For cleans, it’s great, but creates a bit of fizz when you’ve got it cranked.

Features:

General (from the Aracom site)

– On/Off Switch
– Standby Switch
– Indicator Lamp
– Custom Heavy Duty
Aluminum Chassis
– Impedance Switch:
4, 8, 16 ohm
– (2) Speaker Jacks
– Custom Handcrafted
Turret Board
– Handwired
– Gold Plexi Front and
Back Panels

Tremolo Channel

– Single Knob Tone Control
– Single Volume Control
– Tremolo Intensity Control
– Tremolo Speed Control
– High/Low Input Jacks
– Tremolo/Reverb Remote
– On/Off Footswitch Jack
– Reverb: Available with
optional Tube Driven
Reverb in the Combo 1×12
and 2×12 configurations.

Normal Channel

– Single Knob Tone Control
– Single Volume Control
– High/Low Input Jacks

Price: ~$1750 Direct

Tone Bone Score: 4.75 – If it weren’t for the speaker, this would get 5 Tone Bones, but I remedied that very easily by running it through either a Jensen P12N or a Red Coat “The Governor.” I dig that Governor speaker! It really brings out the best in that amp by taming the highs and adding a nice and smooth bottom end.

When you live less than half an hour from a boutique amp maker, you get to try out lots of GREAT gear. It’s so convenient to drop by Jeff’s shop or have Jeff over. He’s someone I love spending time with because we both share a passion for vintage and vintage style gear (Jeff is a passionate Les Paul collector), and we spend lots of time just talking about different kinds of gear, and especially his approach to amp building. As of late, Jeff Aragaki and Aracom Amps have gained a lot of attention in the guitar world for his incredible PRX150-Pro attenuator. And while I love what that attenuator does (it really has made my home recording late at night so much more convenient), it was his amps I fell in love with, and to date, I have three of them, having added the PLX BB 18 to my growing collection of low-wattage amps.

In Jeff’s words, the PLX BB 18 “ …is our tribute to the Marshall 18 watt Tremolo amp that was originally introduced in 1967. The term “Bluesbreaker” originated from the Marshall JTM 45 Tremolo Combo amp that Eric Clapton made famous when he was with John Mayall and the Bluesbreakers. While the JTM 45 Tremolo is the original “Bluesbreaker”, many people also refer to the early 50 watt and 18 watt Marshall amps with Tremolo as Bluesbreaker amps.

This amp is the elder statesman in the Aracom lineup, and while lots of attention has been paid to his latest VRX line, it was the PLX that gave Jeff his start. Unfortunately, because there are lots of classic Marshall Plexi 18 remakes on the market, the PLX BB 18 is probably his least known amp. That’s too bad because the tweaks Jeff made to the classic Marshall circuit has produced a very distinctive amp that has a mojo that’s almost visceral in its appeal.

Based upon a pair of EL84 power tubes, and an EZ81 rectifier, the PLX produces a very three-dimensional tone that’s at once in your face, but also fills the space you’re playing; and mind you, this is at fairly low levels – maybe loud conversation levels – due to squelching the output volume with the PRX150-Pro. Strike a chord or bend a note, and you can feel the tone! It’s that way with my VRX amps as well. There’s something that Jeff has discovered in building his amps that make them ooze a certain mojo.

Like all Aracom amps, the PLX18 BB is packed full of character. It’s amazing how it responds to volume knob changes and pick attack. But one thing that really strikes me about this amp is how smooth the distortion is when I crank the amp. When pushed hard, it has tons of gain and oodles of dynamics, but they’re very well-mannered. Notes are well-defined, and especially played with humbuckers, bloom nicely when you attack a string. F-in A!

How It Sounds

I got the amp this past Saturday, and I’ve been playing with it since. I spent Saturday evening and most of Sunday just getting used to it, and experimenting with different speakers. As I said, the stock speaker is a little bright (admittedly, I’m experimenting with it), but it’s also brand new, so that probably accounts for the abundance of highs. With time, that speaker will mellow out. But as I wanted to use the amp right away, I ran it through my custom 1 X 12 cab with a Jensen P12N and also my Fender Hot Rod’s cab that has the Governor in it. Amazingly enough, this amp LOVES the Governor. The P12N sounds awesome (and I’m a huge fan of Alinico speakers), but the Governor seems to bring out the best qualities of this amp. Anyway, here are some clips I recorded:

  • This clip features the stock Red Fang. I’m playing my Prestige Heritage Elite (an LP copy) for the lead with the Treble pickup engaged. This is a clip from a song I’m working on called “Strutter.” I normally don’t EQ my guitar parts, but I did bleed off some of the real high-frequencies to cut down on the natural fizz.
  • This next song is called “Plexi Lullaby” because it reminded me of a lullaby. The base rhythm track was recorded on the tremolo channel with my Heritage, then I created a second rhythm track with my Strat. The Lead is also played with my Strat. You’ll notice that you really have to listen for the trem. The tube-driven trem is killer. It’s very subtle and oh so smooth! Almost forgot! The base rhythm track was played through the stock speaker, while the Strat parts were recorded through a P12N, and no EQ was applied to any of the parts.
  • Finally, here’s a simple track I recorded just with my Strat for both parts, running the PLX18 BB through the Governor. This in the drive or “normal” channel of the amp with it cranked up to about 3pm, which is almost full out. To achieve the cleans, I just used a light touch, and played it finger style. I picked the Lead so I could get some occasional grind sneaking in:

I really love the tone on the last clip. The cleans it produces just make me close my eyes and play; which is pretty much what I did when recording the lead part. Just hearing how the chords just rang was so inspiring! The amp the entire time was just on the edge of breakup – it’s so expressive! I just added a touch of room reverb in the mix, but the guitars were all recorded completely raw. I didn’t do any adjustments.

Overall Impressions

I know, I say this quite a bit about Aracom amps, but I LOVE THIS AMP! As you can hear from the clips, it has an abundance of character. Jeff has recommended a few times that I try some NOS tubes with it, as all the pre-amp and power tubes are all JJ’s. But I’ve resisted because it just sounds great with the stock tubes. As I told him, “I know, I’ve got some NOS tubes on hand, but there’s no reason to put them in there. It sounds great with the JJ’s.” I may eventually do that, but for now, I won’t replace the tubes until they start getting dull.

The PLX18 BB yet another one hit out of the ballpark by the humble genius, Jeff Aragaki!

Read Full Post »

bambinoSome amps were just meant to be used with a certain kind of guitar. The Reason Bambino is one such amp. Mind you, it sounds great with any guitar, and I play it with a wide variety of guitars. But considering the amp designer, Obeid Kahn, and his love of vintage Strats, it’s no small wonder that the Bambino sound absolutely gorgeous with a Strat.

When I play a Strat, I like to play mostly clean with just a little bit of grit, and the Bambino does this oh-so-well! Here’s a clip of a song I’m working on that demonstrates the Bambino’s gorgeous voice with my MIM Strat with ’57 Tex Mex re-issue pups:

You may have already heard a version of this clip when I demonstrated the KASHA Overdrive pedal, but I thought I’d try the lead plugged straight into the Bambino, and adding just a bit of reverb during production. At least for my Strat in the Bambino, pedals? We don’t need no stinkin’ pedals!

Read Full Post »

To date, this is the most popular article on this site, having held the top hits spot for the past several years now. My feeling is that it addresses the murkiness of the debate between overdrive vs. distortion. And despite many people like myself who constantly say they’re two, mutually exclusive things, it remains a subject that needs clarification. I’m glad this has been a -hopefully good – resource for people! 

Remember: Distortion Is What You Hear! Overdrive Produces It!

I had an interesting conversation with a friend today regarding the difference between overdrive and distortion. Talk about two terms that are bandied about interchangeably in the guitar world! If you ask ten different guitarists the difference between them you’ll get ten different answers. But a common theme you’ll hear is what each sounds like; in other words, you’ll get a much more qualitative description as opposed to a quantitative description. What I’ve been after is a much more objective, quantitative description of each, but not necessarily too technical. So after talking about one versus the other, I decided to write down what we discussed, and throw my two-cents into the mix.

First, let’s look at the two terms, but from the perspective of an amplifier. The simplest explanation I could come up with is that overdrive, or in audiophile terms, over-powering, occurs when input gain exceeds the capacity of a device to handle the amount of gain thrown at it; in our case, a tube. What happens is that the smooth waveform that goes into the device gets “clipped” because the device’s input capacity is less than what is being thrown at it. Sonically, we perceive the result of this clipping as distortion. The higher the amplitude of the wave, the greater amount of distortion we hear.

But what about pedals? I’ll get to that in a bit, but I wanted to take the time to clarify these terms. There’s been a lot of confusion about these two terms because they’re used so loosely, and oftentimes interchangeably. For me, I’ll stick with the audiophile’s perspective of overdrive in that distortion is the result of overdrive or over-powering an amplification device. A way to think about overdrive vs. distortion is that overdrive happens in the front-end (what you put in), while distortion happens on the back-end (what you hear).


Related Articles


But here’s where we get into a bit of murky territory, especially with pedals. Strictly speaking, if we’re talking about overdrive as simply overpowering the front-end of an amp to make the tubes clip, the only pedal that is technically an overdrive is a boost pedal that takes your guitar’s signal and ups its voltage. But lots of manufacturers call their pedals overdrive pedals. In reality, all of those are distortion pedals as they include an internal clipping circuit which is overdriven into distortion – this includes the venerable Tube Screamer. OMG! Sacrilege!

So how do you tell the difference? That’s why I said we get into murky territory with respect to pedals. But as a rule of thumb, a distortion pedal will create a distorted sound irrespective of the amp. In other words, it’ll clip on its own. Put it front of the clean channel of an amp, switch it on, and it’ll create distortion. However, many, if not most, “distortion” pedals also provide a bit of gain boost to overdrive an amp. That’s where it gets murky, as most of the pedals termed “overdrive pedal” function as a combination of both overdrive AND distortion.

There are no real hard and fast rules, but in general, pedals that are commonly known as overdrive pedals (Tube Screamer, etc.) employ what’s called a “soft-clipping” circuit or transistor, where only a small portion of the input signal is clipped. Most distortion pedals employ a “hard-clipping” device to severely clip the input signal to get that “square wave” tone. But as I said, there are no hard and fast rules. Here’s an image that nicely describes the differences in the waveforms between soft-clipping and hard-clipping devices:

Picture courtesy of GM Arts

Sonic Differences Between Overdrive and Distortion Pedals

Many people have asked me over the years if there is a sonic difference between overdrive and distortion pedals. Having tested several of these pedals over the years, I hate to sound ambiguous, but from a practical standpoint, in some cases, it’s simply too hard to tell. For instance, if I crank up my Timmy’s gain then add a bunch of volume to slam the front-end of my amp, I get a lot of crunchy distortion out of my speaker as the signal squares off. Moreover, I get a bit of compression and sustain and it “feels” like I’m playing through a distortion box. On the other hand, if I take my EWS Little Brute Drive and turn the gain knob to about 10 am, I get a similar sounding distortion with a similar feel – even though it’s a hard clipping device! They’re tonally a little different as the EWS adds a bit of low-end punch, but nevertheless, sonically and feel-wise, they’re extremely close.

But there does exist a difference, and that is in output volume. When I do what I do with my Timmy to get that hard distortion sound, I have to use an attenuator because all the input gain creates A LOT of volume, so I attenuate the output so I can keep the volume at a manageable level. But with my EWS Little Brute Drive, because it’s a distortion pedal, it will clip irrespective of the amp, plus I set its output volume to unity. I can set my amp to any volume, then switch the pedal on to get my overdrive-like sound.  I actually do this with the Little Brute Drive a lot when I don’t want to lug my attenuator to a gig.

So yes, you can set up an overdrive or a distortion pedal to make it difficult to tell the difference, but in general terms, with a hard-clipping device, you’ll experience a lot more compression than with a soft-clipping device. The tone will feel “squishy” with very little dynamics. That’s not a bad thing, mind you, because sometimes that’s what you want. Overdrive pedals, on the other hand, because they don’t produce a square wave, will feel a lot more “open” and dynamic. There will be a bit of compression at higher gain levels, but rarely will you get to the order of compression that a distortion box will make.

Gain vs. Volume

Image courtesy of Sweetwater.com

Unfortunately, this is yet another area where we get into murky territory, and where a lot of people confuse the two. So to start out, let’s just put it simply: Gain is input; volume is output.

To provide a bit more clarity, think about the function of an amp as a two-stage device. The first stage takes the relatively weak signal from your instrument, then passes it on to the second stage and amplifies the signal to produce the sound.

The first stage of an amp is called the preamp. The signal passed through the preamp is called Gain. The level of gain will have a direct effect on the volume of your amp. Typically, the more gain you introduce, the higher your volume. BUT, that said, higher and higher levels of gain will have a lesser and lesser effect on volume, as the pre-amp reaches its capacity to handle the amount of signal passed to it (commonly called saturation) and will max out sending all it can handle to the second stage or power amp.

Think of the power amp as the stage that controls the output strength of your sound, or volume, if you will. It works similarly to the pre-amp in that the more signal you throw at it, the louder your volume. Some amps come with a Master Volume. Think of it as a valve mechanism that controls the amount of signal that is allowed to pass into the power amp. When it’s wide open, all the preamp signal will pass through to the power amp. For amps without a master volume, the amount of preamp signal allowed to pass to the power amp is set by the builder.

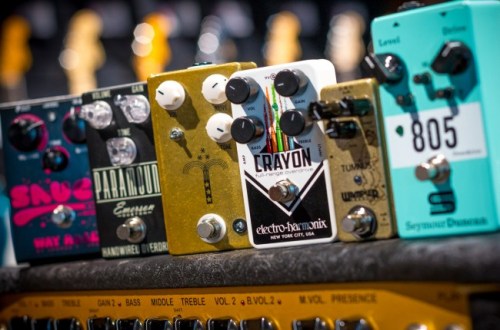
So what does this have to do with pedals? If you look at the picture above, whether labeled or not, all come equipped with both a Gain (or Drive) and a Volume (or Level) knob. These work pretty much the same way as Gain and Master knobs on an amp. The Volume knob controls how much pedal signal will be sent to your amp’s preamp. That could be enough signal to saturate your preamp which will overdrive it into clipping and create distortion. Combined with a distorted sound from the pedal, this could – and in many cases does – create a very pleasing mix of distortion sounds.

So which kind of pedal to choose?

The pat answer is it depends on what you’re after with respect to your distorted tone. I know that this is a rather ambiguous statement, but again, there are no hard and fast rules. In the end, you should choose a pedal based on what sounds good to you. But here are a couple of guidelines:

  • If you have a tube amp and just want distortion purely from overdriving the tubes, then a booster makes sense. There are several kinds of boosters. Some boost only a certain frequency range, like a Fat boost that boosts the lower frequencies. I personally prefer a clean, transparent boost that has a flat frequency response so that the distortion that occurs is my amp’s tone. I typically use a booster in conjunction with my amp set just at the edge of breakup, so when I switch it on, not only will I get a volume boost, I’ll overdrive the pre-amp tubes; and depending on how much gain I throw at the amp, I’ll get the power tubes working as well. Here’s a trick to try: If you have an effects loop, place the booster as the last pedal in your effects loop. When switched on, it will boost the gain going into your power tubes to saturate them. You don’t get a huge volume boost, especially if the power tubes are close to saturation, but you do get a bit of a kick. I learned that from Gene Baker, who does that in his rig.
  • If you want to add a bit of color and overdrive your amp, then a soft-clipping pedal like a Tube Screamer works quite well. Tube Screamer-type pedals typically give you a mid-range boost that results in a much warmer and smoother distortion. Many also add sustain and a bit of compression to simulate power tube saturation at any volume. My Tone Freak Effects Abunai 2 is exceptional in this department. Then there are others, like the EHX Soul Food that add a bit color but interact well with the front-end of an amp. But that said, there are some like my beloved Timmy Overdrive that are transparent. They’ll give you the gain and boost but will not color your sound (Note: that you’ll still have to set up the pedal’s EQ). I will add though, that in general, an overdrive pedal sounds and performs best when the amp is already clipping a bit. The mixture of the two creates a more complex signal that is quite pleasing to the ears.
  • If you want to get a distorted tone at any volume, then a distortion pedal is the way to go. There are lots of these on the market. My personal favorite (and the one I own) is the EWS Little Brute Drive. It’s a half-size pedal with a single knob, but it will give you TONS of distortion at any volume. I normally use it for leads, as it gives just a few dB of gain, but gives me all the distortion I need to get a great screaming tone! It also colors with a fat bottom end which makes leads sound beefy. Typically, you’ll use a distortion pedal against a clean amp. But then again, there are no hard and fast rules.
  • Then if a distortion pedal still doesn’t provide enough gain for you and you need to get a hard-clipped, super-squishy, compressed distortion, then the fuzz will get you there. I call fuzz “ugly dog” distortion. To me it’s like an ugly dog that you look at and say, “holy s$%t,” but it has personality, so you can’t help but love it. Can’t say I’ve ever been into fuzz, but I’ve spoken to lots of players who use it all the time, and they love it!

You can also chain overdrive and distortion effects to great success (aka “stacking”). I do this quite a bit because you get colors that you can’t get with just your amp. One thing that I do regularly is to use an overdrive pedal to push my amp hard, then when I want to get more tube compression and sustain, I slam the front-end with a booster (which is the last pedal in my chain). This doesn’t result in a volume boost because the tubes are already saturated, but you do get much more high-gain sound, and that can really work with solos.

Again, there are no hard and fast rules. You have to play a lot of them to find your sweet spot. But that’s half the fun of it!

More Overdrive Murkiness…

I referred to my Timmy above as a “transparent” overdrive. There’s a lot of debate about transparency, but suffice it to say that while technically distortion is color, transparent overdrives are those that once their EQ is set up to match the EQ setting on your amp, they will not add any other “color” than distortion. On the other hand, once you set up a non-transparent pedal’s EQ, it will still add its own tonal characteristics to color your tone. In practical terms though, transparent overdrives fall more into the booster arena, but it’s the EQ and internal soft-clipping circuits that still define it as an overdrive.

But further exacerbating the overdrive murkiness is that many overdrive pedals are actually purpose-built to mimic the sound of a specific overdriven amplifier. These are meant to be played through a clean channel with lots of headroom. A good example of this is the Caitlinbread Dirty Little Secret that produces classic Marshall Plexi to Super Lead tones. With a pedal like that, you just set your clean channel to purely clean and let the pedal do the overdrive work.

Note: Several articles I’ve read on this topic use the generic “overdriven amp” explanation to describe all overdrive pedals. It would be okay if they described them with respect to how the pedal responds, but more often than not, they use the term to describe the sound. Unfortunately, they completely miss the pedals that are built to be transparent. I’m not saying they’re entirely wrong, but just a little narrow in scope when you consider the overall landscape of overdrive pedals available.

Now… let’s add even more murkiness to the overdrive issue, shall we? There are some overdrives like the EHX Soul Food, which is a Klon Centaur clone, that at first blush, fall into the transparent overdrive category. So one would think that you’d set your amp at the edge of breakup, then use the pedal to push it over the edge and add its own clipping. This is a common way of using an overdrive, and it’s exactly how I use my Timmy. But even though the Soul Food wasn’t purpose-built to mimic a particular amp, I use it almost exclusively as a standalone soft-clipping device played through a clean channel. Its distortion sound is so damn sweet that I don’t want to taint it by adding clipping from my amp.

So… what you choose will be wholly dependent upon what pleases you.

Update: November 26, 2012

I ended the article three years ago with the statement that you have to play a lot of pedals for find your sweet spot. Three years later, that statement remains true. You see, in a recent article where I asked if new overdrives are relevant with so many on the market, there are some pedals that work with certain rig configurations, and some that just do not. There are also some rig configurations that work great on stage that sound absolutely horrible in the studio. I’ve been in the studio for the last few weeks (grabbing studio time where I can), and when we worked on a song where I needed some high-gain sounds, my rig just did not work! I was using my trusty DV Mark Little 40 clean, with my Timmy and the Little Brute Drive for distortion. Sounded like crap when recorded. I ended up bringing in my VHT Special 6, cranking it up all the way, and slamming it with a booster! Worked like a charm, with all the high-gain character that I wanted out of that tone. So I learned a valuable lesson there.

Read Full Post »

« Newer Posts - Older Posts »