Feeds:
Posts
Comments

Archive for the ‘gear reviews’ Category

Epiphone 58 Korina ExplorerThis past week, I was paging through an old issue of Guitar Player mag, and noticed a picture of Nancy Wilson [who wouldn’t notice that absolutely beautiful angel of rock] playing an Epiphone Les Paul in an Epiphone ad. Epiphone is a brand that guitarists know, and is considered to be the “bargain” line of Gibson. But I was curious to find out more, so I did a search to see if I could find a history of the brand. It’s an amazing story!

After I read the article, I remembered that I have an Epiphone 58 Korina Explorer collecting dust in my garage. I originally purchased it for my son as a Christmas present a few years ago, but sadly, he’s given up playing for awhile (he’s devoted pretty much all his time to ice hockey, and that’s okay with me). So I reclaimed it for myself. Unfortunately the Explorer has not been touched for quite some time.I think part of my not playing this guitar so much is that I had this bias about Epiphone being a “cheap” brand. But after seeing that ad in GP, and then seeing that a lot of other great guitarists play Epi’s, plus after reading the Epiphone history, I decided to take my Korina out, and give it a whirl. Also, I’ve had this view that the Explorer is more of a pure rocker’s guitar (think Matthias Jabs of the Scorpions), and I was admittedly very intimidated by the legacy of great players who play the Explorer. So it was with a bit of reluctance that I took it out to play it.

As the guitar had been sitting for a long time, it was obviously very out of tune. Luckily it was dust-free as it sat in a great hard case that I purchased for it all these months; and luckier still that before I put it in the garage, I restrung it with my favorite Fender nickel plated steel strings (Fender Super 250s – actually pretty cheap strings, but I love their tone), so I didn’t have to worry about re-stringing the instrument. After a quick check, and re-adjusting the low E-string’s intonation ever so slightly, I plugged the guitar into my rig, and tuned her up. Once I got her tuned, I strummed a chord, and was completely surprised by the “OH MY F^&KIN’ GAWD!” response that came over me.

The sound that this supposedly “cheap imitation” produced was absolutely gorgeous! Oodles and oodles of sustain, a real natural, overdriven tone, and a beautiful punch from the dual humbuckers. I gotta tell ya, I’m absolutely giddy from the sound that this produces! No wonder Michael Schenker has played an Explorer all these years! So let’s go into a bit more detail, shall we?

Sound

First off, this is a very mid-rangy guitar, when you’re using both humbuckers. Setting the switch to the neck position deepens the tone ever so slightly, and turning the volume knob down produces a beautifully clear clean tone. As one might expect, the bridge pickup picks up more of the high-freq tones, but it’s not “tinny” as many bridge position pickups tend to be. Mind you, this is a guitar that is not for the faint of heart with respect to overdriven tone. The Explorer wants to growl, and any volume position higher than 3 will produce breakup. That may be just this particular guitar, but it’s something I totally appreciate in it. As a side note, another reason why I didn’t play this guitar was at the time, I was a bit intimidated by playing with an overdriven tone. I didn’t know how to control it. But now that I do, I have a renewed appreciation for what this guitar delivers.

Did I mention sustain? The Explorer just loves to sing, and I was totally amazed at the natural sustain that this thing has. Adding my OCD to the signal, just enhanced that sustain with beautiful overtones and harmonics. Then punching in my TS-808 beefed up the midrange. While you might think this was overkill, the sound didn’t get muddy at all! It’s pure ear-candy!

Now even though this guitar wants to growl, it responds well to the volume knob. Increasing levels of volume add more drive and chunk, but the cool thing is that it’s very gradual. Some guitars I’ve played have a threshold where drive comes on suddenly at a certain point. That’s tough to control – especially if you’re in the middle of a song. With the Explorer, it’s easy to dial in just the right amount of break-up that you want. What I’ve done is set the volume knobs to about 4 or 5 to get a nice rumble, then let my TS-808 and OCD pedals add more texture. It’s a nice combo.

Finally, a very pleasing feature that I played around with is feedback. It’s even easier to get this puppy to feedback than with my ES-335, which is known for the nice feedback it produces. The feedback from the Korina is higher in pitch than my 335, and is much more subtle. The 335, on the other hand produces a feedback that’s very robust – a bit too much. But the Korina seems to just make the feedback part of its delivery, and it comes across almost like an overtone – nice!

Playability

The neck is narrow with a shallow, C-shaped back. In other words, it’s a very fast neck. I had my Korina set up with a pretty low action, and had the frets ground down a bit for my son. That was a good call on my part because that’s how I like my necks anyway. I don’t like to dig in too much, and rely on bending and rocking to produce vibrato.The rosewood fretboard (which is something I absolutely love), has a real nice feel to it, and begs you to dig in and apply all sorts of vibrato. Like other Gibson-esque guitars, the neck’s position in relation to the body really draws you to play in the upper registers. Contrast this to a Strat, where I have to move the guitar a bit left to get to the upper registers. It’s not bad, it’s just different.Frankly, even though the Explorer has a space-age shape, it’s a very balanced guitar. The pickups are perfectly positioned, so you can rest your forearm on the body a tad bit, and really articulate the strings with your picking hand. Also, I found that because of the position of the pickups, I could get pinch harmonics without moving around much to find the nodes. On the Korina, the strongest-sounding nodes are just in front of the bridge pickup.

Surprisingly enough, the Explorer feels even lighter than my Strat! The size of the body might suggest a heavy guitar, but it’s quite light, and will be very easy to move around with on stage.

Summing it up…

I should really kick myself for my “cheap” bias surrounding this guitar. After all, I chose a $500 Made in Mexico Stratocaster over a $2400 American Standard. Why? Simply because its sound kicked ass over the American Strat. Here’s the kicker with my Korina Explorer: I paid $200 for it, then spent another $100 getting it cleaned and set up. The guy I bought it from said it was a sweet-sound guitar that played much better than what I was paying for it. He wasn’t wrong. I’ve had a hidden gem in my collection of guitars for all this time, and I didn’t even know it!

Read Full Post »

I already wrote a quick review on this cool little box, but I thought I’d provide an update on the DigiTech Vocalist Live 4. Wow! What a tool! I’ve been playing around with it since I got it, and let me tell you, what it does is nothing short of amazing. Throw pretty much any chord at it – this includes “jazz” chords like half-dims, and it’ll create a harmony – ON THE FLY. What I didn’t go into with the last review were some of the features of the Vocalist. I’ll cover some highlights here.First off, it comes with 50 factory presets, but you can also save up to 50 user presets to customize harmony voicing (and several other parameters – 45 to be exact) to your liking. Editing is very easy. Select a preset number that you want, make your edits with a couple of button presses and knob turns, press “Store” and voila! You’ve got your own customized harmony!As far as it sounds, I created a quick recording of the Eagles’ “Peaceful Easy Feeling.” Mind you, it’s not mastered, and I kind of screwed up the solo, but you’ll get an idea of the great harmony that this box creates.The Vocalist comes in two flavors: the 2 or the 4. The 2 can provide up to two harmony vocals, whereas the 4 can provide up to 4 harmony vocals (hence the numeric designations). In addition, the 4 can also act as a mixer, so if you’re a solo player with just a guitar and your voice, you can use the 4 as your mixer. It comes with line-outs so you can hook up a pair of speakers. Myself, I route the guitar signal to my pedal board so I can use my effects then into the mixing board, then output processed vocals directly to the mixing board. Any way you choose to do it, configuration is a snap.Here are some other highlights:

  • Automatic pitch correction
  • Built-in guitar tuner (I prefer my TU-2)
  • Built-in mic pre-amp (so you can use a ribbon mic that needs a pre-amp)
  • +48V phantom power
  • Guitar ground-lift to eliminate hum
  • 24-bit/44.1 kHz audio (very nice)

Whether you play solo or in a band, the DigiTech Vocalist Live (either the 2 or the 4) is in my opinion a must-have box that will add a lot of vocal texture to your sound.

Read Full Post »

Digitech Vocalist Live 4

I know what you’re thinking… this isn’t really guitar gear… BUT it only works by analyzing guitar chords, so it falls squarely in the guitarist’s tool bag. So… what is it? Put simply, the Vocalist Live is a vocal harmonizer. It’s unique in that the processor doesn’t analyze only the notes you sing, it analyzes the chords you play. This makes for much more accurate harmonization. For instance, harmonizing to a Bb in F major, is going to be a lot different from Bb when sung with a G minor.

I do a lot of solo gigs with just me and my guitar. I sing a wide range of songs from all sorts of genres, and a lot of the songs (like songs from the Beatles) sound a lot better with harmony. Now, with a press of switch, I can insert harmonies – live – without backup singers!

The Vocalist Live comes in two versions: Vocalist Live 2 and Vocalist Live 4. I picked the Vocalist Live 4 because it can do 3- and 4-part harmonies, whereas the Vocalist Live 2 does two-part harmonies. In addition, the Vocalist Live 4 can act as a mixer, which eliminates a piece of equipment, which is also a good thing for a solo musician. Not that the 2 isn’t good; it is, and would be appropriate in a band situation. But I myself prefer the more full-featured Vocalist Live 4. Plus, you can interactively activate more or less harmony parts on the fly. Oh so cool..

The vocalist live also has built-in vocal and guitar effects, plus a tuner. The guitar effects will never replace dedicated boxes, but they’re adequate for what they do, and hey, you can always output the guitar dry and still hook up your pedal board (which is what I do).

So if you’re a gigging musician in search of good harmonies, and whether or not you’re solo, the Vocalist Live 4 could be a solution for you!

View the demo!

Read Full Post »

pedal_tote.jpgOkay, yet another product review on a fairly mundane piece of gear, but hey, sometimes you have to be practical!

A few years ago, I was pretty spoiled when it came toting guitar gear around. I was using a Line 6 Flextone III as my amp, and as a modeling amp with all sorts of effects built in, the only thing I needed to hook up to my amp was my floorboard and guitar. That all changed when I moved to a tube amp for performance. All the things that I used to do to tweak my sound were no longer built into the amp! I had to get effect pedals to get the types of sounds I wanted.

At first, I only had a couple of pedals, so just putting them into my guitar’s gig bag wasn’t a problem. Then I got a couple of more pedals, so I started carrying my pedals and cables in an unused large camera bag. Still, it wasn’t a problem. Once I got to seven pedals, it became a problem. At every gig, I’d have to hook up the pedals to each other, not to mention having to hook up my 1 Spot power cable. What once was a five minute affair was now taking up to 20 minutes to get everything set up and dailed in. So I broke down and bought a pedal board.

There are lots of boards on the market. You can get them custom made, or go with fully powered units. For me, my needs were simple. I wanted a board that could carry up to 8 pedals, and I didn’t want a powered board. The reason was that most powered boards only provide 9V power for all the connections, and I have a couple of pedals that can take18V. Also, powered boards run pretty expensive (for an 8 to 10 pedal board, expect to pay close to $200). There are other powered boards that take 6 pedals, but that wasn’t a real option for me. Enter the Gator Pedal Tote.

The Pedal Tote is a non-powered, inclined pedal board made of 8-ply plywood. It’s covered in black tolex, and topped with small loop carpet. It comes with two 1-inch strips of velcro (about 2 1/2 feet all in all) to stick to the bottom of your pedals. I love the sturdiness of this board. The only beef I have with it is that Gator doesn’t come enough velcro for eight pedals. I had to go down to an arts and crafts store to buy more sticky-back velcro in order to attach all my pedals to the board. Not a big deal, just a minor inconvenience.

So how do I like it? I love it! It’s built like a tank, and has made my life a lot easier. Set up and strike are simple, five-minute affairs now.

Read Full Post »

Dunlop DCB10 Brick 
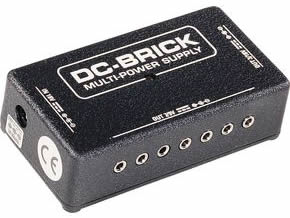
A power supply? I know, kind of mundane, but if you’re still using 9V batteries, you might want to rethink your power supply needs. Here’s a common situation: You’re in the middle of a set, and your beautifully clean tone starts getting kind of fuzzy. It’s not too bad at first, but worsens as the gig progresses. You look down at your effect pedals, and one pedal’s light seems to be a bit dimmer than it normally is. You realize the battery is going dead. So after the song, you go back to your gig bag to get another 9V. You’re shocked to find that you don’t have a spare!

That situation happened to me this past weekend. I recently added a couple of pedals to my chain, but because my 1-Spot only had 5 connectors, I had to use batteries in my new pedals. The batteries were only a couple of weeks old, so I thought I was safe. Was I ever wrong. I had to rewire my signal chain to bypass those pedals. It wasn’t so bad, but it was a pain in the ass because I was in the middle of a set. After this experience, I decided to look into getting a more robust power supply that could power all my pedals.

So why the DCB10? Simply because as far as power supplies are concerned, I think it’s the best one I’ve ever had! It has 7 9V connections, and 3 18V connections – plenty to power up most boards. What really excites me about this pedal are the 18V connections. I have a Fulltone OCD that can take 9V or 18V power. At 18V, the headroom on the pedal just soars! But I digress… In addition to all the connections, the unit doesn’t introduce any hum. My 1 Spot could get a little noisy, and was a bit of frustration point for me. But the brick makes my chain as quiet as can be. A lot of this has to do with the fact that in addition to being a power supply, the Brick is also a power regulator/conditioner, so you get a consistent current going to your pedals at all times. This also means that you have built-in surge protection, which could be fatal to your pedals.

The Brick is also built like a tank, with a heavy-duty metal casing, so it is definitely a road-worthy power supply. Finally, the Brick can be used with any power source, from 110 to 240 (you’ll have to get an adapter for 240), which means you could gig anywhere in the world and not have to worry about swapping out your pedal board’s power supply.

Price: $190 retail / $99 – $109 street

A note about pricing: If you look for this on EBay, make sure you figure the shipping costs into the total price you pay. A lot of EBay vendors list the Brick for $99, but charge $19.95 for shipping. I bought mine from a local shop for $109 flat. Caveat Emptor!

Read Full Post »

BOSS CE-5 Chorus Ensemble
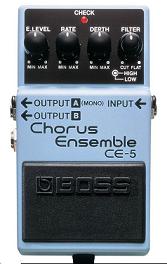
When it comes to chorus sounds, Roland/BOSS is pretty much the standard for the last twenty or so years. The CE-2 has especially been very sought-after used pedal 1) for its simplicity and; 2) for it’s analog design. I owned a CE-2 back in the 80’s, and have since kicked myself since I traded it for other hardware – that I don’t use at all anymore! Since then, BOSS has gone through a couple of renditions with the Chorus Ensemble line, and now offers the CE-5 Chorus Ensemble. A pedal that even though digital, sounds pretty darn good.

The CE-2 was a simple affair: Just two knobs for rate and depth, and a single output. With the CE-3, Boss introduced a “stereo-like” affair with two outputs, and three knobs, introducing a “Stereo Mode” knob to control how the outputs generated their sound. The CE-5 does away with the Stereo Mode knob and replaces it with an Effect Level knob, and a dual knob used for Hi- and Lo-cut filters.

In my opinion, the Hi/Lo Cut knob is what makes this pedal special. With it you can really shape your chorus sound from bright and smooth to dripping wet. All in all, you can’t go wrong with this pedal; and for less than $80, it’s a deal.

Starting with this review, I’m going to start giving summary ratings at the bottom of each review, similar to what you’d see in one of the trade rags.

BOSS CE-5 Chorus

  • Price: $129 (<$80 street)
  • Pros: Very versatile. Can produce a wide range of sounds
  • Cons: Can take awhile to dial in the sound you want
  • Summary: Great sounding chorus at a great price

Read Full Post »

Victoria Amplification Double Deluxe
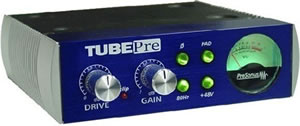
Talk about getting a “clean” tone, and invariably, some Fender amp will be mentioned, especially the models from the 50’s like the Twin. By far, “Fender clean” is the clean tone that has been emulated for decades by amp manufacturers the world over. Unfortunately, if you want that clean tone from the 50’s, you’ll have to get a used Fender amp from a vintage shop – and they’re not cheap. Enter Victoria Amplification. As Mark Baier (owner of Victoria Amps) says on the company site’s “About Us” page:

In 1993, I set out to faithfully recreate the crown jewels among the many classic amplifiers developed by Leo Fender. The tweed amps of the late ’50s defined the sound of rock and blues on vinyl and on stage, but they had also become increasingly scarce, and well beyond the reach of most working musicians.”

And recreate the sounds of those amps he has! So much so, that one might be inclined to say that his amps are even more “Fender than Fender,” as each amp is meticulously hand-wired point-to-point. Most Fender amps today rely significantly on solid state technology, especially for amps in the 40+ Watt range; for instance, using solid-state rectifiers to convert AC-DC current. Granted, solid state rectifiers are considered to be more “reliable” and don’t suffer from voltage sag like a tube rectifier. However, that voltage sag can actually be a real plus when using a tube rectifier as the sag can act like a compressor/sustainer as the voltage builds in the rectifier when you strike a note on your guitar. Thus, amps with tube rectifiers tend to sound “warmer” than their solid-state brethren.

I recently had the chance to plug into a “Double Deluxe,” and I have to say that I am now in love! In testing, I played the Double Deluxe with a Fender Custom Shop ’57 Re-issue Strat (I didn’t have enough time on my lunch break to plug other guitars into it). The first thing I noticed was the touch sensitivity of the amp, even at low volumes. Cranking the volume knob on the guitar produced a singing clean tone, with just the hint of breakup. With my own Fender Hot Rod Deluxe, to achieve this at lower volumes means I have to use a drive pedal. But this little amp, responds well to input gain; I think the tube rectifier has a lot to do with this, though it doesn’t matter. It just sounds great!

The Double Deluxe also responds well to attack. Light finger picking produces beautiful ringing tones, while a heavier, driven attack produces a pleasing, even-toned crunch that is like candy for the ears. Unlike a lot of newer Fender models, the Double Deluxe responded very well to tone settings (there’s just a single knob), which was very impressive, as I could dial in the tone for fatter, thinner, or balanced tone presentation. No matter how you set the tone or attack the guitar, the Double Deluxe retains note definition, and doesn’t muddy up at all.

The 2 – 12″ Jensen P12Q vintage speaker re-issues also have a lot to do with how great this amp sounds. These are generally very warm speakers that don’t squeak with lots of high-frequency harmonics when pushed. Rather, what you get is a very complex sound that you can tweak with the tone knob; and here’s an interesting thing: This amp has no reverb, but you could swear that there’s reverb built in! That’s a testament to the beautiful complexity of sound that this amp generates.

Operating the Double Deluxe is pure simplicity. Plug into one of the inputs (normal or bright – the amp has four inputs so you can jumper between the two “channels;” hence the “Double” in “Double Deluxe”), set the volume according to the input you’re using, then dial in the tone with the single knob. How much easier could it get? You might be thinking that you need individual control over lows, mids, and highs, but this amp just doesn’t need it. Just set the tone knob to what’s pleasing to you and play.

Here are some specs (taken off the web site):

  • Completely hand-wired point-to-point
  • 5E3-type circuit. Class A cathode bias push-pull operation. (40 Watts by default)
  • Tube complement:1-5AR4, 4-6V6GT, 1-12AX7, 1-12AY7
  • 2-Jensen P12Q speakers
  • Cabinet Dimensions (HxWxD, Inches) 20.5 x 24.5 x 11
  • List Price: $2695.00 / ~$1900-2000 (street)

Note that you can swap the 5AR4 rectifier with 5Y3 rectifier to reduce the amp’s output to 30Watts. Very cool.

When I first saw the list price of this amp on the Victoria Amplification web site, I gulped. I thought these amps were accessible. But I looked around, and you can get one for less than 2 grand, so I was calmed immediately. And for the price, what you get is a lot of amp that you can use for all sorts of applications.

Over the past couple of years, I’ve played lots of different amps from big manufacturers to small boutique shops. And among the tweed amps I’ve tested, Victoria Amps Double Deluxe is at the top of my list. If you’ve got a distributor near you, I suggest taking a trip there as soon as you can. You won’t be disappointed!

Read Full Post »

Maxon CP-9 Pro+ Compressor
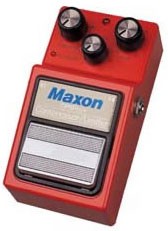
The last review I wrote was on the Demeter Opto Compulator, a great compressor that I had the chance to A/B a couple of weeks ago. In the review, I said that that was the comp I was going to buy, but that was until I did a side-by-side comparison with the Maxon CP-9 Pro+ today. Now it looks like the winner of my search for a good, transparent compressor is the Maxon CP-9 Pro+. But I’ll have to admit, I’m very torn between the two.

When I heard Buford play through the Demeter, I loved its transparency. The compression is so subtle, you hardly notice that it’s there. But my side-by-side comparison with the CP-9 really got me hooked on it instead of the Demeter – for now (I’ll explain in a bit). Let’s look at the features, shall we?

Like the Demeter, the Maxon CP-9 Pro Plus is fairly straight-forward to use. It has three knobs to the Demeter’s two, adding a threshold knob to the ratio and makeup gain knobs, and this is what got me hooked on this pedal. I really liked having that threshold knob to control when the compressor kicked in – that made this pedal much more versatile in my eyes. I set it to about 10-11 o’clock, set about 2.5 to 1 ratio, then set the gain to match the uncompressed signal volume as closely as possible. What this pedal did for the Strat’s sound that I was playing was very sweet. The tone stayed the same, it was just fatter. And for low-volume applications, this is EXACTLY the effect I was looking for. It’s not as subtle as the Demeter, but it’s still transparent as all get out.

Since the shop I tried the CP-9 at also had a Demeter as well, I decided to try out the Compulator for myself, since I didn’t get to play Buford’s guitar that night at the casino. So here’s my feedback. The Demeter is incredibly subtle in its compression. It squeezes your signal just right, but in the quiet environment where I was testing, I noticed a distinct, but very pleasing high-end shimmer that was produced by the Compulator that I couldn’t hear in the crowded environment in which I first heard the Compulator. Talk about ear candy! Unfortunately, what I’ve been looking for is a compressor that doesn’t add any artifacts. It just squeezes. So I was faced with a bit of a dilemma: Go with the Maxon’s versatility, or go with the Demeter’s subtlety and beautiful high-end shimmer. I’ve decided to go with versatility for now.

Mind you, these two compressors are very different beasts. The Demeter employs an optical circuit for compression, while the CP-9 uses a Voltage Controlled Amplifier (VCA) and a RMS sensor. Click here for a great article covering that various electronic approaches to compression. The reason I mention this is because the different approaches yield different sonic results. Optical comps tend to be the most subtle of the compressors, while the VCA type compressors offer the most versatility and highest attack response. That said, it’s possible to use different types of compressors to achieve specific types of tone. Oy Vay!

I’m not sure if I’ll ever get the Demeter, though it will always remain in the back of my mind. And even though I was totally blown away by that high-end shimmer, my practical side made me err on the side of versatility.

Read Full Post »

Demeter Opto Compulator
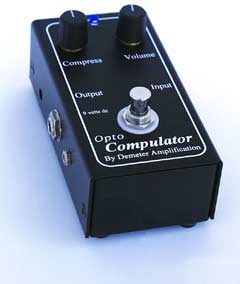
I was at a casino last weekend, sitting in a bar with a couple of friends and listening to this great duo play classic rock hits. During one of their breaks between sets, I went to the stage to talk to the guitarist (he had a cool name: Buford) and checked out his gear. He had a fairly simple setup: Just two effect boxes going into a Vox amp modeler that then went straight into his mixing console. What caught my eye though were his two effect pedals, both by Demeter (pronounced Deh’ meh tur) Amplification. One was Demeter’s FUZ-1 Fuzzulator drive box, and the other was the Opto Compulator. I knew a bit about the Fuzzulator, but I wanted to know more about the Compulator, as I’ve been considering purchasing a compression pedal for some time. So I asked him a few questions about the box. Here’s how the conversation went:

What’s your main application for the compressor?
Even though this is a pretty small stage, we’re playing in a fairly open environment at low volume. When I need to play distorted, I’ve got to fatten up my signal a bit, so I can cut through the crowd noise. Distortion always thins out your tone a bit, so this helps me compensate for that.

Doesn’t a compressor affect your overall tone?
In general, yeah. But this has got to be the most transparent compressor I’ve ever used. With this box, I maintain my tone, but just give it a slightly fatter delivery. And like I said before, in this environment, I need a fatter signal to cut through the crowd noise. I’ve played with a bunch, and this one is the absolute best I’ve ever had.

So what’s so special about the Compulator?
Like I said, it’s really transparent, and the compression effect is so subtle, most people wouldn’t even notice – I hardly notice it myself, but I know when it’s not on. And maybe there’s a bit of me being used to the sound. Other than that, it’s real easy to use. You have two knobs: The left-hand knob controls the amount of compression you want to dial in, and the other knob controls the gain. You also have a little trim dial on the side that you can adjust with a small screwdriver to trim the volume up or down – but I’ve never had to use it.

Can I do an A/B comparison from a slight distance away?
Sure thing. Step back about 20 feet, and I’ll show ya.

So I stepped back, and he played some chords and riffs with it on, and with it off. I’ll be damned! He was right. His tone was the same, but had just a tad fatter quality! Now that’s transparency! And that demonstration convinced me on the spot that the Compulator is the box I’m going to buy.

About compression…

For a good article discussing the general concepts of audio compression, click here. It doesn’t go into into the heavy technical details of compression, but it definitely helps to demystify how it works. For a more comprehensive and technical discussion, click here.

COMP-1 Opto Compulator Features

  • Compress Knob – controls amount of gain reduction up to 30dB.
  • Volume Knob – increases/decreases the output volume (aka “makeup gain”).
  • Trim Pot – very nice feature to adjust the unit’s preamp gain. If you plug a hot instrument into the unit, you could get distortion. You can knock down the input gain to avoid that.
  • Powered by a 9 volt battery, but also has a standard 9V jack.
  • Street Price: Generally around $199.00 (do a Google search)

My prospective usage

I normally play in very small, low-ceiling venues, so compression has not been a big issue for me. However, when I play with my band at my church, I have to play at fairly low volumes, which makes playing in distortion a huge challenge, because in order to hear the effect, I have to turn up my volume. That usually makes me stomp on the mix. With a fatter signal, I should be able to punch through the mix much more effectively without having to pump up my volume too much (or as much as I have been 🙂 ).

After hearing this unit, I’m convinced this is the right pedal. And getting input directly from a guy who swears by it and was willing to demonstrate how it worked had me sold.

Read Full Post »

Presonus TUBEPre

Why use a pre-amp? Quite simply, a pre-amp greatly aids in either bolstering the signal of either a mic or line-level device, but it also can add some very helpful signal conditioning that will add “warmth” to the tone a device produces. I use the Presonus TUBEPre not only for microphone applications, but also for adding a touch of warmth to the signal of my acoustic guitar. The difference that it makes in the overall tonal quality that my guitar produces while plugged into an amp is so immense that it has become an essential piece of hardware when I gig or record.

Among the “lower cost,” sub-$100 pre-amps on the market, I believe that the TUBEPre offers the best value. With its standard features, it surpasses many tube-based pre-amps in this price range. Most tube pre-amps just provide drive and gain knobs and perhaps a phantom power switch, but the TUBEPre also includes four extra features that definitely add to its value.

As the name implies, the Presonus TUBEPre is a vacuum tube-driven device. Specifically, the tube used is a fairly standard 12AX7 tube. Here are the extra features that accompany the pre-amp:

  • Phase Inverter Switch – I’ve never had to use this, but pressing this switch reverse the polarity of the XLR connection to avoid phase cancellation when two mics operate in close proximity.
  • -20db Pad – This is incredibly useful when mic’ing a high output device like an amp so you don’t drive the input signal into distortion.
  • 80Hz Rumble Filter – This is very nice feature that will eliminate low frequency background noise such as wind or air conditioners. Since I use mine in my garage, it’s great for filtering out the low frequency drone of my freezer.
  • +48V Phantom Power – For those devices that require a constant power source, such as a condenser mic, getting enough power is just a button press away.

Gripes

I only have one gripe about the TUBEPre, and that is that the meter is completely useless. In my case, once I hit about 9 o’clock on the gain (with Drive set to 11-12 o’clock), the meter becomes incredibly erratic, and tends to peak way too easily. So I tend to rely on my ears, and the clipping alert LED between the drive and gain knobs (which works). Other than this single gripe, it’s all good, and really it’s about the sound anyway.

How it sounds…

Out of the box, the TUBEPre sounds great, adding a very pleasing warmth to your tone, but it sounds even better with a different 12AX7 tube than the cheapo stock tube that comes with the unit. I replaced my 12AX7 with a Mesa Boogie 12AX7 tube, and the already great sound that came out of the TUBEPre sounded even better!

I use the TUBEPre for both microphone and for warming up the signal from my acoustic/electric. In both cases, the resultant sound is very warm and full of texture. My vocals are very clear-sounding, especially when I’m using a heavy-duty cardioid mic, which tends to project a lot of bottom end and at times sound a bit muddy. With that mic hooked up to the TUBEPre, I get a rich, full tone that brings out the subtleties in my voice (though it does pick up those little vocal mistakes 🙂 ). With my acoustic/electric hooked up to the TUBEPre, it actually helps to brighten out the sound of my guitar, and gives the output much more dynamic range. The net result is that my performance can be a lot more expressive.

As far as driving the tube into clipping, that’s not something that I use it for, but I have done it, and it creates a very interesting effect. The sound is very much pre-amp distortion, but it’s a bit thinner. But as I said, this is not something that I’d do with this unit in any case. Driving the tube into clipping too often and for too long will reduce its life. Tubes ain’t cheap, so I tend to baby this unit as much as possible…

To sum it up, the Presonus TUBEPre is a great addition to your gear if you’re looking to warm up your tone.

Read Full Post »

« Newer Posts - Older Posts »