Feeds:
Posts
Comments

Archive for the ‘gear’ Category


Paul Cochrane Timmy Overdrive

Summary: Others boast transparency, but the Paul Cochrane Timmy overdrive is one of the very few transparent overdrives I’ve ever used, and to me it is the best OD I’ve ever owned!

Pros: Super-simple to dial in a great tone for the guitar you’re using. Bass and Treble cut knobs make all the difference in the world with respect to dialing in your tone!

Cons: None.

Features:

  • Separate Bass (pre-distortion) and Treble (post-distortion) cut dials
  • Gain knob to control amount of clipping
  • Volume/Boost to control output gain
  • Three-way clipping switch to choose between two types of symmetrical clipping (up, middle) and asymmetrical clipping (down)

Price: $129 direct (twice as much on ebay if you don’t want to wait 6 months)

Tone Bone Score: 5.0 ~ I’ve only played with this for a little over an hour this evening, and already I’m in love with this OD pedal! You know me, I love OD pedals, but this one was well worth the wait. I can confidently say that this will NEVER leave my board.

Like many, I had heard of the Tim and Timmy pedals from Paul Cochrane, but I had never played one. I had only heard accounts online, then heard one in action at a concert. After speaking with the guitarist (Dylan Brock of Luce), and hearing him rave about the pedal, I finally got around to ordering one from Paul Cochrane back in October 2010. I finally got the pedal today, and it is hands-down the best damn overdrive pedal I’ve ever played in my life – and I’ve played a lot of them.

I now have only two overdrive pedals on my board: My trusty Tone Freak Effects Abunai 2, and now, my Timmy pedal. They will never leave my board. The Abunai 2 is much more of a distortion pedal than an overdrive and I love the color and compression it adds to my signal. The Timmy, on the other hand, is truly transparent. It takes your tone and give you more of it. And while other pedals will give you a midrange hump or scoop your tone, the Timmy lets you dial in (actually cut out) the amount of bass or treble you want in your signal.

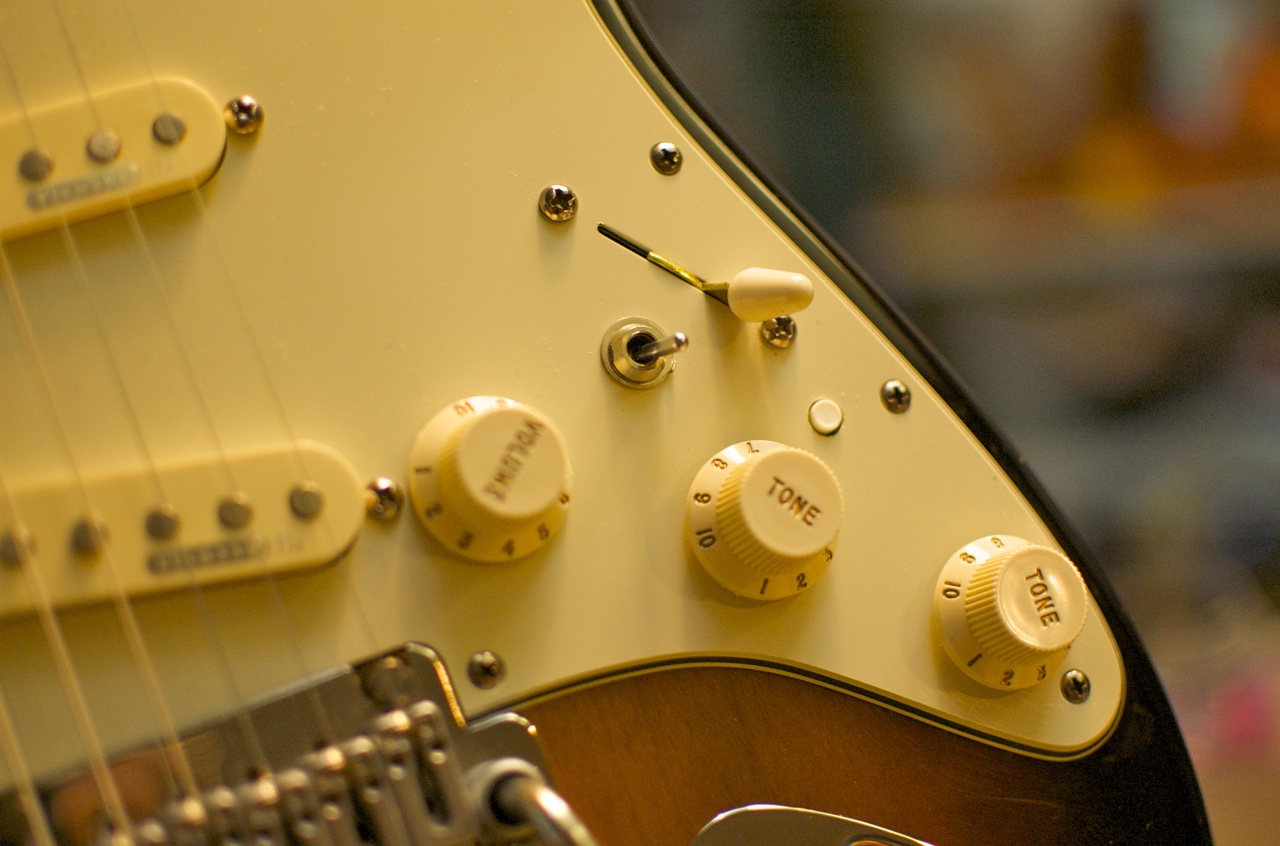
Volume and Gain are pretty standard, so no need to go into those features. What makes this pedal special are the EQ knobs. Both are cut knobs. Fully counter-clockwise, they let in all the bass or treble. As you turn the knobs clockwise, they cut out. It’s a little backwards, but it makes sense once you start messing with the pedals. Paul says he made these like that because of the taper of the pots and doing it in reverse avoided dead spots.

The bass knob functions pre-distortion or before the clipping circuit. Other pedals dial out bass at a fixed level to avoid the bass being too muddy. The Timmy allows you to dial in as much or as little bass as you want. The treble knob functions post-distortion. Again, other pedals have treble set at a fixed point after the circuit to avoid fuzziness. The Timmy lets you dial in as much or as little as you want. The net result is a finer level of EQ control than I’ve ever experienced with an OD pedal, and those two knobs make that pedal very special for me.

I thought I was done with Overdrive pedals…

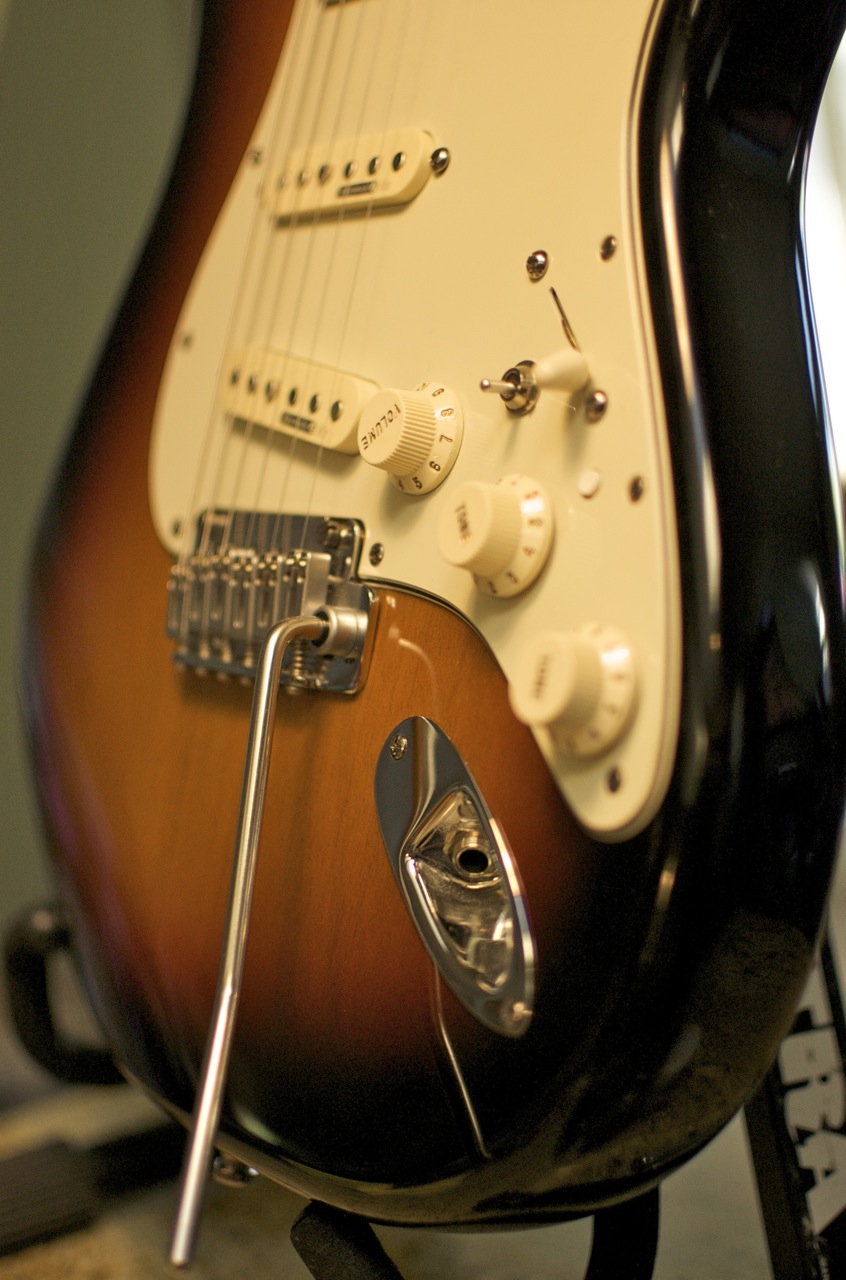
I actually thought I was done with Overdrive pedals for the most part, and instead started relying on my clean boost and occasionally would fire up my Abunai 2 to add some color and compression to my tone. But that all changed when I got my latest Strat. Even though the Kinman pickups and the X-Bridge pickups have more gain than stock Strat pickups, even cranked, they don’t have enough gain to get my vintage Plexi-style amps into their sweet spot – even with the amp cranked. For instance, I had to use my clean boost and/or my Abunai 2 this past weekend to push my amp into its sweet spot.

The clean boost works great in giving me the gain I need, but it doesn’t give me much sustain. The Abunai 2 gives me sustain, but it colors my tone and adds compression (I like that only for certain situations). Enter the Timmy. With the Timmy, I can get the gain boost I need to push my amp into its sweet spot, and with its clipping circuit, I can get a bit of sustain – but without the compression, which is HUGE for me. Mind you, this is all for a Strat. It’s a completely different story with my Les Pauls, as they have plenty of gain on tap, and have LOTS more natural sustain than a Strat. With a Strat, you always need some help. It’s not a bad thing, it’s just it is what it is.

With the Timmy, I think I’m now all set for OD pedals for awhile. Notice I didn’t say I was done… 🙂

I know, I normally do some description of how it looks and how it’s built, but suffice it to say that the pedal’s built solidly, and the purple finish is cool. ‘Nuff said. It’s how it sounds that is important.

How it sounds…

As Paul explained to me six months ago, the Tim and Timmy were designed to be transparent overdrives; that is, they take your tone and give you more of it. Though the signal path does include a clipping circuit, unlike other OD pedals, the Tim/Timmy circuit doesn’t add any color. In any case, here are a couple of clips.

In both clips, I have my Aracom VRX22 set up in its drive channel with the master and and volume knobs set to about 1pm each. With a Les Paul, cranked up in its bridge pickup, this will give me a sweet overdrive tone with lots of harmonics. With a Strat, these gain positions set it at the edge of breakup, and I have to really dig in to get distortion out of the amp.

The first clip is just a raw recording switching between just the Strat cranked up in its bridge position, then playing the same thing with the Timmy engaged. I did add a bit of extra volume to the Timmy so I could make sure that the amp got pushed into its sweet spot. Give it a listen:

The next clip is a re-recording of the song that I used for my Strat review. This time, I play the first part with the raw Strat, then in the second part add the Timmy to finish the song:

Overall Impression

In my mind, there’s nothing not to like about the Timmy. When Dylan Brock said to me, “Man, I just love my Timmy pedal,” I really couldn’t understand what he was talking about at the time. I now understand, and I mentioned above, the Timmy will never leave my board.

Read Full Post »


Fender American Deluxe Stratocaster
Summary: Finally a Strat that I love to play. This one has been upgraded with Kinman pickups and an L. R. Baggs Ctrl-X X-Bridge pickup.Features:

  • Alder Body with 3-Tone Sunburst Finish (my favorite Strat Color)
  • 1-piece Maple Neck
  • 22 Frets
  • Rosewood Fretboard with Abalone Dot Inlays
  • Nut appears to be synthetic tortoise shell – very cool!
  • Locking Tuners
  • L. R. Baggs Ctrl-X Drop-In Tremolo/Bridge Replacement
  • Kinman Noiseless Pickups
  • 8.5 lbs

Value: ~$1500-$2000

Tone Bone Score: 5.0 ~ Wow! What a tone machine! The Ctrl-X pickup has tons of gain on tap, and will give you plenty of crunch when you need it! The Kinman Noiseless pickups really smooth out the tone, and flatten the significant midrange that tends to be in stock Fender pickups.

I love estate sales because you can find some real gems. A friend of mine happened to get a bunch of stuff at an estate sale recently, and picked up this fine specimen of a Strat. What drew me to it initially was the 3-tone burst, which I love. Of course I had to try it out, so we hooked it up to a cheapo amp, and I couldn’t believe my ears! I was expecting that typical bright Strat sound, but what issued – even from that cheapo amp – was a much smoother tone. The tone definitely spoke “Stratocaster,” but it was in another dimension. Of course, I had to take it home with me to bring into my studio and to gig with this weekend… 🙂

For me, I had all but lost hope with Strats. I just couldn’t find one that really appealed to me. But with the changes in this particular Strat, I’ve regained my faith. This is an absolutely killer guitar!

Fit and Finish

The previous owner tragically passed away a few years ago, and the dude was a total gear nut! As a result, he just didn’t play his gear all that much, and so the guitars that were in his collection were in absolutely pristine shape. This particular Strat has the most signs of usage, but there is absolutely no major scratches, and just a tiny ding on the neck. Other than that, the guitar is perfect. The rosewood fretboard is in particularly great shape, and still retains a gorgeous sheen. The abalone dot inlays are a great touch. Here are some pictures:

Playability

Unlike a lot of Strats that have really narrow nut width, this Strat’s 9.5″ nut radius is perfect. The neck is a gentle C and even with my short fingers, I have no problem reaching the lower strings high up on the fretboard. The shape of the neck is simply terrific, and provides a nice balance between solid-feel and speed. I could play this guitar for hours and never get tired. It’s really a player’s guitar.

How It Sounds

As I mentioned above, it sounds like a Strat, but it has a much smoother tone. This is due to the Kinman Noiseless Pickups that replaced the original “noiseless” ones on the stock Strat (don’t have the stock ones, but don’t want ’em). This Strat also has tones of sustain, which really surprised me. It’s not on the order of a Les Paul, but it sustains a lot more than other Strats I’ve played in the past. The Kinman pickups also add a lot of depth and complexity to the tone, picking up subtle harmonics that give the tonal presentation a real 3-D effect – it’s almost reverb-like. How cool is that?

On top of that, the original owner replaced the tremolo with an L. R. Baggs Ctrl-X system. This adds yet another pickup to the bridge that has all sorts of gain; very humbucker-like, but retaining the single-coil characteristics – there’s just more of it. The Ctrl-X system is cool in that you can switch between going fully magnetic to blend with Ctrl-X or fully Ctrl-X. The full-on Ctrl-X is great for soloing!

To demonstrate the gain differences, here’s clip I recorded this morning (actually, the two clips were included in my previous article that I wrote this morning). But here’s the first:

Finally, here’s the quick song that I recorded this morning that has the rhythm part in fully magnetic mode in the 4th switch position (neck/middle). The lead is played in the first position with the Ctrl-X system:

Both clips were recorded using my Aracom PLX18 BB Trem, a fantastic 18-Watt Plexi clone. I was originally going to record with my Fender Hot Rod because the guitar sounded great through it. But my problem with Strat tone came from switching to vintage Marshall-style amps like my PLX that have lots of midrange. Strats just didn’t sound right to me with these amps. But this one blew me away!

Overall Impression

It’s difficult being a gear freak and having so many avenues to evaluate great gear. I have to have this guitar. Period. It’s completely changed my view of Strats!

Read Full Post »


65 Amps Soho
Summary: Super-versatile amp with LOTS of balls. Goes from AC30-like tones to cranked vintage Plexi. While definitely British-style in tone, it has a tone all its own.Pros: One of the very few amps I’ve ever played that REALLY responds to guitar volume knob changes. The Soho, while very versatile is also VERY efficient. The 20-Watt model I heard and tested had the feel of a 50 Watt amp! Very nice.Cons: None.

  • Features:Output: 20 Watts (SoHo) or 35 Watts (SoHo HP)
  • Tubes: Power amp 2xEL84 (SoHo) or 4xEL84 (SoHo HP), Preamp EF86-12AX7
  • Rectifier Tube: EZ81
  • Speakers (combo): Celestion Alnico Blue + G12H30
  • Panel controls: Volume, Treble, Bass, Booster, Bump™, Bump Tone™, Bump Level™, Master Voltage™
  • Extras: Footswitch input jack, dual speaker outs, switch for 8Ω & 16Ω impedance

Price: ~$2400 Street

Tone Bone Score: 5.0 ~ Yowza! I LOVE this amp! It is so versatile and expressive and responsive to input gain. As much as I love my Aracom amps, I think this is an amp that I have to have.

I really shouldn’t go to music stores. But then again, if I didn’t, I’d lose an important source for gear. Last week, I happened to go to my favorite gear store (Gelb Music in Redwood City, CA), and was just hanging out looking at gear. i was also in there to see if they had gotten their latest shipment of Gretsch guitars, as I want to get the Electromatic 5122DC. Unfortunately, it hadn’t come in yet. But Jordan (who’s the guitar dude at Gelb) said that Dan, the designer from 65 Amps was coming in to do a demo from 5-7pm. It was just after 3pm.

Just so happened that Dan had just walked in the door, and Jordan introduced me to him while he was setting up their back room with the 65 Amps they carried. Dan and I got to chatting about gear and gigging, and then I started asking him questions about the Soho, which is an amp that has continually gotten my attention because Andy at ProGuitarShop.com uses one for most of his gear demos. So a cool thing happened: I got a private demo of the Soho from Dan the designer himself.

Now as we were talking, my impression of Dan was that he was a very nice, straight-shooting guy. But I’ve also seen and tested lots of different amps, so I guess I’ve become a bit jaded about boutique amps. But as you’ll soon find out as you read through this article, my jadedness became completely irrelevant in this case…

Dan took me through all the features, and I was completely dumbstruck by the expressiveness and versatility of the Soho while he played. The response to input gain using the guitar volume knob was incredible! I confirmed this when I played through it myself. You can go from clean to dirty with just the knob, then get really nice driving, but not overly compressed hard gain. The tone was incredible!

Now the Soho might look like a two-channel amp from its control layout, but it doesn’t have two channels; rather, it has two modes: Normal and Bump, which gives you a “bump” in tone and gain which is controllable like a separate channel – but it’s not a separate channel. Believe me, it’s very cool!

The “Bump” feature makes the tone of the Soho thick and rich and incredibly expansive. I commented to Dan that when he had it cranked, the amp sounded as thick and loud as a 50 Watt Plexi. He just grinned, as he knew exactly what I was talking about. As I mentioned in the Summary section above, this little amp has BALLS!

Equally impressive is 65 Amps’ trademark “Master Voltage” which is a bit different from a master volume in that like a regular MV it varies the B+ voltage it also keeps the filament voltage up, so you can still break up at lower volumes. Not sure the tech behind this, and who knows, it might be hype. But hyped terminology or not, it works; and it works incredibly well! It acts like an attenuator, giving you all the grind you need at lower volumes, without the extra circuitry.

I didn’t get as much time to play with it as I would like, and I tend to be rather self-conscious in stores when I’m evaluating gear, so I didn’t try too much. But I took it through various things I might do in a gig, and all I have to say is that the Soho is a true player’s amp. It has everything you need to cover gorgeous cleans to hard-driving rock. It’s definitely not a metal machine, but for producing most rock sounds, you can’t do much better. It’s not a small wonder why a great player like Andy over at ProGuitarShop.com uses this amp for his demos.

Here’s another thing: The amp is absolutely unforgiving. You can’t be tentative with your playing when you play through this amp because every mistake will be picked up. I love that about this amp! That’s why I call it a player’s amp because you really have to play. When I first started playing around with it, Dan said, “Give yourself some time Brendan. It takes a little while to get used to…” Man, was he right! I twiddled knobs, found a setting I liked, then just closed my eyes and started to play (closing my eyes helps me lose my self-consciousness – beside if I suck, I know it’s not the gear). 🙂 Luckily, I didn’t flail too badly, and in the process, I fell in love with that amp. It simply rocks! I need to get this amp. Damn! There goes the GAS again!

BTW, here’s a video demo of the amp by Dan:

For more information, visit 65 Amps Soho page!

Read Full Post »

TC Electronic Corona Chorus

Summary: Part of TC Electronic’s new Compact line, this is just about the most tweakable chorus I’ve ever played. Standard chorus most offers a wide range of chorus tone from subtle, ringing tones to thick leslie-like warble. But with TonePrint and TriChorus, you’ve got even more chorus sounds at your fingertips.

Pros: For the chorus lover, the Corona is a tone tweaker’s wet dream! There’s so much you can dial in with this pedal, and guess what? It all sounds great! Great TC sound in a standard-size enclosure? No problem, mahn!

Cons: None. Granted, I haven’t played with it much, but I just can’t think of anything NOT to like at this point.

Features:

  • TonePrint – instant access to custom pedal-tweaks made by your idols!
  • 3 chorus types – expansive tonal options from glassy shimmer to mind-boggling swirls of sound
  • Speed, Depth, Color and Level controls – sculpt your chorus sounds from subtle to extreme
  • Stereo in & out – for added flexibility to your set-up
  • True Bypass – zero loss of tone
  • Analog-Dry-Through – maximum tonal integrity and clarity
  • ToneLock – protects your presets under all circumstances
  • Easy battery access – makes changing batteries fun! (well, almost)
  • Small footprint – save precious pedalboard space
  • High quality components – only the best will do when it comes to tone
  • Road-ready design – ready to follow you wherever your playing takes you

Price: $129 Street

Tone Bone Score: 5.0 ~TC Electronic is finally coming down from the stratosphere. In the past, price was a big barrier to entry, but with the Compact line of pedals, that’s no longer the case. You get great TC tone at an absolutely affordable price.

Selling Like Hotcakes

I called up my buddy Jordan over at Gelb Music in Redwood City today to see if he had any of the TC Electronic Compact Line in stock. He said he had one chorus and one delay left. He had three of each two days ago, and people are calling, so he has a bunch on order. I’ve been reading the buzz about these pedals for the past couple of days, and it seems that dealers sell them as soon as they get them; and for good reason: At least for the Corona, the pedals sound INCREDIBLE! As soon as Jordan told me he had a Corona (which is what I was originally interested in), I told him I’d be down in a few minutes and he said he’d pull the pedal. He knows me too well; if I like and bond with some gear, I’ll walk out the store with it.

Well, such was the case with the Corona. As soon as I got to the shop, Jordan handed the pedal to me. I took it and got set up to test it. I tested it through a 100 Watt Sebago Double Trouble with a Gretsch Electromatic at the shop and immediately fell in love. This is a keeper, and will be going on my board – today! Let’s get to the review, shall we?

Fit and Finish

Can you say, “built like a tank?” 🙂 The enclosure is absolutely solid. The knobs feel totally sturdy, and the bypass switch (yes, it’s true bypass) feels solid. In other words, if the Corona is any indication of the rest of the line, these pedals will be gig-worthy.

How It Sounds

Sorry, no clips yet as I have yet to bring it home. 🙂 But all I can say is that the chorus is simply silky-smooth. The “Analog-Dry-Through” (ADT) technique that they’re using really works. Basically, with ADT, the dry signal stays untouched in the pedal, and the effect is simply blended in. I really like this technique, as it ensures that your signal retains its integrity. So there’s no signal loss, and no gain boost like you get with other pedals that modify the dry signal directly. It also gives you a lot finer control over how much effect  you want.

I tested all three modes: Chorus, TonePrint, and TriChorus. Here’s a synopsis of each:

Chorus Mode ~ If the Corona only had this mode, I still would’ve bought it. Based upon TC’s classic SCF circuit, this is a smooth, sexy chorus. There’s nothing bell-like with this mode, but it just adds some very beautiful character to your sound and it doesn’t sound at all processed. Based upon my initial test, this will most probably be the mode I use the most.

TonePrint Mode ~ This mode, of course, offers the ultimate in tweakability. Out of the box, the default TonePrint is an asymmetrical TriChorus that has some really cool swirls. But if you don’t like that, just hook the pedal up to your computer via the included USB cable and print a chorus sound you like. You can download TonePrints from the TC Electronic site, where they’ve had some major artists provide TonePrints. Want a Bumblefoot chorus sound? How ’bout one from Orianthi? Pretty cool stuff!

TriChorus ~ For me, used subtly in mono, this mode out of the box will give you very cool leslie-like tones. Apparently, it’s best used in stereo. While I liked it, it was the least of my favorites, but I can actually see where I can use it in one of my songs. It’ll work perfectly for that.

Overall Impression

As I entitled my previous article on the Corona chorus, I really thought I was done getting chorus pedals. But this is a must-have for me as I wanted to have another chorus pedal that could do sounds that me Boss CE-2 can’t do. The CE-2 is a really in-your-face type of chorus, while the Corona can be dialed back for a much more subtle chorus tone. I’ll be using this pedal – A LOT!!!

Read Full Post »

I usually keep up on new stuff, but the Aria has been around for about a year now. Can’t believe I missed it! In any case, I just spoke with Dave Koltai of Pigtronix, and he said the Aria was the result of releasing a product with no marketing. I take it that Dave is one of those back-room geek dudes who come up with lots of amazing shit, then just put it out there. 🙂 Actually, after speaking with him, he’s a really cool guy, and it’s great to meet someone who has a passion for what they do, and that was clear that he has a passion for creating great pedals.

I’ve known about Pigtronix for quite awhile, but it wasn’t until I got the press release on the Keymaster and shared it, that I started looking in on Pigtronix’s product line. They’ve got an impressive array of pedals. The one that I’m really keeping an eye on is the Philosopher King pedal, which is a compressor/sustainer, grit, and envelope filter. Have to save my pennies up for that one, but it’s definitely something I’d like to add to my board. But more to the immediate, I also came across the Aria Disnortion pedal, and that’s what this post is about…

I love dirt pedals! I’ve got a bunch of ’em, and for some reason, I just can’t get enough of ’em (I know… I say that a lot, but it’s true). Each one that I have has a different character, and they rotate on my board with seeming regularity as I get the in the mood for different tones now and then. As of late, I’ve really been into more transparent overdrives and boost, as I love the natural sound of my amps when overdriven, and the Aria definitely seems to fit the bill.

Now with respect to transparency, let’s face it, nothing is transparent. Everything you put on your board will change your tone. But what I tend to look for – especially in dirt pedals – is that they don’t take anything away, ESPECIALLY dynamics and and note separation. Some pedals I’ve tried in the past sound pretty decent and have lots of dynamics, but at high gain levels, lose clarity and note separation. While I’m not a speed demon on the fretboard by any stretch of the imagination, I do have more of a legato style of playing where I play several notes in one complete phrase which I’ll end with a bend or sustain, depending upon what I’m playing. So note separation is VERY important to me. There’s nothing worse than playing a well thought out phrase, only to lose it in a mush. From what I’ve heard from the demonstrations by Peter Thorn and Andy at Pro Guitar Shops, even at high gain settings, the pedal retains note separation. That’s a huge plus!

Another plus of this pedal that I can see is the 3-band active EQ that provide 12dB of cut or boost to really shape your tone. The gain knob will give you clean boost to fuzz, which makes this an incredibly versatile dirt pedal. This ain’t no one-trick-pony; that’s fo sho!

Then add to all that this pedal retails for a street price of $149, OMG! I have to get this pedal! 🙂

For more information on the Pigtronix Aria Disnortion (no, it’s not a typo), visit the Pigtronix Aria product page!

In any case, for your viewing/listening enjoyment, check out these demo videos!

Peter Thorn

Andy @ ProGuitarShops.com

Read Full Post »

No, not the sexual kind – though we do like that – but the spring reverb kind. 🙂 Specifically, I’m talking about the Tone Candy Spring Fever. I reviewed the Spring Fever back in May, and gave it a 4.5 Tone Bones. But now that I’ve got it and after spending a few hours with it last night, I’m now giving it 5.0 Tone Bones! Here’s why:

  1. As I said in my original review, the Spring Fever is just about the best spring reverb pedal I’ve ever played. It sounds incredibly realistic, and unlike many of the digital varieties I’ve played, while it’s jangly with some top-end, it also doesn’t lose bottom end, so your tone stays nice and rich. That’s a little disconcerting to some folks because they’re used to a brighter tone, but for me, the retention of the bottom end is really what sold me on its tone, plus with the Spring Fever, you can go from subtle spring ‘verb, to rich, spacious, swirling surf tones, so there’s lots of variety on tap.
  2. What I didn’t get to test out in my original audition of the Spring Fever was its Volume knob which also acts as a clean boost if you turn the Reverb and Mix knobs all the way down. I’m not sure how much boost the pedal adds, but there’s enough boost on tap to slam the front end of your amp with loads of gain.

I particularly like the Volume knob because it solves a real problem for me when I play my acoustic gigs at venues where I have to plug directly into a PA board. My acoustics’ pickups don’t have much gain, and I usually have to crank up the volume faders on the board, which can be problematic as it makes it difficult to balance out the guitars’ volume with my vocals. I’ve solved this in the past by lugging my Presonus TUBEPre preamp with me, but that’s a bit of a pain to lug (read: extra gear, not because it’s heavy), and requires a separate 12V power supply. The Volume knob on the Spring Fever eliminates the need for me to bring a preamp with me. Nice.

If I have one complaint of the pedal, it has to be its finicky nature with power supplies, and will add some noise to the signal. Mike Marino explains this on the Spring Fever product page, and recommends some power supplies to use, such as the 1-Spot. I used the 1-Spot in my clips, and when the Spring Fever was activated, there was a slight, but noticeable hiss. This has to do with the power supply, and not the pedal. This also happens when I use my MXR Carbon Copy with the 1-Spot. When I hook it up to a regulated power supply like a Dunlop DC Brick, the pedal is as quiet as can be. So despite Mike’s recommendation about the 1-Spot, don’t use it. Get a regulated power supply like the DC Brick. Luckily, I have an extra DC Brick, so that will be powering my mini board.

How It Sounds

As I said, the Spring Fever is about the best spring reverb pedal I’ve ever played! Capable of producing a wide range of reverb, this pedal will be a permanent fixture on my board! I’ve still got to play around with it some more, but I recorded a few clips to give you an idea of what it can do. The clips below were all recorded using my 1958 Fender Champ output to a Jensen Jet Falcon 1 X 12. I start out each clip with a dry signal, then play it again with some “grease.” What that pedal adds with respect to spaciousness is amazing! All the clean clips were recorded at unity volume, while the dirty clips were played with the amp turned up to about 2pm, and the boost at 1pm with Mix and Reverb completely off. I wanted to demonstrate the clean boost and its effect on an overdriven amp.

Les Paul, Middle Pickup, Fingerstyle. Reverb: 11am, Mix:10 am

Left Channel: Les Paul Middle Pickup, Reverb and Mix same settings as above
Right Channel: Les Paul Neck Pickup, Reverb: Dimed, Mix: 8pm

I love the right channel track on this clip. Turned up all the way, you get this cavernous room sound, but with the Mix set real low, it becomes a much more subtle effect, providing almost a delay-like ambience without the echos.

Squier CV Tele Middle Pickup. Reverb: 10am, Mix 10am
MXR Carbon Copy with long delay time, Mix at about 10am

Les Paul Middle Pickup (biased toward bridge), Volume: 2pm, Mix/Reverb Off

Squier CV Tele Bridge Pickup (biased toward bridge), Volume: 2pm, Mix/Reverb Off

Overall Impression

Yeah, it’s pricey at $275, though you can find it at a lower price if you look. But I haven’t heard as a good a spring reverb pedal like this – ever. And the fact that it has a booster in it just rocks! For me, and especially for my acoustic gigs, this is a game changer!

Read Full Post »

VHT Special 6 Combo
Summary: This is a hand-wired, solidly built tone machine that packs great features for an unbelievable price. The value proposition alone is enough to turn heads, but add superb tone to the equation and you have a winner!

Cons: None.

Features (as tested):

  • 6 Watts
  • One 6V6 Output Tube
  • One 12AX7 Preamp Tube
  • Volume and Tone Controls
  • Footswitchable Boost Mode
  • High/Low Power Switch (Pentode/Triode)
  • 10” VHT High-Sensitivity Speaker
  • 4, 8, and 16 Ohm Speaker Jacks
  • Mod-Friendly Eyelet-Type Board
  • Hand-wired In China

Price: $199 Street / $179 Street for Head

Tone Bone Score: 5.0 ~ Clean or dirty, this amp delivers the goods! The tone sweep is absolutely excellent giving you gorgeous, warm jazz cleans, to classic rock bite! Add the Hi/Lo power switch, and Push-Pull volume knob boost (also includes a footswitch), and you’ve got an amp that can live in a variety of musical genres.

About a week ago, I extolled virtues of the Marshall Class 5, and raved about how great it sounds. It’s a fantastic little amp, and I haven’t changed my opinion of it. But along came the VHT Special 6 and the game has completely changed. VHT raised the bar with Chinese-manufactured, low-cost, low-wattage amps by offering a hand-wired, super-well-built amp with fantastic features that can easily change the amp’s character for under $200 for a 1 X 10 combo.

I think the arrangements many gear manufacturers have made with overseas assemblers is great. Egnater is another example of a manufacturer doing it with great success. Design the gear here in the US, then partner with an overseas manufacturer to take advantage of their cheaper parts and labor, ensure that they meet a high standard of quality, then give the savings back to the customer. The top-of-the-line stuff can be saved for domestic production, but the stuff you want to get out to the masses can certainly be made elsewhere, and in much higher volumes and production rates. It’s a good model that many manufacturers have been following for years. I realize that I’m going to piss off some of the ultra-patriotic that will only buy stuff made in the USA; I myself prefer to buy US-made stuff, but it’s tough to argue with getting great tone for a great price, and that is EXACTLY what the VHT Special 6 and lots of other gear assembled overseas provide.

But enough toeing the political line. Let’s get into discussing the Special 6, shall we?

Fit and Finish and Features

The first thing I noticed when I first looked at the amp is how solid it looked. Picking it up revealed an amp that is no lightweight. I don’t know the exact weight, but the Special 6 is not lacking in heft. The cabinet is made of birch ply, and from what I could tell, fairly large transformers were used with the amp and those are heavy. Note that I’ve actually heard some conflicting information about the cabinet wood. Some say MDF, others say Baltic birch ply. Actually, it just doesn’t matter. The cabinet’s solid, and it works well as a resonance chamber for the speaker.

As far as cosmetics are concerned, the amp is covered in tolex with white piping around the front grille. The rear panel sports a partially open back that, like the Marshall Class 5, has a thin metal screen covering the opening. That’s a nice touch.

The control panel is super simple. You’ve got two chickenhead knobs for tone and volume, on/off switch, a three-way Hi/Lo Power / Standby switch (I dig that), and two input jacks for Lo and Hi input. The volume knob is a push-pull knob that when out, adds boost (sorry, not sure about the amount of boost). You can surmise just by these features that you can do a lot of tone shaping with this little beast. 🙂 The back panel has jacks for 4, 8, and 16 ohm speaker outs, plus a jack for switching between normal and boost.

Sound and Dynamics

Even with a 10″ speaker, the amp is capable of producing a variety of tones, from lush, Fender cleans, to ringing, AC15-like overdrive to gorgeous, smooth Plexi overdrive. I’m not kidding about this! Depending upon the pickup you’re using and where you set the tone knob, and other amp settings such as hi/lo input, pentode/triode mode, you can cover a wide range of tones! This is what is so SICK about this amp! It’s so damn versatile!

I played around with it in my studio this afternoon, getting ready to record some clips (which I’ll have in an upcoming article), and just for kicks, I unplugged the stock speaker and ran the amp out to my 2 X 12. Granted, there is a HUGE difference between a 2 X 12 and a little 10″ speaker, but in my experience, many low wattage amps still sound a little on the thin side even when going into a bigger cab; not so with the Special 6. It sounded big and ballsy; much more “big-amp-ish” than it’s diminutive power. That really came as a surprise, much like my surprise when I plugged the Reason Bambino into a big cab. It’s clear that just like the Reason guys, VHT didn’t want to just build a low-wattage amp. They wanted to build a great amp, period.

I also gigged with the amp in my weekly church gig yesterday afternoon, and it worked absolutely stellar! I kept the amp in high power mode, plugged into the high power input, set the tone and volume at 3pm each, then pulled the boost knob to activate the normal/boost footswitch. I didn’t use any effects at all as I just wanted the raw amp tones. I even tuned with my Peterson StroboClip so my signal from my guitar to the amp was completely direct. Note that even with a 10″ speaker, I still had to use an attenuator, and my trusty Aracom PRX150-Pro worked stellar with the amp.

During the gig, I mostly used the volume knob on my guitar to vary gain, whether in normal or boost mode. The amp responded so well to volume knob and pick attack. Even if I didn’t reduce the volume, and picked very lightly, I could clean up the sound. So sweet!

The only time I made any adjustments to the amp was when we did a song that I needed absolutely clean tones. I simply reduced the volume to around 11 am, then bypassed the attenuator. And the cleans were simply fantastic!

Made to Mod

Despite the fact that VHT says this amp is highly modifiable, I doubt that most people will do no more than swap tubes. I’ve seen some forum posts where people have made a couple of changes, but I’d say the majority of folks just won’t see a need to do that. But curious, for shits and giggles, I swapped out the stock 6V6 with a couple of different 50’s-era 6V6’s (GE and RCA). They each sounded beautiful as I expected, but quite frankly, they were just too smooth. The Chinese tube seems to be “hotter” and produces lots of harmonics; something my NOS tubes didn’t do. In my opinion, the Special 6 is meant to be a mini-rock machine. It won’t do really heavy stuff, but for 70’s and 80’s classic rock, it sits right in the sweet spot.

Overall Impression

I am thoroughly impressed with the VHT Special 6. Hand-wired, immensely versatile, plus fantastic tone for under $200? That’s tough to beat! And unlike other small, low-wattage amps that have only a volume and tone knob, the combination of inputs, low/hi power modes and boost make this an amp that can be used in a variety of ways. Big thumbs up, and 5 Tone Bones!

I’ll have clips in an upcoming article. Stay tuned!

Update: January 2, 2013

It has been awhile since I wrote the original article, and amazingly enough, I’m still using the Special 6. I did finally swap out tubes to 50’s era NOS for both pre-amp and power tubes, and I also swapped out the stock speaker and put in a Jensen Jet Electric Lightning. I use this amp frequently at my church gig where I don’t need a lot of volume since mic the amp and use the PA, and it is perfectly suited for that venue.

Even after all this time, I do have to say that I’m still thoroughly impressed with the tone of this little amp. When it’s cranked, and especially with the Electric Lightning speaker, the amp sounds SO much bigger than what its diminutive 6 watts would suggest. A lot of that has to do with how the speaker projects, but when cranked, that amp absolutely sings with tones of sustain and really sweet overtones. I love playing this amp with a Les Paul. The clean tones are gorgeous as well, and when I don’t hook it up to an attenuator, I just use pedals to get my distortion. From that perspective, the amp takes to pedals real well.

Finally, even with a simple, single EQ knob, the EQ works fantastically well with the amp. It’s kind of bright out of the box, so I normally just set the tone control to about 10 am. On some amps I’ve played, that muddies the tone a bit; but not with the Special 6. It simply makes the lower range stand out a bit more.

I’ve even been using the amp in the studio, over my DV Mark Little 4o and Aracom VRX’s (except where I need a heavier sound). It’s perfect for the studio.

Read Full Post »

While I did a “mini review” of the Mad Professor Deep Blue Delay a couple of months ago, that was in a shop in a controlled environment, and though I played it for almost an hour, there’s no better test of gear than using it at a gig where nothing is predictable.

After I originally auditioned the pedal, I anguished for the last couple of months about getting it. Why? Simply because of its price: It is NOT a cheap pedal by any means (I got it for $335), and it was always easy for me to reason why not to get the pedal. However, I’ve been a bit disappointed with my VOX Time Machine when using it with my acoustic rig. I thought that since it performed so well with my electric rig, that it would translate well to my acoustic rig. That couldn’t be further from the truth. Truth be told, while the Time Machine simply kicks ass with my electric rig, my tone feels and sounds “processed” with my acoustic rig. The net result is that I stopped using it for my acoustic gigs.

I knew I had to get a good delay that would work well with my acoustic rig, and I also knew that after auditioning quite a few digital and analog delays at the shop, it was the Deep Blue Delay that spoke to me. But the price of the pedal made me shudder, so I put off the purchase for the last couple of months.

Then yesterday, in a moment of weakness, I purchased the pedal on my lunch break at work. Jordan, the sales guy I’ve been buying gear from at Gelb Music for years, swears by this pedal, and he just said, “Dude, I know the price is steep, but there’s none better than the the Deep Blue Delay. It’s always on my board, and it’s almost always on. The VOX Time Machine is a killer pedal (he sold me that one as well), but you know how the Deep Blue sounded with the APX900 (Yamaha – I bought that one from him too – though he didn’t make a recommendation that time 🙂 ) when you tested it a couple of months ago. Believe me, you won’t be disappointed.” Mind you, I trust Jordan’s advice implicitly. I’ve been buying gear from him for years, and have learned that when he raves about some gear, it’s not bullshit because he owns it or has gigged with it. And with the Deep Blue Delay, I’ve never witnessed him rave so much about a pedal!

So I am now the proud owner of the Mad Professor Deep Blue Delay, and like Jordan, I can’t rave enough about it! What about my Time Machine? It goes back on my electric rig board. I love that pedal because it has such a great sound with whatever electric guitar I use on it. But for acoustic, it’ll be the Deep Blue from now on.

Fit and Finish

With a gorgeous, shiny, blue powder coat finish, this is simply the most gorgeous pedal I have. I’m partial to blue, but the gloss is like a mirror, as the photos below show. If I have one nit, the blue LED is a bit difficult to see in bright lighting conditions, but that’s just small nit. Other than that, the pedal is solidly built. The knobs have good resistance without being tight, and the toggle switch is heavy duty. I’m not sure what kind of jacks were used but connectors snap into place nicely, so I’m assuming they’re fairly high-quality jacks.

Taking the back off the pedal, there are LOTS of wires connected to a foam-wrapped circuit board (that I didn’t want remove), so it’s clear that the Deep Blue Delay is completely hand-wired, save for the circuit board. The wires are all fairly heavy-gauge with thick shielding, which speaks to the quality of components used in the pedal. I didn’t want to lift the foam pad because the wires were so heavy and I didn’t want to have to deal with putting them back into place. 🙂 Mad Professor could’ve easily used thin-gauge wires for this pedal, but I like the fact that they opted for the heavier gauge.

This slideshow requires JavaScript.

How It Sounds

I know that I use the words “awesome” and “incredible” on this blog. After all, this is a “best of breed” type of site. So let’s just assume that the pedal can be described with those words, and I’ll take a different tack and describe what that sound does to me.

I know a piece of gear is incredible when it just makes me close my eyes and soak up the sound it produces. That’s the effect the Deep Blue Delay has on me. The delay effect, even at high levels is always smooth, and amazingly enough sounds so natural. There is nothing processed about this sound. And unlike other analog pedals I’ve played, the Deep Blue Delay doesn’t get dark, which is what has kept me from getting analog delays in the past.

At last night’s gig, I turned a disaster into a way to fully evaluate the Deep Blue Delay. With my acoustic rig, since I don’t have too many pedals, I use my BOSS TU-2 to power up the rest of my pedals. But last night, I had forgotten that I removed the TU-2 to use at a gig last week, so when I opened up my pedal bag, I was shocked to see my TU-2 missing. Luckily, I had left my 9V plug in the bag, so I figured that it was a great way to use the Deep Blue. So I plugged my guitar into the pedal, and it went straight into my Fishman SoloAmp.

I set up the pedal with the Delay and Repeat knobs at about 2pm, and the Level at 9am so I could get a nice, ambient sound that didn’t dominate. That created a hall-like effect that was simply delicious. I kept it at that setting for several songs. Then just as an experiment, I upped the level to 11, and then the skies parted and a voice rang from the heavens, “You have found s a sacred tone!” 🙂 Seriously though, I was completely blown away by what the pedal produced. The repeats were on the speedy side and the decay was a nice tail without being overbearing, and at that level, the wet/dry mix was just perfect!

The wonderful thing about the Deep Blue is that it seems like there’s a pre-delay built into the pedal. The one thing that sets this apart from other delays I’ve used is that at anything greater than low level settings, you get delay going right away. But even at 11am, whatever I was playing, whether finger picked or strummed, didn’t start repeating until there was space – or at least that was what it seemed like. Of course, at higher levels, the delay kicks in right away, but despite that, what you’re playing is invariably clear and doesn’t get washed out by the repeats.

Overall Impression

In other words, this truly is an incredible pedal. I’m still smarting just a little from the price, but as I haven’t played a delay for my acoustic as good as this – ever – it is well worth the price! I originally gave the Deep Blue pedal a 4.75 Tone Bones rating because of its cost. But my thinking now is that if that’s what it costs to get this kind of delay, then that’s what it costs, and I’m so much happier playing with this pedal in my signal chain. I’ve re-rated it as a 5 Tone Bones pedal. If you can afford it, this pedal will not disappoint; in fact, I’ll wager that it’ll make you practically squeal with joy!

About the Photos

Another hobby of mine – and no, I don’t sleep all that much – is photography. With this hobby, I don’t aspire to be a professional photographer, but I do like to take good photos. These photos were taken with a Nikon D40 with a f1.8 35mm fixed-length lens. All shots were taken in manual mode. I don’t remember the settings, but I shot about 60 photos and picked what I felt were the best shots. Then I used Adobe PhotoShop Elements to crop the photos and did a minimal amount of color correction on a couple of them. I believe that unless you’re going to make artistic enhancements to photos, you should set up your shots so you can “print” them immediately without color manipulation; that is, set up your camera so you don’t have to compensate later.

I know, this is a guitar gear blog, but going forward, I will be doing my own photos of gear. What I love about this particular set is that my camera caught the wonderful reflections off the shiny powder coating of the Deep Blue Delay. I find that marketing photos tend to be a bit too sterile. This is the best-looking pedal in my collection, and I wanted to do its look justice.

Read Full Post »

Click for larger image

Sennheiser ew 172 G3 Wireless System

Summary: If you’re looking for a great instrument wireless system that is both easy-to-use and a snap to set up, look no further!

Pros: 1680 available frequencies make this ideal for busy RF venues. Super easy to set up sensitivity levels. Transmitter sports a metal housing, so durability shouldn’t be an issue. Integrated guitar tuner in transmitter – works great! 25Hz low-end response – great for bass!

Cons: None.

Features:

  • Sturdy metal housing (transmitter and receiver)
  • 42 MHz bandwidth: 1680 tunable UHF frequencies for interference-free reception
  • Enhanced frequency bank system with up to 12 compatible frequencies
  • High-quality true diversity reception
  • Pilot tone squelch for eliminating RF interference when transmitter is turned off
  • Automatic frequency scan feature searches for available frequencies
  • Enhanced AF frequency range
  • Increased range for audio sensitivity
  • Wireless synchronization of transmitters via infrared interface
  • User-friendly menu operation with more control options
  • Illuminated graphic display (transmitter and receiver)
  • Auto-Lock function avoids accidental changing of settings
  • HDX compander for crystal-clear sound
  • Transmitter feature battery indicatation in 4 steps, also shown on receiver display
  • Programmable Mute function
  • Integrated Equalizer, Soundcheck mode and guitar tuner
  • Contacts for recharging BA 2015 accupack directly in the transmitter
  • Wide range of accessories adapts the system to any requirement

Price: $499 street

Tone Bone Score: 5.0 ~ I waited a LONG TIME to pull the trigger on a wireless system, and while I could’ve gotten a cheaper one that would work well, but it was hard to argue with the frequency coverage of this unit. The added features of a guitar tuner and EQ are great, but the ease of use factor really hit home with me as well.

As I mentioned above, I’ve been holding out a long time to get an instrument wireless system. When I finally pulled the trigger, I decided upon the Sennheiser G3 Wireless system; first and foremost because of the number of frequencies it has on tap, but honestly, also because it’s a name I trust as my performance mics are Sennheiser. I’m not being a cork-sniffer here. I swear by the brand because of the years of great performance I’ve gotten out of other Sennheiser equipment, so it stands to reason to trust it for something completely new.

As it turns out, true to my past experience with Sennheiser gear, there was absolutely nothing to be disappointed about with the wireless system. I took it to my church gig yesterday and it well, just worked, with no tweaking on my part; save for adjusting the sensitivity levels which I didn’t even think to do when I first opened up the box. In fact, I didn’t even read the manual when I took it out to try in my studio. I just attached the antennas to the receiver and plugged in the instrument wire into the transmitter, popped in the batteries, and let ‘er rip. It literally took less than a couple of minutes to get up and running. Insofar as my church gig is concerned, it was a great venue to put the unit through its paces, as there are potentially several wireless units in operation at one time, including my own wireless headset mic. I’ll talk more about the system’s operation below.

In any case, since this isn’t something that actually makes music, my review areas are going to be a bit different from my normal reviews.

Ease-of-use

As I indicated above, the unit’s pretty plug and play. But of course, you should check the sensitivity of the transmitter and receiver to make sure you’re not overdriving the unit. The LCD’s on both the transmitter and receiver makes setting sensitivity of either unit a snap. Both have an active meter and navigating to the sensitivity menu is just a couple of button presses. Sennheiser did a great job with the menus to make them only two levels deep, so you won’t have a problem getting to the parameter you need to set.

Durability

Both transmitter and receiver have very sturdy metal housings, so you needn’t worry about the units cracking. The transmitter has a real solid feel, and that instills confidence that you don’t have baby the unit, though of course, it’s always good to take care of gear.

Performance

Despite having 1680 UHF frequencies to scan, the receiver locks on to a usable frequency almost instantaneously once you turn it on. That is such a boon to using the unit. You switch it on, and you can use the unit.

One of the tests that my sound guy and I did was for me to walk a distance away from the receiver to see if it lost connection. I honestly don’t know what the maximum range is, but no matter how far I got away – I got about 100 feet away – the transmitter and receiver didn’t lose their connection to each other.

To save battery life, when I’m not playing I always switch off the transmitter on my headset mic. I did the same with the G3 in between songs. Every time I switched it back on, making a connection to the receiver only took a couple of seconds.

Final Verdict

I haven’t even begun to explore all the different features that this system has; one of which is a cable emulation mode that simulates a cable’s capacitance to ensure consistent operation of your effects and amp settings whether you’re plugged in or wireless. This a great feature. Admittedly, I didn’t use this, but my rig sounded pretty much the same with the same dynamics once I dialed in the sensitivity of both transmitter and receiver. Or it could be that the only thing I obsess about with my tone is if it sounds good and I’ve got dynamics. Minute changes due to changes in my chain don’t really bother me too much. So if I got a slight change in tone, since my sound with the G3 system was good with no loss in dynamics, it didn’t trigger anything displeasing with me.

But other than performance and sound and all the other stuff I discussed, going wireless is simply fantastic. I like to move around a lot when I perform, and not being tied to a spot by a cable is so freeing! It really boosted my ability to lead musical worship, and that is so COOL!

Read Full Post »

When you’ve got a guy like Lance Keltner singing the praises of your equipment and calling you a genius to boot, you must be doing something right. Jeff Aragaki of Aracom Amps is someone I’ve been praising for quite awhile, and I’m glad he’s finally getting the recognition he deserves.

As far as the DAG unit is concerned, that’s available exclusively through Destroy All Guitars. I’ve played through one of those units myself, and the high-cut filter works great, and definitely takes the edge off, without throwing a blanket over your tone and dynamics like many attenuators do that include one. If you have an amp that outputs lots of highs when cranked – or somehow hear high-frequency transients –  then the DAG unit is the way to go.

Coming up…

While Jeff has gained lots of popularity with his attenuators, often overlooked are his wonderful amplifiers of which I have three. In the next couple of days, I will be getting a 50 Watt Evolver to test out in my studio. I’m so excited! I’ve played through an Evolver at Jeff’s workshop and that amp has tons of balls! It’s definitely Marshall-esque, but with Jeff’s particular twists. I’m excited to be getting this unit for a full test!

Read Full Post »

« Newer Posts - Older Posts »