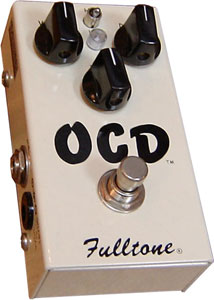
There have only been a few times in all the years that I’ve been playing guitar that I’ve had an epiphany with a pedal, where after just playing a few notes, a light bulb would go off in my head, and I’d exclaim, “That’s the sound I’m after!” The Fulltone OCD did that to me this afternoon. I just love when that happens! Here are some of the features of this little beast:
- First off, it has a true bypass switch, so when it’s off, it’s off, and you don’t have to remove the battery if you’ve got it plugged into a 9 volt power source.
- Volume knob – speaks for itself. But here’s a real treat: The volume knob can give you up to 30dB of boost!!! Need a clean booster? Here it is, plus you can get that sexy, smooth distortion out of it as well. Special note for my friend IG over at igblog: Here’s your clean booster, and you get a freakin’ amazing distortion box to boot!!!
- Tone knob – according to the manual (and I confirmed this as well), the tone knob only affects the high frequencies, but you can use it to sweeten up a lead or get a more squishy, punchier sound – very cool.
- Drive knob – again self-explanatory. It’ll give you more or less distortion depending up on the position you set it to.
- HP/LP switch. This is unique to this pedal. Set it to (H)igh (P)eak and you get glorious sounding bottom end and increased dynamic range, plus more distortion throughout various volume levels. Set it to LP, turn down the drive, and the pedal acts as a clean booster with the volume knob.
How it sounds…
- Whether you’re in HP or LP mode, the thing that I noticed the most was the amount of sustain it added to the notes I was playing. One thing that can be a bit of a frustration for me when playing my Strat is when I bend a high note (above the 12th fret), there’s just not much sustain in the guitar itself (of course, unless I crank my amp). But the OCD adds a lot of sustain with hardly any tonal interference (that makes your sound really muddy).
- As far as distortion is concerned, the OCD will not muddy your tone – especially at lower volumes, and you get all the juicy, complex harmonics that you get out of a cranked amp. With the OCD, your tonal clarity is retained, even with heavy distortion, AND you get those overtones and harmonics – EVEN AT BEDROOM LEVELS!!! Think of the OCD’s distortion as an extension and enhancement of your tone. It’s very much in character with a box like the Ibanez TS-808, another overdrive box that I have that I love for its transparency.
- With the OCD, you also get the touch sensitivity you’d expect out of a cranked amp. That’s yet another amazing thing about the OCD, it’s sensitive as all get-out even at lower volumes.
- I haven’t confirmed this, but from other reviews I’ve read, and from the dude that sold me the pedal (I trust him mightily), the more voltage you run through the OCD, the better it sounds. I only have a 9 volt power supply, but it’ll take up 18 volts, though I’ve read that 12 volts is probably the best.
In a nutshell, if you’re looking for a distortion box that will make your good tone sound even better, this box is for you. That said, before Mike Fuller released this box, there was A LOT of hype surrounding it. Once it was released, a lot of players were disappointed, thinking that this would be the be-all, end-all of distortion boxes. It’s not. It has a different character; actually, a VERY unique character, that will endear it to some, and ward off others, especially those who are expecting a real low-end oomph. The OCD has that, but that’s not its strength. As I mentioned, it’s a tone enhancer, that will break up your signal as much or as little as you want. It won’t pour on oodles of low-end, especially if your setup is on the thin side.
An important note: The OCD works best with a single channel Class A amp, or on the clean channel of a multiple gain stage amp. It does not sound good when used in the drive channel, which already breaks up your tone. That said, if you do use it with a drive channel, either let it do the driving, and turn your amp’s boost down, or turn down the OCD’s distortion, and pump up the volume knob on the box. Otherwise you’ll get a very rough (read: ugly) distortion. A lot of folks have complained about this pedal clipping too much with their amps. Most likely, they’ve tried to use it in the way I described above.
Comparisons? Well, I’m never one to say this box is better than this box, unless the tonal quality is perceptibly that much better. The closest box I can think of to compare the OCD to off the top of my head would be the box I mentioned above: The TS-808 Tube Screamer. But where the Tube Screamer is more of a midrange booster, and it produces a much more crunchy tone, the OCD has much smoother distortion characteristics, and has way more inherent sustain than the Tube Screamer. Which one is better? Neither. For me, they both have their uses, though I’ll have to admit that the Tube Screamer will most likely be my go-to box for crunchy rhythms, and the OCD will be used for leads and more funky rhythm parts played high on the neck.
Sometimes, it’s just in the stars…
I stayed home from work today to take care of my toddler who has an ear infection. He’s been cranky all day with a fever, and of course, the incessant annoyance of the inner ear infection. So to calm him down, and help him take a nap, I took him for a drive. I wasn’t actually intending to go to my local guitar gear shop but I ended up exiting the freeway on the street that the shop was on, and just happened to drive in the direction of the shop (I really wasn’t meaning to go there, dammit! 🙂 ) Anyway, as I was driving, I noticed the “Guitar Showcase” sign, and turned into the parking lot. I figured I could browse around in the nice, air-conditioned space, which would be great for my little boy with a fever. So I put the baby in the stroller and entered the store.
Once I entered the store, I noticed that Peter, who sold me my Fender Hot Rod Deluxe was working behind the counter, so I struck up a conversation with him. He’s a touring musician, so I asked him how the gigging was going, and we swapped stories. Then it occurred to me to ask him about a good drive/distortion pedal that I could use in conjunction with my TS-808 (which he also sold me and also plays through). He said, “Man, here it is: The Fulltone OCD. This’ll do the job for you. You can use it as a clean boost, but you’ll get the sweetest, creamiest distortion you’ve ever heard. Other pedals, can sometimes make your tone turn muddy, but this will break up your signal and retain your clarity.” Peter knows what I play through, and the guitars that I have, so he knows how important my tone is. With that, I replied, “You know, I wasn’t banking on buying any gear today, but based on what you’re saying, I’ve got to try this pedal out.”
So Peter hooked me up to a Hot Rod Deluxe. I played one simple phrase: An ascending minor scale in E. Actually it was more like 4 notes with a bend and vibrato at the end, and my jaw just dropped!!! I couldn’t believe the sexy tones that came out of this little box! It was like the sea had parted and the way was made clear! Then Peter twiddled the knobs a bit, then told me to play some funky rhythm line, and it’s like the song just came to life! I swear, within a minute of playing through the OCD, I just turned to Peter and said, “Sold. I’m gonna play a bit more, but you can start writing up the order. I’m not leavin’ the store without one.” So, I am now the proud owner of a Fulltone OCD.
Read Full Post »
 Okay, yet another product review on a fairly mundane piece of gear, but hey, sometimes you have to be practical!
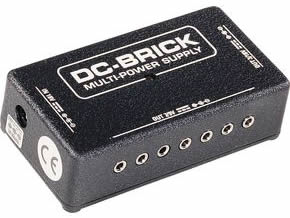 A power supply? I know, kind of mundane, but if you’re still using 9V batteries, you might want to rethink your power supply needs. Here’s a common situation: You’re in the middle of a set, and your beautifully clean tone starts getting kind of fuzzy. It’s not too bad at first, but worsens as the gig progresses. You look down at your effect pedals, and one pedal’s light seems to be a bit dimmer than it normally is. You realize the battery is going dead. So after the song, you go back to your gig bag to get another 9V. You’re shocked to find that you don’t have a spare!
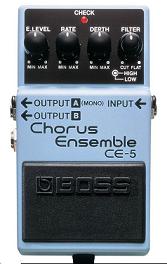 When it comes to chorus sounds, Roland/BOSS is pretty much the standard for the last twenty or so years. The CE-2 has especially been very sought-after used pedal 1) for its simplicity and; 2) for it’s analog design. I owned a CE-2 back in the 80’s, and have since kicked myself since I traded it for other hardware – that I don’t use at all anymore! Since then, BOSS has gone through a couple of renditions with the Chorus Ensemble line, and now offers the CE-5 Chorus Ensemble. A pedal that even though digital, sounds pretty darn good.
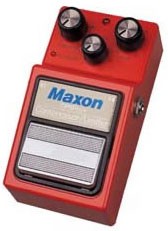 The last review I wrote was on the Demeter Opto Compulator, a great compressor that I had the chance to A/B a couple of weeks ago. In the review, I said that that was the comp I was going to buy, but that was until I did a side-by-side comparison with the Maxon CP-9 Pro+ today. Now it looks like the winner of my search for a good, transparent compressor is the Maxon CP-9 Pro+. But I’ll have to admit, I’m very torn between the two.
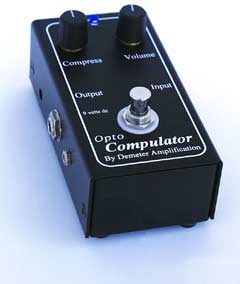 I was at a casino last weekend, sitting in a bar with a couple of friends and listening to this great duo play classic rock hits. During one of their breaks between sets, I went to the stage to talk to the guitarist (he had a cool name: Buford) and checked out his gear. He had a fairly simple setup: Just two effect boxes going into a Vox amp modeler that then went straight into his mixing console. What caught my eye though were his two effect pedals, both by Demeter (pronounced Deh’ meh tur) Amplification. One was Demeter’s
 Since I recently did a