Feeds:
Posts
Comments

Posts Tagged ‘gear reviews’

4.75 Tone Bones - Almost perfect but not quite

bohemian-guitars-21787167

Bohemian Guitars BOHO Series Motor Oil

Summary: Inexpensive but incredibly playable and most importantly, very nice sounding, the BOHO Motor Oil really took me by surprise. Yeah, it seems a bit gimmicky, but these guitars are inspired by the founder’s South African roots where people put instruments together from whatever they could find.

Pros: Super-easy and comfortable to play. Pickups are voiced such that there’s a clear distinction between the positions. Very response to volume knob variation.

Cons: These are nits at most: The tuners need to be tightened a bit, as the strings can go out of tune fairly easy. Tone knob almost acts like a volume knob, but it’s serviceable.

Price: $299.00 Direct

Features:

  • Model: Motor Oil!
  • Body: Recycled metal hollow body w/ removable back panel. Basswood frame for increased amplification and structural integrity
  • Neck Wood: Maple
  • Neck type: Bohemian Through-Body
  • Fretboard: Rosewood
  • Headstock: Red
  • Finish: Golden Glaze
  • Frets: 21
  • Nut Width: 1 3/4″
  • Width at 12th Fret: 2 1/8″
  • Width at 21st Fret: 2 3/8″
  • Neck Thickness: 7/8″
  • Scale Length: 25 1/2″
  • Hardware: Chrome
  • Tuners: 3R 3L screw in w/ removable keys
  • Bridge/Tailpiece: Tune-o-Matic
  • Pickups: Humbucker, Humbucker
  • Electronics: Volume, Tone
  • Switch: 3-way toggle
  • Self-standing: This model has a built in stand made from recycled rubber.
  • Inspired by South Africa. Designed in Atlanta. Produced in China.

Tone Bone Rating: 4.75 ~ The best word to describe this guitar is FUN. It plays as fun as it looks!

I’ll admit it right out of the gate: I really tried NOT to like this guitar. The moment I took it out of the box, my first reaction was literally, “Oh shit! HAHAHAHAHA!” and I chuckled about it for several minutes. In fact, I let the guitar stand in my living room for a few days before I even decided to play it because I didn’t think this was a very “serious” guitar. I imagined myself in a clown suit playing it. But since I asked for the review unit, my sense of obligation overcame my initial amused disdain for it. So I took it to my man-cave, plugged it into my amp, tuned up the guitar, then started to play. And play. And play.

A couple of hours passed by with me just tooling with the guitar, and I finally had to stop when my wife opened the kitchen door glaring at me because I hadn’t gotten to my honey-do projects for the day.

Did I really lose track of time? I asked myself, That ONLY happens when I’m getting lost in the sound and what I’m playing is pleasing to me. When something gets me in the “zone,” it’s special, and all my initial thoughts and bias about its appearance completely disappeared.

When I put the BOHO down, I resolved to do a sound test with it as soon as I could. I had a gig that night, so I couldn’t get to it until the next day, but I looked forward to playing that guitar throughout my gig.

Even still, this guitar reeks of “gimmick” when you look at it. But how it plays and sounds completely overshadows any gimmickry that its appearance may imply. It totally took me by surprise, and I have to say that hands-down I love it! And the fact that it’s made in China is actually a good thing. Chinese guitar construction has come a long, long way over the years, and labor is still cheap, which means these guitars are affordable, so you shouldn’t let price-bias get in your way.

Fit and Finish

I could see nothing wrong with the guitar’s appearance. Other people have reported dents in the past, but my review unit had none. Note that those reports were from earlier models, and I don’t think they had the bracing that the new models have that make them tougher. The only nit I really had was that bending the first string at around the 12th or 13th fret while really digging in would fret out the string. But I attributed that more to a setup problem, and it’s quite possible that the bridge settled a bit during shipping. Raising the bridge a millimeter or two would solve that issue. It certainly wasn’t a neck angle issue. Everything appeared to line up just fine.

As far as overall construction is concerned, amazingly enough, the guitar’s pretty solid-feeling. I was thinking that it might be a bit flimsy; after all, its body is a freakin’ gas can! But the internal bracing provides plenty of structural integrity, so fragility isn’t an issue at all.

But other than my little nit, the guitar actually looks pretty cool, and over time, as I played it, it grew on me. That had more to do with how it plays and sounds than its appearance.

Playability

Amazingly enough, moving around the neck is smooth as silk. I love that it has a rosewood fret board because it provides a tactile feel that makes it feel familiar (most of my many guitars have rosewood fret boards). I personally prefer fatter fret wire, but that’s just personal preference, and doesn’t take away from how well the guitar feels and plays. And surprisingly enough, even with my belly, the guitar’s very comfortable to play despite the obviously fatter body from the can.

How It Sounds

Okay, so this is where the rubber hits the road, and where, most importantly, the guitar impacted me the most. Once I got past the guitar’s appearance, it was its voice that really struck me. While the folks at Bohemian Guitars tout this as the “rock” model, and it certainly has a great voicing for rock, I actually loved its voicing clean or just slightly dirty. For comparison, the voicing has elements of a later model Les Paul with sort of deep voice, but also has the “woody” elements of a semi-hollow body like a 335. It’s a cool voice. I would’ve liked to have a better EQ response with the tone knob because changes in the tone knob affected volume, but I found a good spot that worked for all three pickups and kept it there.

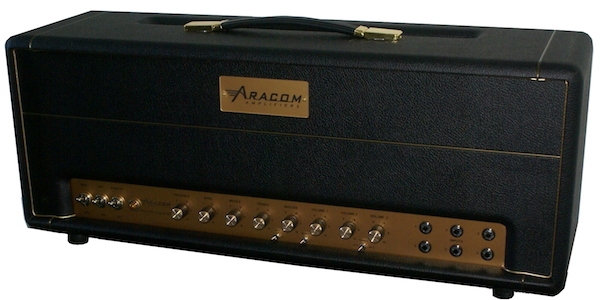
The first three clips you’ll hear are the same phrase played through each of the pickup positions, starting with neck pickup and moving to the bridge. With the first two, I just made up stuff off the top of my head, but with the third clip, I used the main riff from Oasis’ Wonderwall. No matter what I’m playing, the one thing I always look for is note separation, especially when played dirty. I didn’t play any lead lines because frankly, 97% of the time I’m playing rhythm. So it’s important to get a sense of how well the guitar articulates. The amp I used for this was my trusty Aracom VRX18 with EL84’s, played in the drive channel. The amp was set to the very edge of breakup so I could get it to overdrive with volume knob changes and attack.

All clips were recorded raw with the exception of the last clip where I added some hall reverb.

Clean, all three pickups

Dirty, all three pickups

Edge of breakup, all three pickups

Jazzy Blues w/reverb, middle pickup

Admittedly, the clean and edgy tones were the ones that got me to lose myself for those couple of hours when I first played the guitar. And to be completely honest, I love the sound this guitar produces clean and at the edge of breakup best. This probably has to do with my Les Paul bias with respect to a “rock” sound. It’s not that I don’t like the overdriven sound of the guitar, it’s just that I have a preference for the sound I want to produce when playing with overdrive.

Overall Impression

Once I got over my initial doubts about the guitar, I discovered a very nice-playing and nice-sounding guitar under the covers. And at $299, this an incredibly approachable guitar that won’t break the bank in the process. Would I gig with it? To be honest, I’m not sure. But I have no doubts with its solid construction that it would be able to stand the rigors of gigs. But for its gorgeous clean tones, I’d certainly use it in the studio, especially for the new reggae-style tunes I’m working on.

And truth be told, its appearance has actually grown on me. I still don’t know if I’d gig with it regularly, but that has nothing to do with how it looks. With a gigging guitar, I typically look for versatility. I’d have to bring it to band rehearsal to see how it would perform. But other than that, I love this guitar. For what it is, it’s the ultimate in “cool.”

Read Full Post »

5 Tone Bones - Gear has stellar performance, value, and quality. This is definitely top of the class, best of breed, and it's a no-brainer to add this to your gear lineup!

Hughes & Kettner TubeMeister 18 Head

Summary: This amp is truly a tone chameleon, capable of delivering vintage to modern tones in one 18 Watt package. I daresay that it is pretty much the most versatile amp I’ve ever owned; not only from a tone standpoint, but also from a power standpoint. 18 Watts too loud in your space? Bring it down to 5W or 1W or even 0W! The on-board RedBox DI is absolutely killer, and provides for truly silent recording, which is a huge for late-night recording when the kids are asleep (or roommates, etc.).  Super-responsive EQ makes for tons of tone shaping possibilities.

Pros:Where do I begin? This amp has it all for me; especially in the recording department.

Cons: This is a very minor nit, but even with a Strat, the lead channel can really compress at high gain settings.

Price: $599 Street ($50 for the optional footswitch)

Features:

  • Channels: Clean, Lead + Lead Boost
  • Power Soak: 5W, 1W, Silent
  • Preamp: 2 X 12AX7
  • Power Amp: 2 X EL84
  • Effects Loop (Serial)
  • Speaker Output: 8 & 16 Ohm (will automatically detect – no switch)
  • Tube Safety Control (TSC) – keeps power tubes biased properly for optimal performance.
  • Padded, protective cover included
  • Optional channel switching footswitch.

Tone Bone Rating: 5.00 ~ I have to admit, I really lucked out with this amp. I bought it used from a good buddy who had only gigged with it once, and to be honest, didn’t know too much about it. But after I researched it, what originally attracted me to the amp was the on-board RedBox DI. But after playing with it for several hours since I picked it up, I simply love all the tones I can get from this amp – and I’ve only played one guitar through it! It’s a winner!

I’m such a gear slut. When I got this amp, my buddy, who’s also a fellow gear slut chuckled and said, “As if you need another amp…” I also laughed, and almost got buyer’s remorse. BUT what I didn’t have was an amp that had an on-board DI. But the RedBox is a special DI in that it has speaker simulation, which means you’re going to get the reactance of an amp connected to a speaker. It’s one thing to DI into a DAW, but it sounds like an amp plugged directly into a speaker. Add speaker simulation and there’s something special that happens when you add reactance into the mix. You get the dynamics you expect when plugged into a cabinet.

Fit and Finish

This amp is built like a tank. I’m sure H&K had the gigging musician in mind when they built the amp because it’s very solid. The only nit I’d have with respect to it’s physical appearance is that the level dots on the knobs can be a bit difficult to see from certain angles because of the chrome finish. It’s a small nit, and when I gig with the amp, I’ll probably either paint dark lines or stick some thin pieces of colored tape to the top of the knobs so I know where I’m setting things.

Also, when switched on, that blue LED glow is pretty cool. To be honest, I don’t really care about how the thing looks and focus much more on the sounds it can produce. But hey! If it sounds good and looks great in the process, I’m not going to complain.

How It Sounds

To start off, whether plugged into a cab or outputting directly from the DI into an audio interface, this amp is dead quiet when idle, except at high gain settings where the power amp will hum just a tiny bit. But that humming also has a lot to do with my Strat’s single coils. Haven’t tried it with any of my Les Pauls just yet, and I’m anticipating that they’d be quieter. But any amp fully cranked is going to make some noise.

Now to be completely honest, none of the clips I’m supplying here are with the amp hooked up to a cabinet and me miking the cab. My focus was on using the DI to capture my guitar sounds to see if I could get a usable recording that I could then tweak in production. Circling back a little with the DI, one thing that having a speaker simulation is that you get the subtle overtones and dynamics in the signal that you wouldn’t get with a direct signal. It’s typically a little dead when using a regular DI with no speaker simulation, thus no reactance. Truth be told, it’s not perfect, and it doesn’t sound nearly as good as the amp plugged into a cabinet. But it’s close. Real close, and though it doesn’t sound as good as a speaker moving air, it doesn’t suck tone. Dynamics are all retained. My thought behind getting this amp was to get a usable signal that I could then process in Logic and add the texturing there. So without further ado, let’s take a look (BTW, for these clips, I used my Strat plugged directly into the amp, with an XLR going direct to my MBox 2):

Raw signal, clean

My first test was to record a simple clean clip raw to see how it sounded. This clip has absolutely no plug-ins employed in neither the guitar tracks nor the output track.

When I finished the “rhythm” track for this, I immediately smiled. Not only did I have a usable signal, it sounded like my amp was plugged into a cabinet because the dynamics that I was expecting were all there, but with the added plus of no ambient room noise.

Clean, slightly processed

Since I had a usable signal, I wanted to fatten it up a bit and add some reverb to give the sound more space. Here’s the same clip as above, but slight processed (Note: I didn’t do any EQ on the either track).

After doing just those simple tweaks, I knew I had a winner with respect to a recording amp.

Dirty

I wasn’t going to originally include this clip because if there’s one nit I had with the amp while recording this last night, was that at real cranked up settings, the signal compresses – a lot. I guess I’m used to using vintage-style amps that never get that far. But with this amp, I have to be careful about cranking the amp too high. It’s a little hard to hear in the clip itself, but while playing, I noticed a reduction in note separation. But granted, I had the Master wide open, and the gain knob at 3pm. I’ve learned to set the Gain to around 10am, and I still get plenty of sustain, but much less compression.

Sustain test

Finally, I wanted to experience that noted H & K tube sag, and see how well the amp would sustain my guitar signal. In a nutshell, it sustains incredibly well.

The most impressive thing about this clip was at the end where the amp is picking up the overtones of the guitar. OMG! I couldn’t believe that when I was playing last night!

Final Impression

I don’t know what it is, but I’m running across a lot of game-changers for me. While I love my vintage-style amps, and will continue to gig with them, I have a feeling that I’ll be getting a of mileage from the TubeMeister 18. As a bonus, check out this video review from Guitar World. Paul’s a killer player, and he really brings out the gorgeous tones the TubeMeister 18 can produce. There are actually two videos, and the second video where he starts playing the lead channel, had me swooning over the gorgeous overdrive this amp can produce.


Read Full Post »

4.75 Tone Bones - Almost perfect but not quite

play_electric

TC-Helicon Play Electric

Summary: Sporting the fantastic TC Helicon vocal engine and upgraded guitar pedal effects, including several TonePrint patches – Corona Chorus, Hall of Fame Reverb, Flashback Delay – plus a very nice compressor. Play Electric adds amp emulation from its big brother, the Voicelive 3, and with the right tweaks, it’s entirely possible to plug this right into a PA and leave the amp at home.

Cons: The only little nit that I have is that the loop length is extremely short – around 15 seconds. That’s enough to capture a few bars to solo over, but there are times when you want to loop an entire verse or chorus. For that, you’ll have to use another looper. A bit of a bummer, but not enough to dismiss the power behind this unit.

Price: $349.00 Street

Features (from web site):

  • Professional Vocal Effects and Tone with natural sounding Vocal Harmonies guided by your guitar  and/or Room Sense which captures the ambient sound and can be used with piano.
  • Guitar FX styles from TC Electronic’s award-winning range of TonePrint pedals
  • Powerful amp emulations from VoiceLive 3 with a dedicated guitar output
  • User-friendly design with per-preset Vocal and Guitar FX combinations for easy performance control

Tone Bone Rating: 4.75 ~ If it weren’t for the short loop length, I’d be giving this unit a 5. I got a Switch-3 switch box to control the looping, and if you’re going to use the looper, this is a must-have.

I’ve had this unit a few months, but actually didn’t start using it until a couple of weeks ago when I had holiday gigs at various venues where space was at a premium, and lugging my pedal board along with my PA was impractical. I wish I had started using it sooner… the on-board modulation effects combined with amp simulation provide a super-rich tone; equivalent to the quality of tone that I’ve come to expect. But I’m getting a little ahead of myself.

The first holiday gig I had was for the staff party at an assisted living facility. To get to the place I was to play, I’d have to park my car in a loading zone then carry my stuff through a couple of halls. Now normally, my load out would take two trips, but this wasn’t really an option. Conceivably, I could take my entire rig (pedalboard, gig bag, cord bag, and SoloAmp PA) in one trip, but the stuff is a bit unwieldy, and I’ve dropped my pedal board, actually ruining a couple of pedals once. So a single trip was in order.

While I was trying to figure out how to configure my rig, I remembered that I had the Play Electric unit that had everything that I needed on board. So the morning of the gig, I did a quick tweak of the guitar settings (setting them to global so they’d be the same for every vocal patch, which is a godsend of a feature, by the way), packed up my cord bag with the cords I needed plus the Play Electric, and set off to my gig.

I didn’t use the looping feature at that gig because after seeing another dude play with a VoiceLive 2 and the Switch-3 switching unit, I knew that was the way to go, and besides, I didn’t have the Switch-3 yet. But that was okay. It was only a two-hour gig, and I could do all my songs – even the ones where I normally loop – without a looper.

Setup was an absolutely breeze. I had the VoiceLive 2, so setting up wasn’t anything new. Once I was all set up, I remembered the RoomSense feature, which is an on-board mic that picks up the ambient sound in a room, and can be used to harmonize for instruments that don’t plug in; like a piano for instance…. The facility where I played had a beautiful Kawai baby grand, so I upped the sensitivity of the RoomSense mic, and tested it out. OMG!!!!! I wish I had used that with my VoiceLive 2 when I had it. I could’ve been doing harmony while playing piano all this time! Oh well… lesson learned, and where there was a piano at my holiday gigs, which was everywhere except for two places, I used the RoomSense to harmonize while playing piano.

Note that since the unit uses the same vocal processing algorithms found in all the high-end TC Helicon vocal processors, I won’t be covering harmony here, just the guitar stuff.

Packed with Features

I thought the VoiceLive 2 had tons of stuff packed into it, but the Play Electric has so much more. Here are the amp models that are offered in the unit:

Clean Brit, Cali Clean, UK Clean, Deep Clean, Bright Switch, Warm, Little Thing, Chicken Picker, Brit OD, AC Crunch, Chunky Brit, Lil Champion, Chime Drive, 2×12 Combo, 4×12 Crunch, Swamptone, Nasaltone, Brown, Scooped, Metallic, TC Electronic Dark Matter Pedal, OD Pedal, Dark OD Pedal, Distortion Pedal, Acoustic (Flat), Acoustic (Shaped/BodyRez)

On top of that, you have full EQ control in the unit to adjust the EQ settings for what every guitar you’re playing. One nice feature of the EQ is that you can “move” the midpoint frequency of the mids. This is something that you typically find on good PA boards, but I can see the sense in including a feature like that with the Play Electric. You could move it higher for a naturally warm-sounding guitar, or lower to take the edge off a bright guitar, then adjust the high, mid and low around the midpoint. Very cool feature.

On top of that, the same algorithms that power the TonePrint pedals are also in the unit. I use two of the pedals on my electric board: the Corona Chorus and Hall of Fame reverb. These are mainstays on my pedal board, and to have those pedals in the Play Electric is awesome. The delay and compression models are also quite nice. I totally dig the compressor, and even though it’s fairly simplistic, it’s adjustable enough to achieve a very rich tone.

How It Sounds

Sorry, I don’t have any sound clips to share at this time, but after using it several times, I can confidently say that both the vocal and guitar tones are awesome. But as with anything, it takes spending a bit of time dialing in the settings. Luckily this is not at all difficult with the Play Electric. The brightly lit LCD screen is super-easy to read, and frankly, you can adjust practically everything without having to refer to the manual (though admittedly, I had to refer to the manual to adjust amp EQ settings).

As far as guitar tone is concerned, though I probably should’ve tested this with an electric guitar, the plain fact of the matter is that I would use this almost exclusively in my acoustic gigs (I’m actually in between bands right now). And for that, this unit produces incredible sound; so incredible, in fact, that I will be leaving my pedal board at home going forward. Here’s a little more discussion on the pedal models:

Though the unit includes TonePrint models, it’s not exclusively limited to those. Each model includes several other non-TonePrint models that you can use (I believe these are the same found on the VoiceLive 2), which have been traditionally pretty high-quality. Personally, I didn’t use them when I had the VoiceLive 2 because I had dedicated pedals that were much better than the on-board models. But with the TonePrint models, as these are my pedals of choice for modulation effects (specifically, chorus and reverb), using them is another no-brainer.

Corona Chorus

This is not nearly as adjustable as the standalone pedal; actually none of the models are, but it’s very easy to dial in the right level and speed to get a subtle (which I prefer) to a super-wet, drippy chorus tone.

Hall of Fame Reverb

When I got this pedal a couple of years back, it soon became my go-to reverb. The spring reverb is magnificent, but it’s the plate and hall reverbs where this pedal shines. I use the hall reverb to add a subtle expanse to my guitar tone without it sounding like I’m in a simulated all. It’s just a touch to “grease” as Doug Doppler says.

Delay

I don’t know if the Flashback model is used here, but the delay is quite nice on this unit. Again, I use it very subtly to provide just a touch of slapback, with a low mix level.

Compressor

This is actually my favorite “pedal” in the unit. There are five presets available that provide either more attack, sustain, pop or pump, and you can adjust the amount and makeup gain as necessary. I use the Subtle Sustain setting, and it works great with my acoustic.

Looping

As I mentioned, my only nit about the Play Electric is the short loop length, but after playing through several of the songs I play with looping, I found that for the most part, I can live with the short loop length because the sound that the Play Electric produces completely meets my needs; moreover, the prospect of carrying one less bag makes using this an absolute no-brainer.

Wrapping It Up

Getting to the point, I dig Play Electric. I wish it had longer looping, but to get that, plus a finer control over the guitar and vocal settings, I’d have to go to the VoiceLive 3 which is more than twice the price of this unit. Could it be worth it? Possibly… probably… but it’s not expense that I can make right now (especially since I’m saving up for a Gretsch Brian Setzer) 🙂 But for what the Play Electric provides besides looping, it’s a unit that will serve me well for a long time.

Read Full Post »

5 Tone Bones - Gear has stellar performance, value, and quality. This is definitely top of the class, best of breed, and it's a no-brainer to add this to your gear lineup!

 deacci_greenfaze

deacci_greenfaze_logo

Deacci Pure Legend “Green Faze” Humbuckers

Summary: This is a set of PAF-style ‘buckers with a reverse-wound neck pickup that captures that Peter Green out-of-phase sound. Whether or not they’re true to the original, these are game changers for me! They’re so clear and articulate – even with that “woman” tone in the neck position, I’m like… “Hey baby! Where ya been all my life?”

Pros: Absolutely articulate in any pickup position. Neck pickup is warm and deep-textured without losing that top-end bite. Bridge is bright and expressive, and that middle position… OMG! It’s going to give me countless tone-shaping possibilities!

Cons: None.

Price: $275.00 – $300.00 direct

Features:

  • Reverse-wound neck pickup to get that out-of-phase tone in the middle position.
  • Super responsive with an aggressive attack
  • Un-waxed potting
  • Available with nickel, chrome or gold plated covers – or unplated (all black, all creme, zebra-striped).

Tone Bone Rating: 5.0 ~ As I said, this is a game-changer for me. With my Les Pauls, I use either the Treble or the Rhythm pickup; rarely do I use the middle pickup. But the tonal possibilities this particular set of ‘pups offers in the middle position will ensure I’ll be using that position – A LOT. Rex Kroff, the luthier I had install the pickups and do my yearly setup, said the pickups made “Amber” suddenly wake up. To him – and me – the difference in tone between the Burst Buckers and these pickups was like night and day. Where the Burst Buckers sounded a little subdued and “wooly,” the Green Faze pickups made my guitar come to life!

At the end of May, I got contacted out of the blue by Declan Larkin, founder and builder of Deacci pickups. He asked me if I’d fancy a set of “the best humbuckers ever made.” He’d send me a set to review, and I could do with them as I pleased. I’m used to reviewing gear then eventually returning it after I’m done. As I’ve mentioned in my about page, I don’t like to be beholden to any manufacturer or appear that I’m doing a review because someone comped me some gear. So admittedly, I was a bit wary of this seemingly blind giveaway.

So I started doing a little research on Deacci. I found some forum posts in a couple of UK forums (Deacci is based in Norther Ireland) discussing the pickups, and I found some sound samples. The sound samples turned me on my ear! They sounded absolutely marvelous! Needless to say, I was intrigued. Plus, as an amusing aside, I found that the pickups are in a “Patent Applied For” state, and that Deacci pickups are PAF-style pickups, so PAF-PAF’s. 🙂

But seriously though, Declan also caught me at a good time, as I was considering swapping out the stock pickups in “Amber,” my ’58 Historic Les Paul. I was only using the bridge pickup on her because the neck pickup to me was just not clear enough. Even the neck didn’t have the “bite” that I was wanting. She had a gorgeous clean tone in the neck, but driven, the neck pickup was practically unusable; just way too muffled for my tastes. And having moved from a bluesy to a more straight-up rock sound, I needed brighter pickups.

So I looked at the various models that Declan builds and found that the Green Faze pickups had the slightly lower impedance ratings that I felt would brighten up Amber just right. And it must’ve been kismet because as I was doing my research on Deacci, I was listening to “Oh well, ” so perhaps there was some subliminal stuff going on because I just love that song! In any case, I contacted Declan and asked if it would be okay to evaluate the Green Faze set, as I was sensitive to the fact that his was a brand-new company, and I didn’t want to take advantage. But he said it was all good, and he’d send them over once he’d wind up a new set. Frankly, I was blown away by this, and absolutely humbled. All Declan asked for was a honest review, and if I didn’t like them, I could return them.

Well they’re not going back. They’re staying in my guitar – forever! I’m not saying this because of the freebie, I’m saying this from the root of my heart. The sound my guitar now makes with the Green Faze pickups installed in it moves me practically beyond words.

What’s so special about them? I think a lot of that has to do with how they constructed and especially, how they’re wound. Declan uses a Fibonacci number to determine the number of winds of wire to apply to the pickups. He has also established what he says is a much more efficient and consistent way to hand wind the pickups as well. As far as the Fibonacci stuff is concerned, that could all be just techno-voodoo. But Fibonacci numbers are extremely important because they exist in nature. So applying them to a man-made artifact – at least to me – makes sense as the Fibonacci numbers represent balance.

How They Sound

I’m not going to spend much time singing the pickups’ praises. Suffice it to say that to me, these pickups sound so good, they leave me short of words to describe them. In lieu of that, I recorded several clips. All clips were recorded with my Aracom VRX22 into a custom Aracom 1 X 12 with a Jensen Jet Falcon speaker in it. I also recorded the clips at bedroom level by running my amp into the wonderful Aracom DRX attenuator. Note also that absolutely no EQ was added in production, and I turned off all compression. So what you’ll be hearing, save for the lead break for “The Hit” is the guitar’s natural tone as picked up by my microphone.

Bloom

I played my guitar clean in the shop and was taken by the gorgeous overtones the pickups were producing, so I couldn’t wait to get home to see if I could get that classic Les Paul bloom. For this clip, I played the neck pickup, with the tone control turned all the way down to get that “woman” tone. I’m just picking single notes in an Am pentatonic.

Slow Blues – Fingerpicked – Neck Pickup

Putting the Bloom to Work

The next clip uses the fingerpicked clip above with a simple lead using the woman tone. Oh my…

After recording that, I wanted to see what the guitar would sound like on one of my more engineered songs. This is the lead break from my song “The Hit.” The first half features the “woman” tone, then I switch over to the bridge pickup to finish the solo.

Crunchy Tones

Here I’m playing the same riff for all three positions. The volume knobs are dimed, and my amp is set at the edge of breakup. These pickups through a lot of signal at the front-end of the amp forcing my pre-amp tubes to compress. It’s most evident with the Neck pickup.

Neck

Middle

Bridge

Clean Funk

I just love the fast attack of these pickups. The clean tones are right in your face, but not off-putting at all.

Neck

Middle

Bridge

Clean – Fingerpicked

The overtones that the pickups produce combined with the natural sustain of a solid body Les Paul, make for a rich, complex tone that makes me want squeeze every bit of tonal goodness out of what I’m playing.

Neck

Middle

Bridge

Oh Well…

Of course, I couldn’t do a review of Peter Green-style pickups without doing at least one Peter Green riff. Here’s “Oh well” (at least as close to what my ham-handedness could produce):

Overall Impression

Need I say more? I love these pickups. It’s past midnight and I’ve been writing this review since 8pm. It has been a stop and go affair as I’ve taken breaks to play my guitar. 🙂 I don’t give 5 Tone Bones often. What I do give 5 Tone Bones are game-changers. The Deacci Green Faze pickups are game-changers for me without a doubt!

For more information on Deacci pickups, go to the Deacci site!

Read Full Post »

5 Tone Bones - Gear has stellar performance, value, and quality. This is definitely top of the class, best of breed, and it's a no-brainer to add this to your gear lineup!

voicetone

TC-Helicon VoiceTone harmony-G XT
Summary: This could be considered the little brother of the VoiceLive Play GTX, as they both use the same harmony algorithm. Great, automatic vocal tone-shaping, with five different settings (I just used the default which has presence bump and bit of compression). The doubling on this unit is VERY nice; very human-like.Pros: Simple and straight-forward setup, and super-easy to use. Great audio quality. Very human-like harmony voices. Internal vocal tone-shaping is fantastic.

Cons: Reverbs are good, but a little on the subtle side. This could be due to my inexperience with the pedal. But this doesn’t in any way reduce its usability or quaity.

Price: $224.00 – $275.00 Street

Features:

  • Listens to guitar and voice to create correct harmony parts automatically
  • Tone switch smooths vocals with adaptive Live Engineer Effects
  • 18 combinations of reverb, delay and µmod shared by vocal and guitar input
  • 10 presets available, each with A/B options
  • Harmony interval selection includes 3rds and 5ths above and below, octave up and down, and the unique Bass interval
  • Stereo or mono configurable output
  • Clean, studio quality mic preamp with phantom power and XLR input
  • Guitar signal can be mixed in and share reverb or passed through to separate amplifier
  • Fast, accurate guitar tuner

Tone Bone Rating: 5.00 ~ After my VoiceLive Play GTX went kaput, I wanted to find a suitable replacement without all the GTX’s bells and whistles. After just a single gig with this pedal, the harmony-G XT more than fits the bill!

I’ve had a harmonizer/vocal processor in my acoustic chain for over ten years. The difference that it has made in my solo performances has been immense; adding a dimension to my performances that make a pure solo performance seem bland in comparison. I originally started with the DigiTech Vocalist Live 4, but when that went south, I got the TC-Helicon VoiceLive Play GTX. Now THAT was a game-changer. The harmony algorithm made the voices so much more human-like than the Vocalist Live.

But alas, nothing works forever, and after around 500 or so gigs, my VoiceLive Play GTX finally went kaput a few weeks back. Due to finances, I couldn’t just go out and get a replacement. But that turned out to be a blessing in disguise because it gave me some time to check out other harmony/vocal processor solutions, but more importantly, to re-evaluate what my needs actually were.

With the VocalistLive and VoiceLive units, I enjoyed a lot of fine-tuned control over vocal processing and harmony parameters. But to tell you the truth, I rarely set the parameters much different from their defaults. And there were definitely times where I just wanted something much more simple. So I took a good look at both the DigiTech Vocalist Live 3 and the harmony-G XT. Both units had simple, straight-forward setups. Both were absolutely easy to use. But knowing how great the audio quality was with the TC-Helicon stuff, it was a pretty easy decision to go with the harmony-G.

So I purchased it yesterday a couple of hours before I had to leave for my gig. When I got home, I opened up the box, hooked up the unit, then went through the quick start procedure in the manual (yes, I read the manuals). What amazed me was just how easy it was to dial in the settings I needed. Granted, the first preset was voiced just how I wanted it with respect to the harmony voicings, so all I had to do was get the level right. I played around with it for about 10-15 minutes, then packed everything up for my gig, where the real test would take place.

How did it perform? Well, it was like I had my VoiceLive Play back in my chain. The harmonies were excellent. But more importantly, the compression and presence really made my voice jump out. Having been without vocal processing for the past few weeks, I can tell you that just a little compression can make all the difference in the world. And amazingly enough, even though I don’t have fine control over the amount of compression, I’m actually not missing being able to set it. The harmony-G seems to be set at the sweet spot. EQ-wise with respect to vocals, I just set the EQ on my PA to flat, and let the harmony-G drive my EQ. My vocals last night were clear and present without being mid-rangy.

With a simpler solution, there are trade-offs. For instance, I don’t have the kinds of effects like chorus that I could apply to the vocals, and mid-song switching between the A and B settings of a preset has a bit of delay. But that’s just going to take some practice to overcome. But considering my basic needs, I’ve basically everything I need to take me through a solo gig. I couldn’t be happier!

Read Full Post »

5 Tone Bones - Gear has stellar performance, value, and quality. This is definitely top of the class, best of breed, and it's a no-brainer to add this to your gear lineup!

ElectroHarmonix Soul Food Overdrive

Summary: Billed as a clone of a Klon Centaur (or “klone” as some put it), this overdrive purports to offer the same tone capabilities as that pedal but at five times less the original cost, and twenty times less than what they’re going for on eBay.

Pros: The Soul Food falls into my “ideal” category of overdrives: Pushing my front-end, but enhancing my tone. Super-usable Treble Boost; very touch-sensitive and expressive. Lots of boost on tap.

Cons: None.

Price: ~$62.00 – $65.00 Street

Features (from EHX site):

  • Transparent overdrive
  • Boosted power rails for extended headroom and definition
  • Super responsive
  • Compact, rugged design
  • Selectable true bypass or buffered bypass modes
  • 9.6DC-200 power supply included. Also runs on 9 Volt battery

Tone Bone Rating: 5.0 ~ Some people have billed this as a one-trick-pony in that it is best used to boost the front end of an amp at the edge of breakup, then add just a bit of grind. To be honest, that really is the pedal’s sweet spot. But what it does to my tone with just that makes it highly expansive with respect to sustain, overtones, and harmonics, giving me an enhanced palate of drive and nuance. That’s no one-trick-pony to me.

I’m going to just get this out of the way right now: The Soul Food is NOT a transparent overdrive, no matter how it’s touted. As an aside, I think this whole transparency thing in the gear world is a little overblown. Yeah, I know, I’ve been on the transparency wagon for a long time, but I’ve started reconsidering my whole notion of transparency. I’ve been working on an article that discusses this that I’ll release some time. But everything you add to your signal chain is going to alter your tone in some way. Granted, if you ONLY use the pedal as a boost, with neutral EQ, and zero gain, then I suppose you could call it transparent. But let’s be realistic; I don’t know of any overdrive pedal that I’d use where I didn’t adjust the EQ to fit the gear I’m playing and also add varying levels of grit. With respect to the Soul Food, it may not be transparent, but WHO CARES? 🙂

I’ll also say this: This pedal is the shit! I’ve never played a Klon, but if this pedal does anything near what the Klon does, then I’m not surprised why people are paying upwards of $1000 to $1500 for that pedal, but I’ll pay $62 all day! But that said, don’t mistake my enthusiasm for getting great tone for so cheap. I’m excited about the tone, period! If this pedal cost $200, I’d buy it for its wonderful sound.

I realize there are folks who say this sounds nothing like a Klon. I’ve viewed and listened to several demos head-to-head demos, and yes, there are differences; though I have to admit that the differences I observed were fairly subtle, at least recorded. But to me, based upon playing it for several hours over the last couple of days, I couldn’t care less how close or far away it is from a Klon. This pedal stands on its own as a great overdrive pedal.

EHX Is Classy

I mentioned this in my first impressions article, but EHX definitely went the extra mile with the Soul Food. Not only do you get the pedal, they include a 9V power supply as well! You might say ho-hum but to me it says a lot that a company would be willing to throw in some extra stuff for such an inexpensive pedal.

How It Sounds

In a word, awesome! I’m not excited about this pedal just because it cost me less than $70. That’s certainly something to be excited about. But to get the tone and performance that the Soul Food delivers at this price-point just blows me away. EHX has totally hit the ball out of the park with this pedal irrespective of it being a “klone.” Plain and simple, this is just a great overdrive pedal! Ancestry aside, the Soul Food stands on its own.

I’ve created some clips, but as opposed to saving the discussion till after, I’ll discuss it now. When I first hooked up the pedal, I did the usual thing I do with overdrives and set the volume to unity gain (about 10am), zeroed out the drive, and placed the treble boost at neutral (noon) – all through a totally clean amp. The first thing I noticed when I switched it on was how the Soul Food brought out subtle harmonics and overtones. My tone was also a little fatter, but with the high-frequency artifacts, also had a little more top-end sparkle. That alone was simply yummy to me and it got even sweeter when I upped the gain on my amp to the edge of breakup, then added a bit of treble boost and drive to the pedal.

When I found the sweet spot of the Soul Food, the skies parted and a chorus of angelic host sang out in joy. Not really. But lots of great things happened. What you get is more sustain, great touch-sensitivity, incredible response to both attack and volume knob changes, wonderful grind, all while maintaining note separation. One would think that with the extra sustain the tone would be muddy and feel squished, but not so with the Soul Food. Again, if this comes close to a Klon, I can see why that pedal is so highly coveted. There’s definitely some tonal magic that’s happening with the Soul Food.

When I first get overdrive pedals, I try to be as skeptical as possible about them. They have to prove to me that they’re worth the money I’ve spent or if they live up to the hype. Within the first few minutes of getting the pedal, the Soul Food proved definitely its worth, and then some. The cool thing though was that it wasn’t EHX that was creating the hype. It was bloggers such as myself who were testing it out and writing positive reviews of the pedal. It just simply kicks ass!

I realize that there are those who pooh-pooh the Soul Food as a cheap imitation. But as I said above, this pedal can stand on its own, regardless of its supposed ancestry. For me, I’ve never had the opportunity to play a Klon, so I really don’t know for certain what it can do. If it does what the Soul Food does, but just better. That’s awesome. But I’m absolutely digging what the Soul Food is doing for my tone right now!

Okay… Time for clips!

This first clip is very short and demonstrates the sustain you get when the pedal is switch on. I’m playing my 59 Les Paul replica with the “woman tone” (volume cranked, tone to zero).

This next two clips demonstrate the clarity and definition that the Soul Food provides when switched on, making your sound just come alive. I suppose you could say that this is a demo of what the Treble Boost can do. Here I’ve got it set at 2pm. My replica is in the middle pickup position, with both volumes at about 6, and tones all the way up.

Did I mention that the Soul Food is incredibly responsive? In this clip, I’m just noodling. I start out with little blues riff in E major with the pedal off, then I switch it on and go from a light touch to greater attack. The pedal responds beautifully!

Finally, here clips from First Impressions article (I’ve just taken the whole excerpt so I don’t have to re-explain everything). All clips below were played on R8 Les Paul:

Testing the Treble Boost, from 0 to all the up

In this one, I have the drive set to noon, and the volume set to unity, so all the grit is coming from the pedal. Not really my favorite setting. But apparently, it’s the same with the Klon. It was best used with predominant boost against an amp on the edge of breakup, then add gain to taste.

This next one is with the pedal in its sweet spot for my R8: Volume at 12, gain at around 10am, and EQ at about 2pm.

Finally, I did a quick lead in the lead break of a song I wrote.

Overall Impression

Notice I didn’t do a “Fit and Finish” section as I normally do. EHX pedals are very well-constructed. I’ve never had a problem with one dying on me because of structural issues. Frankly though, the Soul Food isn’t going to win any beauty contests. It’s just a Hammond box with a sticker placed on the top. But who cares? It’s job isn’t to look good; it’s to sound good, and it does that in spades!

I always say that I’m done with overdrive pedals. And to be honest, once I got my Timmy, it was pretty much game over. The Timmy is truly what I’d consider a transparent overdrive. The Soul Food isn’t all that transparent, but it will surely be a great addition to my board, and I’m hoping a great stacker (haven’t played with that yet).

I’ll say it one last time: The Soul Food stands on its own as a great overdrive pedal. I don’t bandy about 5 Tone Bone ratings. There’s a reason this got my highest score: It sounds so good that it’s gone directly to my board and staying there!

Read Full Post »

4.75 Tone Bones - Almost perfect but not quite

polarity_j3

Polarity J3

Summary: Made out of one of the hardest woods in nature, the Polarity J3 pick produces a warm, but also “spanky” tone that is perfect for leads.

Pros: I’m a big fan of natural materials for plectrums, and the J3 doesn’t disappoint with its feel in the hand. Natural materials also tend to not squeak when striking a vibrating string. As far as sound is concerned, I dig the sound that this pick produces – A LOT!

Cons: My only concern with this pick is its lifetime. I took the picture I supplied to the left after playing with the pick for about an hour on various guitars, strumming and playing solos. If you click on it, you can see where some of the Carnuba wax has already started wearing away, so I’m not sure just how long the pick will last. However, I’ll have a better idea after I gig with it this coming weekend and will post a follow-up article. NOTE: This is a fairly small nit because I only put a few hours of playing on it, and note that the only wear was the wax coating. The wood itself didn’t have any wear on it.

Price: $29.00 ea

Specs:

  • 1.3 millimeters thick
  • 7/8″ wide X 1″ long
  • Handmade
  • Magnetic

Tone Bone Rating: 4.75 – If I didn’t have the initial concern that this pick might have a short lifetime, I’d give the pick a 5 Tone Bones as it plays and feels and most importantly, sounds great.

As with most gear I write about, how good it feels, plays, and sounds is a matter of personal preference. That also affects what I’d be willing to pay for gear as well. So based upon my initial experience with the Polarity J3 pick, though the pick is on the pricey side, I’d make an investment in it just the same. It plays and feels and sounds fantastic. Is it something I’d use for general use? Probably not, simply because despite the wood being extremely hard, it’s still wood, and will most probably wear at a quicker rate than harder materials. I certainly wouldn’t use it for rhythm playing with a Strat that has vintage-style pickups with the poles that protrude. I nicked several Red Bear picks on my Strats, so I never play a Strat with a Red Bear pick.

But for leads? This is a great pick for that. Here’s a little ditty I put together last night to demonstrate how it sounds (I used my Slash L Katie May through a Fender Twin AmpliTube model):

I already have the perfect application for it. As of late, at my solo gigs, I’ve been making a lot of use of my looper to create live tracks that I can improv over. The “backing tracks” are usually recorded finger-style or using a variation on a clawhammer technique, and most of the time, I just hold my pick in my hand. This is a perfect pick to use for that application, and it’ll get a lot of use; especially this Friday and Saturday. So I’m looking forward to playing with it!

I love a number of things about this pick.

  • Being a rigid pick, it has a relatively fast attack, as compared to standard flexible picks. Even for strumming the quick response helps to stay in time.
  • The pointy tip produces a nice, bright tone, but the wood helps balance that out with some warmth in the mid-range.
  • Amazingly enough, I was expecting to have a bit of friction because of the wood. But it’s so hard that it slides over the strings quite easily, but the awesome thing is that it’s just soft enough so you don’t get that ugly squeak when you’re hitting a vibrating string, as you often get with hard plastic picks.
  • I was a little dubious about its size when I first got it, but after playing with it for just a few minutes, it’s extremely comfortable to hold plus, there’s a lot to be said about holding natural and natural-feeling material.

Will it last?

That’s really the big question, isn’t it? Despite being made of a hardwood, it’s still wood, and wood is somewhat delicate. Only time will tell if it holds up. As I mentioned above, I was a little concerned about the wax coating wearing so quickly after just a little bit of time playing the pick, but the wood was absolutely intact, so my feeling is that as long as I keep the scope of how I use it fairly narrow, this pick should hold up for a long time.

Overall Impression

I’m diggin’ this pick, and will use it this coming weekend at three gigs, so I will get a really good idea about its durability. But as it stands now, I’ve put in a few hours of playing with the pick on acoustic and electric guitars, and even used it with my bass. This is not a pick that I’d use for strumming; not that I’m concerned that it’ll break, but because of its size and shape, it just seems to be made for doing solos.

Read Full Post »

SONY DSC
Aracom PLX100

Summary: Based upon the PLX amp “platform” that Jeff Aragaki has created for creating customer-specific amps, this 100-watt beast is actually 3 classic Marshall amps in 1: Plexi 100 SuperLead (JMP), Plexi PA, and JCM800 (high gain).

Features

  • Three channels (Plexi SuperLead, Plexi PA, JCM800)
  • “Bite” Switch (mild mid boost)
  • Master Volume Control with Bypass Switch
  • Presence, Treble, Middle, B ass Tone Controls
  • Solid State/Tube Rectifier Simulation Switch
  • Channel Disable Switch
  • Bias Test Points with user accessible bias pot
  • Handwired turret board construction
  • “M” style large box head cabinet

Price: ~$2900

Tone Bone Score: 5.0 ~ Talk about high-gain versatility. This is no gimmick. Each different channel has voicing that you’d expect out of that particular model. The SuperLead is classic, bright Plexi, while the JCM800 has a darker, much more aggressive tone, and the SuperPA is all about clean headroom. While the amp in an of itself is special; the PLX platform is what make all this possible. If I’ve said it once, I’ll say it to the grave: Jeff Aragaki is genius!

About three years ago, Jeff Aragaki and I were talking about a new amp design. I told him that I would love to have a high-gain amp either in a 50 or 100 Watt version, but gave me the flexibility to voice it in various ways to fit the particular sound I wanted. We affectionately called this a “FlexPlex” because for me in particular, I wanted that Plexi sound, but wanted to be able to tweak it. Jeff actually built it, and I saw the prototype for it a couple of weeks ago.

But in the process of building the FlexPlex, you might say he “stumbled” upon a completely new way to build his amps; and that was basing his builds upon a platform. This wasn’t trivial, and no, I’m not just bandying about some buzzword. The platform that Jeff discovered has allowed him to create all sorts of different amps; starting with a common construct. I’m not sure about all the details, but the proof is in the pudding. Here Jeff’s words that describe this particular amp:

“The ARACOM PLX100 amplifier is a platform that allows us to build customer specific amplifiers with the features and specifications they desire.   For this custom build, our customer wanted a 100 watt amplifier with the vintage Marshall Super PA look.   The Super PA head cabinet has a “wide mouth” front panel opening, allowing access to four separate P.A. channels.    The model designation for this custom ARACOM amplifier is” Super H.T”.,  H.T. representing the initials of our customer.  However, instead of having 4 identical channels like a standard Super PA amplifier, the Super H.T. has 3 different channels, allowing for a highly versatile amplifier. 

“The JMP channel offers clean and overdriven tones as expected with a Plexi SuperLead amplifier.  It has two separate Bright switches that allow the channel to go from a Plexi Normal (Dark) channel tone to Plexi Bright channel tone, or something in between.   The Super PA channel provides slightly less gain than the JMP channel, with a fuller bass response.   The JCM channel is the high gain channel, designated for overdriven/distorted tones.   The JCM’s Bright switch allows for the standard JCM800 bright tone or a slightly darker tone.   The Master Volume control with a true bypass switch, allows for cranked up tone at lower volume levels.   The rear panel Bias Test points, allows for quick and easy tube biasing.”

Fit and Finish

It sure looks like a Marshall… 🙂 But in all seriousness, it’s an Aracom Amp, and that means quality. Jeff doesn’t skimp on components, and he takes a lot of pride in making sure everything that leaves his shop looks absolutely professional, and the PLX100 is no exception. The tolex is perfect, and all the knobs are snug and turn smoothly. And since this amp was going overseas, you can bet that Jeff made sure that everything was sturdy to eliminate or severely reduce the risk of breakage.

Ease of Use

I normally don’t have this section in my reviews, but I thought it necessary in this case. While I absolutely love the amp, with all the switches and the push-pull knobs, I have to admit that I’d have to take a lot of time getting familiar with it. I don’t call that really a negative mark on the amp. For goodness’ sake! How else do you pack in all those features? But despite that, the knob and switch layout is pretty clear. It would take me awhile to find the sweet spot in each channel for all the guitars I’d play through it. But that’s the beauty of discovery and experimentation, wouldn’t you say?

How It Sounds

This amp sounds amazing! Jeff explained each channel as I would have, so I’ll just reiterate and say that his descriptions of each channel reflect my own experience with it. When I was in his shop testing the amp, we must’ve played around with it for at least an hour as he twiddled knobs and flipped switches to demonstrate the amazing number of voices that could come from this amp. The permutations of settings make this amp able to tackle practically any style of music. Oh! We did all the testing through a huge 4 X 12 at gig volumes, so it was LOUD! 🙂 I played a Les Paul, a Gene Baker prototype (it was a hybrid that is VERY cool), and a Strat through the amp, and each guitar sounded killer through it. My favorite channel by far was the SuperLead channel, which had lots of gain on tap, but wasn’t at all over the top. Next was the JCM channel – especially its dark mode which produced thumping overdrive. I wasn’t too wild about the SuperPA with a Les Paul, but with single coils, that channel was absolutely SWEET! It would be a perfect channel to use with overdrive pedals because of its clean headroom.

Overall Impression

What strikes me the most about the PLX100 is that you literally have three amps in one. If you had all three, you’d probably be close to $10,000. That this amp is only $2900 is pretty amazing to me. But that’s Jeff. He doesn’t make a huge profit on the gear he builds – that’s a personal choice. He just wants to build great amps. This is like my friend Perry Riggs of Slash L Guitars. He makes absolutely awesome guitars but sells them at a price-point that’s rather incredible. Both of these gentlemen are true artisans of their trade, and I’m glad there are folks like this.

With respect to the PLX100, I sure wish I played in venues where I really open up an amp like this and really do it justice. For my particular uses, this is way too much amp. But if I ever get the chance to regularly play large venues, you can bet that I’ll be calling Jeff Aragaki to build me an amp on the PLX100 platform. Or… maybe he has a 50 Watt version. 🙂

For more information, visit the Aracom PLX100 product page!

Read Full Post »

5 Tone Bones - Gear has stellar performance, value, and quality. This is definitely top of the class, best of breed, and it's a no-brainer to add this to your gear lineup!

DualRox

Aracom DRX Power Attenuator

Summary: Truly an evolution of the attenuator, Jeff Aragaki has once again upped the ante with the DRX attenuator. This dual-level attenuator not only will tame your volume, but it will give you the ability to use two different volume levels; and with the optional foot switches, will give you flexibility not offered by any other attenuator on the market. Furthermore, the adjustable reactance allows you to tame your tone on top of controlling your volume.

Pros: The Aracom attenuation technology is the most transparent that I’ve tested – and I’ve tested and used several over the years. Nothing comes close. But the dual-level attenuation (normal and boost modes) blows away the competition in my book. Then add variable reactance to the mix, and there’s nothing that can even touch what this attenuator can do.

Cons: Is a little on the pricey side, but the capabilities are worth it to me. I’m having one built.

Price: Starts at $850.00 direct

Features:

  • Dual-level attenuation
  • True bypass, minimum attenuation, variable (which goes all the way to load)
  • 5-position Variable Dynamic Control – varies the reactance between the attenuator and speaker, acting like a high-cut filter.
  • 3 optional foot switches (boost only, boost + channel switch, boost + A/B)
  • Weighs only 7 lbs.
  • Line out with level control
  • Will handle 4, 8 and 16 ohm

Tone Bone Rating: 5.00 ~ A few years ago, when Jeff first showed me his prototype attenuator mounted on a pine board, I never thought that

Jeff Aragaki is a genius. I knew it from the first moment I met him. I started out by first being blown away by his “more Marshall than Marshall” amps and now the proud owner of three of them to witnessing his attenuator technology go from a project box, demonstrating to me a way to throttle output volume that was unlike anything at the time (and still no one has been able to duplicate what he has done), to now three iterations of attenuators (Pro, DAG, and now the DRX). The DRX is by far his most incredible riff on his unique attenuation technology. And no, if you think you know how it works, you’d be wrong. I’m no expert, but I’m familiar with the basics of traditional attenuation (read: everyone else’s attenuators), and the Aracom technology is like nothing on the market.

As I mentioned above, the DRX (short for DualRox) attenuator takes that technology to a new level by offering two modes of operation: Normal and Boost; at least if you’re just using boost mode (Type A foot switch). It opens up more possibilities with the Type B and Type C foot switches which provide the capability to switch channels (Type B), or use an A/B (Type C), perfect for two-channel amps that don’t have channel switching. These features alone had me completely sold on the unit, and I had only originally tested it with the Type A foot switch! My test unit which Jeff lent to me for review included the Type B boost and channel switch (which I’ll demonstrate in a clip below). But irrespective of the type of switching, being able to boost my volume under attenuation just blew me away!!! Here’s a clip that demonstrates only switching between normal and boost modes:

From a performance standpoint however, having both the dual attenuation levels, plus the ability to switch channels is absolutely HUGE! For instance, I can go from clean to full-on overdrive with the click of the foot switch; much like engaging an overdrive pedal. But there’s no pedal involved. Without an attenuator, going from clean to dirty on the amp usually involves a huge jump in volume. But with the dual-level attenuation, I can set my cranked up volume to just a bit over the clean volume. Again, this is just having an overdrive pedal, but this time, it’s only my amp, so I don’t have to worry about dialing in another device’s EQ to get the right tone. Check this clip out:

I used my Aracom VRX22 for that, which is another Plexi clone but with 6V6 tubes. This amp is notable for its haunting clean tone, and monster overdrive, which comes from 1950’s NOS 6V6’s that I have biased a little hot. I also had it customized with channel switching, so it fit the bill for testing out the Type B foot switch. I just can’t wait to gig with this come Sunday! It’s gonna be fun!

But it doesn’t stop there. In addition to the dual modes is a feature that no one else has, and that’s the Variable Dynamic Control. While it acts essentially as a subtle high-cut filter, it’s not an EQ. Instead, it changes the reactance between the attenuator and speaker. Fully right is full reactance, and as you move left to the leftmost position (there are 5 positions), the reactance is reduced, producing the effect of rolling off the highs. But it’s very subtle, and you can really only tell a difference between the most extreme settings. This is an incredible feature in that it allows you to dial in your tone; especially your cranked tone. For instance, my Aracom VRX18 (18-watt Plexi clone) produces lots of highs when cranked. They’re not entirely undesirable, but they do get piercing, especially at gig levels. So by slightly reducing the reactance between the attenuator and speaker, I can get rid of the super-super highs while retaining my fundamental tone. In a word: Killer. Here’s a clip that demonstrates the Variable Dynamic Control:

As I said, it’s subtle. The fundamental tone doesn’t change much, but going from extreme to extreme, you can tell when the highs roll off a bit.

For those who are familiar with the previous Aracom attenuators, one feature that set them apart was the ability to mix and match amps and cabs with different impedance settings. For instance, you could match an 8 ohm amp output with a 4 ohm cab. But that came at the price of a huge transformer that made those units weight 18 lbs. The DRX requires that both amp and cab impedance settings match. But that’s not really a loss at least for me because all my amplifiers have multiple output impedance jacks, so it’s really not a big deal. And for what I get in return from the DRX, that loss of flexibility is not a very high price to pay.

Overall Impression

When I first tested the prototype of this unit a couple of years ago, I actually thought that Jeff had changed the circuit technology. But in fact, he didn’t, which is a good thing because when you have this unit, you’re assured of getting the most advanced attenuation technology on the planet. Yeah, I’m raving about it because for the past few years, this technology has afforded me the flexibility to play in ANY venue, large and small, indoor or outdoor, and not ever have to sacrifice my tone; something I can’t say of other attenuators I’ve used and tested. I can crank up my amp as much as I need, confident that my tone hasn’t changed, but never having to worry about pissing someone off about my volume.

But on top of that, with the ability to have two levels of attenuation, plus the ability to dial in my highs, I couldn’t be happier, and I can hardly wait for Jeff to finish constructing my unit.

And yeah, as I mentioned above, it’s a bit on the pricey side. But how much is great tone worth? I’ve spent countless hours and thousands upon thousands of dollars on guitars, amps and pedals over the years – especially the last few years – and with each one, I justified my expense. The DRX is a tool that will let me ensure that I keep the tone that I’ve worked so hard to achieve. It may not make sense for the solo bedroom player, but for working musicians like myself, the DRX is an investment in my tone that I’m willing to make.

For more information, go to the Aracom DRX product page!

Read Full Post »

rocknstompn

Rockn Stompn Power Supply
Summary: Nothing like clean power. But there’s also a lot to be said about getting your power on in the right sequence.Pros: Great power conditioning, plus the ability to properly activate your rig in the right power-on sequence.Cons: A little pricey.

Price: $379.00 Street

Features:

  • Fully customizable power-on interval setup
  • 1935 Joules of surge protection
  • Power conditioning ensures your rig always gets optimal power.
  • Convenient foot switch for power-on.

Tone Bone Rating: 4.75 ~ You might be thinking that it’s just a power strip. But this isn’t your ordinary power strip. The surge protection and power conditioning alone are worth it.

Kimball, the maker of the RocknStompn power supply, contacted me recently, wanting to send me his power supply for review. As is my normal routine when contacted out of the blue, I do a bit of research to find out about the product. So I went to the Rockn Stompn web site to see what was what with this power supply. Admittedly, when I saw the price of the unit, I got extremely curious. What could make this so pricey? So I emailed Kimball back, and said I’d review the unit.

It arrived a few days later, and I immediately plugged it in, plugged my amp and pedal board in, turned my amp on, then switched on the unit. As advertised, the power to the plugs went on sequentially with amp coming on last. That’s actually a VERY cool feature as it ensures that you always power on your rig in the proper sequence.

But the thing that I found was much more important than the sequencing was the power conditioning. I have a few pedals – one in particular – that are extremely sensitive to the power supply I plug into. If the power is “dirty” these pedals make a lot of noise. But with the Rockn Stompn, I get clean power, and even my most finicky pedal, my ToneCandy Spring Fever, was absolutely quiet. That pedal has frustrated me since day one when I got it, and for the first time since I’ve owned it, it is dead quiet.

I first tried the power supply in my studio, and it worked just fine. But you know me, the real test for any gear is at a gig, so I brought it to my church gig last weekend. My church is an interesting place in that we have pretty good audio equipment, but the power can be a little dirty. But with the Rockn Stompn powering my rig, I had zero noise. My VHT Special 6 can also be a bit finicky with power, and it too was dead quiet.

After the gig, I asked myself, would I actually spend this kind of money on just a power supply? After using it, yeah, I would definitely save up to get one of these units. Not only does it give me clean power, but the surge protection is worth it as well. Protecting my gear is ultra-important to me, and for as much as I gig year round, having that protection gives me a lot of peace of mind. Plus, once you have everything hooked up, all you need to do is hit the foot switch, and your rig will power on – in the right sequence. The foot switch is VERY convenient.

Notice that I didn’t mention anything about tone; neither does the company. But with continuous clean power, and a clean signal, one thing that I did notice in an A/B test was that my tone seemed a little clearer. I’m not saying that this will improve your tone, but it’ll definitely help with cleaning it up; especially if you’ve been running through dirty power. You know me, I’m highly suspicious of the snake oil that’s out there. But the Rockn Stompn isn’t sold with claims that it’ll improve your tone. But it sure does give you clean power, and that could have a good effect on tone.

I highly recommend that you check this out. It comes with a lifetime warranty, so the risk is minimal; you won’t be over a log if it stops working. I know one thing’s for sure as far as I’m concerned: This unit will be like an American Express card; I won’t be leaving home without it!

Read Full Post »

« Newer Posts - Older Posts »